2.1 Starting the Messaging Agent
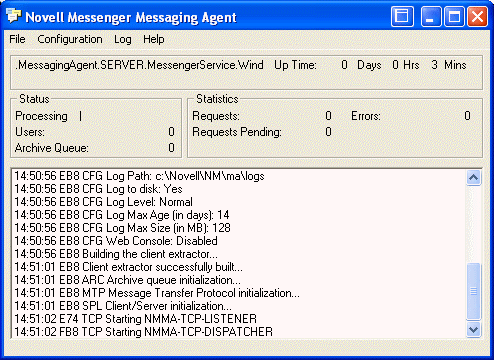
When you finish creating your Messenger system, the Installation program can start the Messenger agents for you. If you installed the Messenger agents on a Windows server, the Messaging Agent console appears on the Windows server console, as follows:
Figure 2-1 Messaging Agent Console
If you installed the Messenger agents on a NetWare server, the Messaging Agent console appears on the NetWare server console.
If you installed the Messenger agents on a Linux server, the Messaging Agent, by default, runs as a daemon and has no comparable user interface. However, you can, if desired, start it in a terminal window so that status messages are displayed, as described in Starting the Linux Messaging Agent in a Terminal Window, and you can monitor the Messaging Agent from your Web browser, as described in Using the Messaging Agent Web Console.
The following sections help you start the Messaging Agent manually, as well as automatically whenever the server restarts:
2.1.1 Starting the NetWare Messaging Agent
The Installation program creates the nmstart.ncf file in the Messenger agent installation directory (sys:\novell\run by default). This file contains lines similar to the following example:
load sys:\novell\nm\ma\nmma.nlm @sys:\novell\nm\ma\strtup.ma
load sys:\novell\nm\aa\nmaa.nlm @sys:\novell\nm\aa\strtup.aa
If you do not plan to enable archiving, edit the nmstart.ncf file and comment out the second line so that the Archive Agent does not start when the nmstart.ncf file is run.
To start the Messaging Agent manually:
-
Enter sys:\novell\nm\nmstart.ncf at the NetWare server console prompt.
The Messaging Agent console appears.
To start the Messaging Agent automatically when the NetWare server restarts:
-
Add the following line to the autoexec.ncf file in the sys:\system directory:
sys:\novell\nm\nmstart.ncf
If you want to start the Messaging Agent in protected mode, you must be using LDAP access to Novell eDirectory. See Using LDAP Access for the Messaging Agent. In addition, when you stop the Messaging Agent agent in protected mode, you must manually unload the address space.
2.1.2 Starting the Linux Messaging Agent
You have several alternatives for starting the Messaging Agent on Linux:
Starting the Linux Messaging Agent as a Daemon
To start the Messaging Agent as a daemon, use the startup script provided in the /etc/init.d directory.
-
At the Linux server, become root by entering su and the root password.
-
Change to the /etc/init.d directory.
-
To start the Messaging Agent, enter the following command:
./novell-nmma start
You can also use the stop, restart, and status options for the Messaging Agent from the same directory.
Messaging Agent log files are created in the /var/opt/novell/log/messenger directory. The Messaging Agent can be monitored using the agent Web consoles from your Web browser, as described in Using the Messaging Agent Web Console.
Starting the Linux Messaging Agent in a Terminal Window
To start the Messaging Agent in a terminal window, run the Messaging Agent executable.
-
At the Linux server, become root by entering su and the root password.
-
Change to the /opt/novell/messenger/bin directory.
-
To start the Messaging Agent, enter the following command:
./nmma @/etc/opt/novell/messenger/strtup.ma
Agent status information and messages are displayed in the terminal window.
To stop the Messaging Agent when it is running in a terminal window, press Ctrl+C and the Messaging Agent performs a normal shutdown.
Configuring the Linux Messaging Agent to Start Automatically as a Startup Service
A startup service starts automatically each time the server reboots.
Configuring the Messaging Agent as a Startup Service on SUSE Linux
-
At the Linux server, become root by entering su and the root password.
-
If eDirectory for Linux is installed, enter the following command:
insserv novell-nmma
or
If eDirectory for Linux is not installed, use the following command to override the dependency on the ndsd service:
insserv -f novell-nmma
If you later want to remove the Messaging Agent as a startup service, enter the following command in a terminal window:
insserv -r novell-nmma
Configuring the Messaging Agent as a Startup Service on Red Hat Linux
-
At the Linux server, become root by entering su and the root password.
-
Enter the following command:
chkconfig --add novell-nmma
If you later want to remove the Messaging Agent as a startup service, enter the following command in a terminal window:
chkconfig --del novell-nmma
2.1.3 Starting the Windows Messaging Agent
Follow the instructions for the Windows installation option you chose:
Starting the Messaging Agent as a Windows Application
To start the Messaging Agent manually:
-
Click > > > .
You might want to create a desktop shortcut for this action.
To start the Messaging Agent automatically whenever the server restarts:
-
Click > > > > .
-
Browse to the directory where you installed the Messaging Agent (\novell\nm\ma).
-
Double-click nmma.exe, then add the startup file (strtup.ma) to the command line.
Example: nmma.exe @strtup.ma
-
Click .
-
Select the folder, provide a name for the shortcut, then click .
Starting the Messaging Agent as a Windows Service
To start the Messaging Agent manually:
-
Click > > .
-
Double-click > .
-
Right-click the service, then click .
To start the Messaging Agent automatically whenever the server restarts:
-
Click > > .
-
Double-click > .
-
Right-click the service, then click .
-
Set .
-
Click to save the Windows service startup setting.
If you do not want to run the Archive Agent along with the Messaging Agent, make sure that the Novell Messenger Archive Agent service is disabled.
To start the Messaging Agent without a user interface on the Windows server desktop:
-
Click > > .
-
Double-click > .
-
Right-click the service, then click .
-
Click , then deselect .
If you suppress the Messaging Agent console in this manner, the Messaging Agent can still be monitored from the Messaging Agent Web console, as described in Using the Messaging Agent Web Console.
-
Click to save the Windows service logon setting.
2.1.4 Changing the eDirectory Access Method for Starting the Messaging Agent
The Messaging Agent cannot start if it cannot read its configuration settings from the Messaging Agent object in eDirectory. During installation, an eDirectory access method was selected, as described in Installing a Novell Messenger System
in the Novell Messenger 2.1 Installation Guide.
Figure 2-2 Directory Access Page in the Messenger Installation Program

The information for the eDirectory access method was stored in the Messaging Agent startup file as settings for the following startup switches:
Table 2-1 Startup Switches
To change the directory access method selected during installation, follow the appropriate set of instructions:
Using LDAP Access for the Messaging Agent
-
Edit the Messaging Agent startup file (strtup.ma).
On Linux, the startup file is located in /etc/opt/novell/messenger.
On NetWare and Windows, the startup file is located in the Messenger Agent installation directory. You can edit the startup file from the Messaging Agent console. See Controlling the Messaging Agent from the Messaging Agent Console.
-
On Linux and Windows, comment out the /dirreplicaaddr switch.
On a NetWare server, this switch does not apply, because the eDirectory replica resides on the NetWare server.
-
Scroll down to the bottom of the startup file.
-
Remove the comment character (;) from the /ldap* switches and provide the required LDAP information, as listed in Table 2-1.
-
Save the startup file.
-
Stop and then start the Messaging Agent so that it reads its updated startup file and uses LDAP access to eDirectory.
If you have already created an LDAP profile to configure eDirectory access for Messenger users, as described in Providing LDAP Access to eDirectory for Messenger Users, the LDAP profile continues to be used for users, while the startup switches now control how the Messaging Agent accesses eDirectory to obtain its configuration information.
Using Direct Access for the Messaging Agent
-
Edit the Messaging Agent startup file (strtup.ma).
On Linux, the startup file is located in /etc/opt/novell/messenger.
On Windows and NetWare, the startup file is located in the Messenger Agent installation directory. You can edit the startup file from the Messaging Agent console. See Controlling the Messaging Agent from the Messaging Agent Console.
-
Remove the comment character (;) from the /dirreplicaaddr switch and provide the IP address of the eDirectory replica that you want the Messaging Agent to access.
On a NetWare server, this switch does not apply, because the eDirectory replica resides on the NetWare server.
-
Scroll down to the bottom of the startup file.
-
Comment out the /ldap* switches.
Removing the LDAP information causes the Messaging Agent to access the eDirectory replica directly.
-
If you want users to continue to use LDAP access, create an LDAP profile for them, as described in Providing LDAP Access to eDirectory for Messenger Users
-
Save the startup file.
-
Stop and then start the Messaging Agent so that it reads its updated startup file and uses direct access to eDirectory.