OnDemand Services includes nine gadgets. Each of these gadgets represents a window to specific content or functionality provided by OnDemand Services. Some of the gadgets are intended for users, some for budget holders, and some for administrators. The following list describes the gadgets and their intended audience:
ConfigWizardGadget (Administrator): Used to store the OnDemand Administrator (ODSAdmin) context and password in a place where the other gadgets can get it in order to authenticate to eDirectory. The Configuration Wizard must be run before any other OnDemand Services gadgets will work.
UserAdminGadget (Budget Holder): Used to create, modify, enable, and disable user accounts, and to assign packages to users.
ApprovalGadget (Budget Holder): Used to approve or deny package purchase requests submitted by users.
CurrentBHGadget (Budget Holder): Used to select which budget holder is the current budget holder and to add or remove budget holders.
PackageRequestGadget (User): Used to submit a purchase request for a package.
EditAccountGadget (User): Used to edit user account information such as name, password, and e-mail address.
WorkflowTrackingGadget (User): Used to check the status of package purchase requests and to cancel requests.
LaunchItemGadget (User): Used to launch purchased applications.
ReportGadget (Administrator, Budget Holder, User): Used to generate expense reports based on package purchases and usage.
TabbedContainerGadget (Administrator, Budget Holder, User): Used to enable the other gadgets to be displayed in a preconfigured tabbed-page format. This is an alternate page design to the one explained below. For information about implementing tabbed pages, see Tabbed Portal Pages .
You need to design your portal to give users, budget holders, and administrators access to the appropriate gadgets. There are many designs you can use. The instructions in the following sections help you create a simple portal. If you have already installed the full version of NPS 1.5 and implemented a portal design, you should still review the following sections to see how you need to configure the gadgets as you add them to your existing portal.
You need to log in to NPS as a portal administrator. By default, the Admin user you entered when installing NPS is configured as a portal administrator.
To log in to NPS:
In your Web browser, enter the following URL:
http://web_server_address/nps
where web_server_address is the IP address or host name of the Web server running NPS. If you are using SSL, make sure to enter https rather than http.
Enter the Admin user's name and password.
If the Admin user is not in one of the User contexts you specified when installing NPS, you will need to enter the Admin user's distinguished name using LDAP syntax. For example:
In the list, select Create New Top Level Page, then click Create to display the Create a New Page page.
In the Name field, enter Applications, click Create to display the Page Saved page, then click Edit to edit the Applications page.
Add the Launch Item gadget to the page. To do so:
Click Add, select OD_LaunchItemGadget in the gadgets list, then click Add to display the gadget's configuration page.
In the Display Name field, enter the gadget's name as you want it displayed on the page. For example, you could use Launch Applications.
If you want to enable users to launch desktop applications (ZENworks for Desktops applications), select TRUE for the Display Workstation Applications setting.
In the Secure Sensitive Pages field, select TRUE if the Web server supports SSL; otherwise, select FALSE.
Modify any other configuration settings.
To get a short description of each field, click the Descriptions button at the bottom of the page. For more detailed information about the fields, see Gadget Configuration Settings .
Click Continue to add the configured gadget to the Applications page.
Add the Package Request gadget to the Applications page. To do so:
Click Add, select OD_PackageRequestGadget, then click Add to display the gadget's configuration page.
In the Display Name field, enter the gadget's name as you want it displayed on the page. For example, you could use Request Applications.
In the OnDemandService Object field, enter the distinguished name of the OnDemandService object that was created in eDirectory during installation. Use LDAP syntax to specify the name (for example, cn=ondemandservice,ou=services,o=novell).
Modify any other configuration settings.
To get a short description of each field, click the Descriptions button at the bottom of the page. For more detailed information about the fields, see Gadget Configuration Settings .
Click Continue to add the configured gadget to the Applications page.
Click Save to save the page, then click Assign to display the Assign Page to Objects page.
Assign the page to users. To do so:
Click Add.
You can assign the page to users by adding individual User objects, Group objects in which the users are members, or container objects where the users reside. By default, no objects are listed. You need to search for the objects that you want to add.
In the Search For field, select the type of object you want to search for, enter the search criteria in the Named field, then click Search to display all objects that match the search criteria.
Select the objects you want to assign the page to, then click Assign.
Repeat Step 6.a through Step 6.c to assign the page to additional objects.
Click Close.
Configure the layout of the page. To do so:
In the list of pages, select the Applications page, then click Edit.
Click Layout Gadget Assignments.
Both the Launch Applications and Request Applications gadgets are listed under column 1. To display the gadgets in two-column format:
Select the Request Application gadget, then click the To Column 2 button.
In the Pages list, select Create New Top Level Page, then click Create to display the Create a New Page page.
In the Name field, enter My Account, click Create to display the Page Saved page, then click Edit to edit the My Account page.
Add the Edit Account Information gadget to the My Account page. To do so:
Click Add, select OD_EditAccountGadget in the gadgets list, then click Add to display the gadget's configuration page.
In the Display Name field, enter the gadget's name as you want it displayed on the page. For example, you could use Edit Account Information.
In the Secure Sensitive Pages field, select TRUE if the Web server supports SSL; otherwise, select FALSE.
Modify any other configuration settings.
To get a short description of each field, click the Descriptions button at the bottom of the page. For more detailed information about the fields, see Gadget Configuration Settings .
Click Continue to add the configured gadget to the My Account page.
Add the Workflow Tracking gadget to the My Account page. To do so:
Click Add, select OD_WorkflowTrackingGadget, then click Add to display the gadget's configuration page.
In the Display Name field, enter the gadget's name as you want it displayed on the page. For example, you could use Track Requests.
In the OnDemandService Object field, enter the distinguished name of the OnDemandService object that was created in eDirectory during installation. Use LDAP syntax to specify the name (for example, cn=ondemandservice,ou=services,o=novell).
Modify any other configuration settings.
To get a short description of each field, click the Descriptions button at the bottom of the page. For more detailed information about the fields, see Gadget Configuration Settings .
Click Continue to add the configured gadget to the My Account page.
Click Save to save the page, then click Assign to display the Assign Page to Objects page.
Assign the page to users. If you need instructions, see Step 6.a through Step 6.d.
When finished assigning the page to users, click Close.
In the list, select Create New Top Level Page, then click Create to display the Create a New Page page.
In the Name field, enter Reporting, click Create to display the Page Saved page, then click Edit to edit the Reporting page.
Add the Reporting gadget to the Reporting page. To do so:
Click Add,select OD_ReportingGadget in the gadgets list, then click Add to display the gadget's configuration page.
In the Display Name field, enter the gadget's name as you want it displayed on the page. For example, you could use Create Purchase Reports.
In the OnDemandService Object field, enter the distinguished name of the OnDemandService object that was created in eDirectory during installation. Use LDAP syntax to specify the name (for example, cn=ondemandservice,ou=services,o=novell).
Modify any other configuration settings.
To get a short description of each field, click the Descriptions button at the bottom of the page. For more detailed information about the fields, see Gadget Configuration Settings .
Click Continue to add the configured gadget to the Reporting page.
Click Save to save the page, then click Assign to display the Assign Page to Objects page.
Assign the page to users. If you need instructions, see Step 6.a through Step 6.d.
When finished assigning the page to users, click Close.
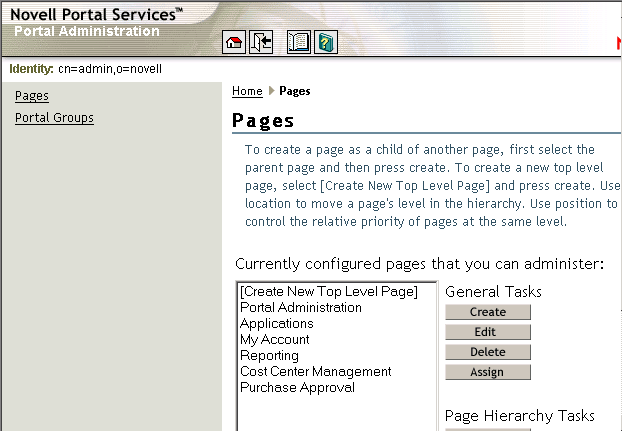
The three pages you created should now be displayed in the Pages list.
You will create two pages that all budget holders will have access to.
Example Page Name
Gadgets Included on Page
Cost Center Management
OD_UserAdminGadget OD_CurrentBHGadget
Purchase Approval
OD_ApprovalGadget
Creating a Budget Holder Portal Group
A budget holder portal group lets NPS automatically grant page access to any users who are defined as cost center budget holders. A portal group is the best way to assign your budget holder pages because it is updated on-the-fly as users are added or removed as budget holders.
Click Portal Groups > click Create to display the Create Portal Group page.
In the Name field, enter a name for the portal group (for example, BudgetHolders).
where cost_center_context is the context (using LDAP syntax) of the Organizational Role objects that are serving as OnDemand Services cost centers. For example:
If the test does not return any matches, click Cance, verify that you've entered the correct information in the query filter strin, then retest the query.
Creating and Assigning the Cost Center Management Page
Click Pages.
In the list, select Create New Top Level Page, then click Create to display the Create a New Page page.
In the Name field, enter Cost Center Management, click Create to display the Page Saved page, then click Edit to edit the Cost Center Management page.
Add the User Administration gadget to the Cost Center Management page. To do so:
Click Add, select OD_UserAdminGadget in the gadgets list, then click Add to display the gadget's configuration page.
In the Display Name field, enter the gadget's name as you want it displayed on the page. For example, you could use Manage Users.
In the Secure Sensitive Pages field, select TRUE if the Web server supports SSL; otherwise, select FALSE.
In the OnDemandService Object field, enter the distinguished name of the OnDemandService object that was created in eDirectory during installation. Use LDAP syntax to specify the name (for example, cn=ondemandservice,ou=services,o=novell).
Modify any other configuration settings.
To get a short description of each field, click the Descriptions button at the bottom of the page. For more detailed information about the fields, see Gadget Configuration Settings .
Click Continue to add the configured gadget to the Cost Center Management page.
Add the Current Budget Holder gadget to the Cost Center Management page. To do so:
Click Add, select OD_CurrentBHGadget, then click Add to display the gadget's configuration page.
In the Display Name field, enter the gadget's name as you want it displayed on the page. For example, you could use Change Current Budget Holder.
In the OnDemandService Object field, enter the distinguished name of the OnDemandService object that was created in eDirectory during installation. Use LDAP syntax to specify the name (for example, cn=ondemandservice,ou=services,o=novell).
Modify any other configuration settings.
To get a short description of each field, click the Descriptions button at the bottom of the page. For more detailed information about the fields, see Gadget Configuration Settings .
Click Continue to add the configured gadget to the Cost Center Management page.
Click Save to save the page, then click Assign to display the Assign Page to Objects page.
Assign the Cost Center Management page to budget holders. To do so:
In the Search For field, select Portal Groups > enter the name of the portal group in the Named field, then click Search to display the portal group's context.
In the list, select Create New Top Level Page, then click Create to display the Create a New Page page.
In the Name field, enter Purchase Approval > click Create to display the Page Saved page, then click Edit to edit the Purchase Approval page.
Add the Approval gadget to the page. To do so:
Click Add, select OD_ApprovalGadget in the gadgets list, then click Add to display the gadget's configuration page.
In the Display Name field, enter the gadget's name as you want it displayed on the page. For example, you could use Approve/Deny Purchase Requests
In the OnDemandService Object field, enter the distinguished name of the OnDemandService object that was created in eDirectory during installation. Use LDAP syntax to specify the name (for example, cn=ondemandservice,ou=services,o=novell).
Modify any other configuration settings.
To get a short description of each field, click the Descriptions button at the bottom of the page. For more detailed information about the fields, see Gadget Configuration Settings .
Click Continue to add the configured gadget to the Purchase Approval page.
Click Save to save the page, then click Assign to display the Assign Page to Objects page.
Assign the Purchase Approval page to budget holders. To do so:
In the Search For field, select Portal Groups, enter the name of the portal group in the Named field, then click Search to display the portal group's context.
Select the portal group, then click Assign.
Click Close.
The two budget holder pages you created should now be displayed in the Pages list.
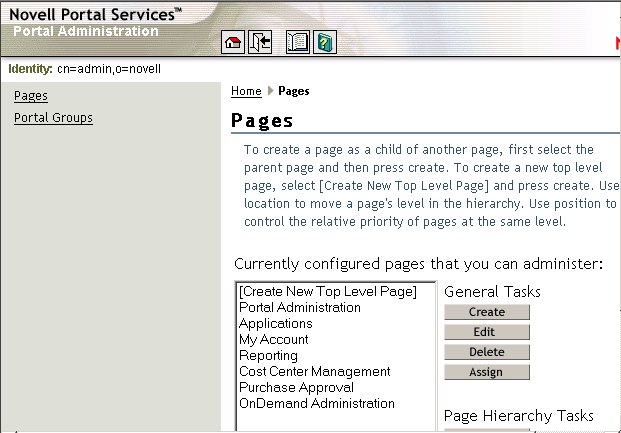
You will create an OnDemand Administration page that the Admin user will have access to.
Example Page Name
Gadgets
OnDemand Administration
OD_ConfigWizardGadget
In the list, select Create New Top Level Page, then click Create to display the Create a New Page page.
In the Name field, enter OnDemand Administration, click Create to display the Page Saved page, then click Edit to edit the OnDemand Administration page.
Add the Configuration Wizard gadget to the OnDemand Administration page. To do so:
Click Add > select OD_ConfigWizardGadget in the gadgets list > click Add to display the gadget's configuration page.
In the Display Name field, enter the gadget's name as you want it displayed on the page. For example, you could use Configuration Wizard.
In the Secure Sensitive Pages field, select TRUE if the Web server supports SSL; otherwise, select FALSE.
Modify any other configuration settings.
To get a short description of each field, click the Descriptions button at the bottom of the page. For more detailed information about the fields, see Gadget Configuration Settings .
Click Continue to add the configured gadget to the OnDemand Administration page.
Click Save to save the page, then click Assign to display the Assign Page to Objects page.
Assign the OnDemand Administration page to the Admin user.
Click Add.
In the Object Name field, enter the context of the Admin user (for example, cn=admin,o=novell) > click Assign.
Click Close.
The administrator page should now be displayed in the Pages list.
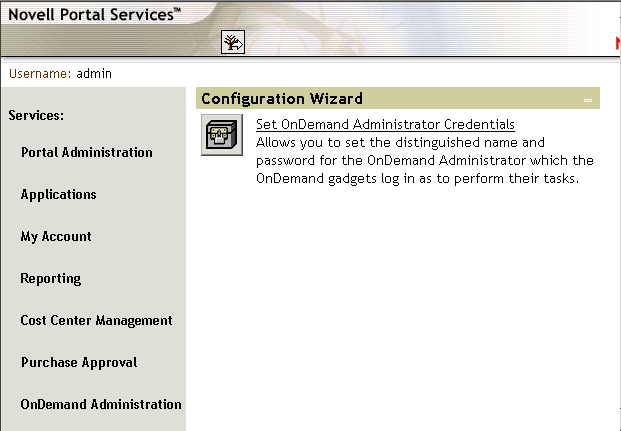
Running the OnDemand Services Configuration Wizard
You must run the Configuration Wizard before the other OnDemand Services gadgets will function properly. The OnDemand Services gadgets authenticate to eDirectory through the OnDemand Administrator (ODSAdmin) object created during installation. The OnDemand Administrator object has the rights required by the gadgets to perform their tasks in eDirectory.
When you run the Configuration Wizard, it stores the OnDemand Administrator context and password in a location that the other gadgets can access.
Log out of the portal and log back in to refresh the portal pages.
Open the page where you added the Configuration Wizard.
Click Set OnDemand Administrator Credentials to display the Set Credentials window.
In the Distinguished Name field, enter the full context of the OnDemand Administrator (ODSAdmin) object (for example, cn=ODSAdmin,ou=services,o=novell).
In the Password field, enter the OnDemand Administrator password. This password must be the password that was entered during installation.