8.4 Configuring CIFS in a Cluster
Perform the following tasks to configure or enable CIFS and make it available on a cluster environment:
8.4.1 Prerequisites
-
The cluster environment is set up and ready
-
All nodes in the cluster are installed and configured for CIFS
-
All nodes in the cluster meet CIFS standalone server setup requirements and CIFS is running
-
The shared disk is configured through iSCSI or SAN and is able to create shared pools
8.4.2 Creating Shared Pools and Accessing Sharepoints
You can configure, enable, and access the CIFS services by using iManager or by using NSSMU.
Using iManager to Create the Pool
-
Ensure that the Prerequisites are met.
-
Log in to iManager, then click
-
Under , specify the cluster object or browse and select it.
-
Click .
-
Specify the pool name and click .
-
Select the shared disk and allocate the pool size with a value of 0, then click .

-
Specify an , ensure that you select under , then click .
-
Use the cluster status command to verify that the created pool server is running.
For details, see
Console Commands for Novell Cluster Services
in the OES 2 SP3: Novell Cluster Services 1.8.8 Administration Guide for Linux. -
Create volumes in the shared pools.
For details, see
Configuring Cluster Resources for Shared NSS Pools and Volumes
in the OES 2 SP3: Novell Cluster Services 1.8.8 Administration Guide for Linux. -
Create sharepoints on the volume created on the shared NSS Pool. Use the same procedure that you used to configure standalone CIFS server.
For details, see Section 5.1, Using iManager to Manage CIFS, but ensure that you select only the virtual or pool server as the OES 2 server.
-
Access the sharepoints from a client workstation through the virtual server IP address or virtual server (NetBIOS) name.
For details on creating pools by using iManager, see Creating a Cluster-Enabled Pool and Volume with iManager in the OES 2 SP3: Novell Cluster Services 1.8.8 Administration Guide for LinuxOES 2 SP3: Novell Cluster Services 1.8.8 Administration Guide for Linux.
NOTE:If the cluster object is created in a container that is in a different subtree than the one in which the nodes are present or is at a higher level than where nodes are present, then the CIFS proxy user must be manually added to the trustee list of cluster server object and required rights must be assigned to it along with the inherited rights.
Using NSSMU to Create the Pool
-
Ensure that the Prerequisites are met.
-
Start NSSMU from the server console of a cluster server.
-
Select pools from the NSSMU main menu.
-
Select the device where you want the pool to be created.
-
Specify the pool name and virtual server’s or pool server’s IP address.
-
Select for CIFS under .
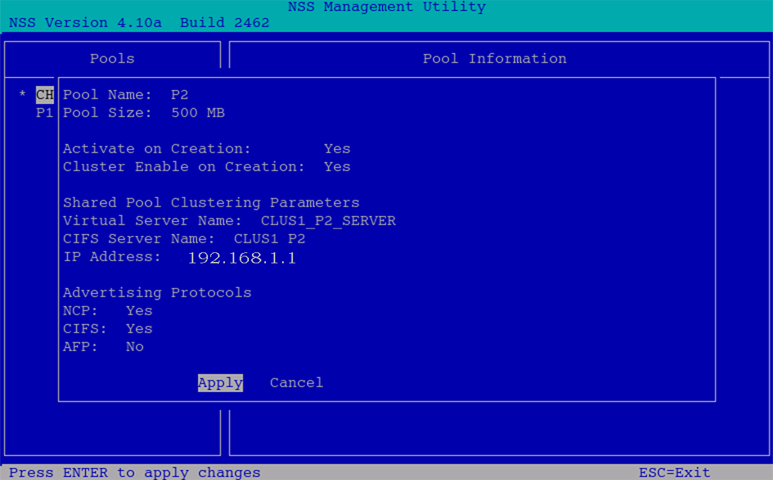
-
Select and press Enter.
-
Use the cluster status command to verify that the created pool server is running.
For details, see
Console Commands for Novell Cluster Services
in the OES 2 SP3: Novell Cluster Services 1.8.8 Administration Guide for Linux. -
Create volumes in the shared pools.
For details, see
Configuring Cluster Resources for Shared NSS Pools and Volumes in the OES 2 SP3: Novell Cluster Services 1.8.8 Administration Guide for Linux
. -
Create sharepoints, provide access rights, and assign password policies for the CIFS virtual server or pool server. Use the same procedure that you used to configure standalone CIFS server.
For details, see Section 5.1, Using iManager to Manage CIFS, but ensure that you select only the virtual or pool server as the OES 2 server.
-
Access the sharepoints from a client workstation through the virtual server IP address or virtual server (NetBIOS) name.
For details on creating pools by using NSSMU, see Creating a Cluster-Enabled Pool and Volume with NSSMU in the OES 2 SP3: Novell Cluster Services 1.8.8 Administration Guide for Linux.