2.1 Hardware
Hardware settings include the following:
2.1.1 Configuring Bluetooth Services
Bluetooth services enable you to connect wireless devices such as mobile phones and personal data assistants (PDAs) to your computer. Bluetooth wireless support includes automatic recognition of Bluetooth-enabled devices via the YaST central configuration and administration tool. Click , then set the configuration options that are appropriate for your device.
NOTE:Root privileges are required for configuring Bluetooth services.
2.1.2 Configuring Your DSL Connection
If you connect to a network over a DSL Connection, use this option to configure your connection. The DSL connection is configured in YaST.
NOTE:Root privileges are required for configuring your DSL Connection.
-
Click .
-
Enter the root password.
YaST opens.
-
Follow the instructions in YaST to configure DSL.
2.1.3 Configuring Your Graphics Card and Monitor
Your graphics card was configured for your monitor during installation. If you ever need to change these settings, click , then set the appropriate options for your monitor.
NOTE:Graphics card configuration is done in YaST2 and requires root privileges.
2.1.4 Modifying Keyboard Preferences
Use the Keyboard Preferences tool to modify the autorepeat preferences for your keyboard and to configure typing break settings.
Click .
You can set the following preferences:
Configuring Keyboard Preferences
Use the Keyboard tabbed page to set general keyboard preferences.
Figure 2-2 Keyboard Preferences Dialog—Keyboard Page
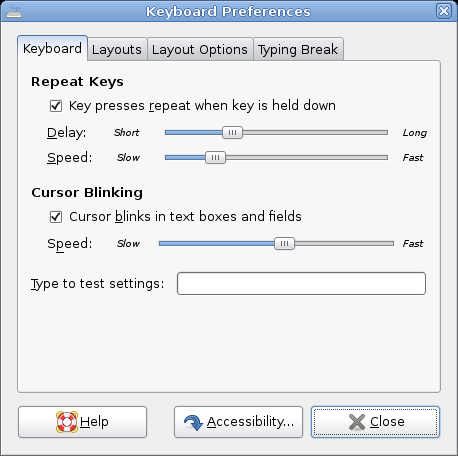
You can modify any of the following keyboard preferences:
Table 2-1 Keyboard Preferences
Click the button to start the Keyboard accessibility preference tool.
Configuring Keyboard Layout Preferences
Use the Layouts tabbed page to set your keyboard layout.
Figure 2-3 Keyboard Preferences Dialog—Layouts Page
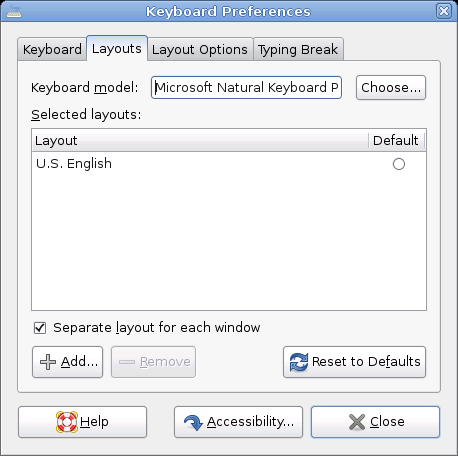
Select your keyboard model from the drop-down list, then use the navigational buttons to add or remove the selected layout to or from the list of available layouts.
You can select different layouts to suit different locales.
Click the button to start the Keyboard accessibility preference tool.
Configuring Keyboard Layout Options
Use the Layout Options tabbed page to set your keyboard layout options. These options determine the behavior of certain keys and other keyboard settings.
Figure 2-4 Keyboard Preferences Dialog—Layout Options Page
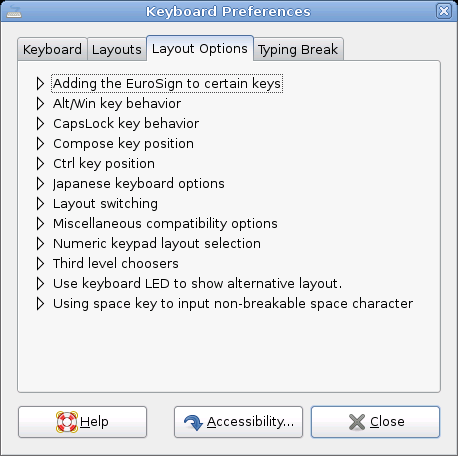
Select an option to open a submenu for that option, then select the desired settings. For most users, there is no need to change these settings.
Table 2-2 Keyboard Layout Options
Click the button to start the Keyboard accessibility preference tool. See Section 2.3.1, Configuring Keyboard Accessibility Settings for more information.
Configuring Typing Break Preferences
Use the Typing Break tabbed page to set typing break preferences.
Figure 2-5 Keyboard Preferences Dialog—Typing Break Page
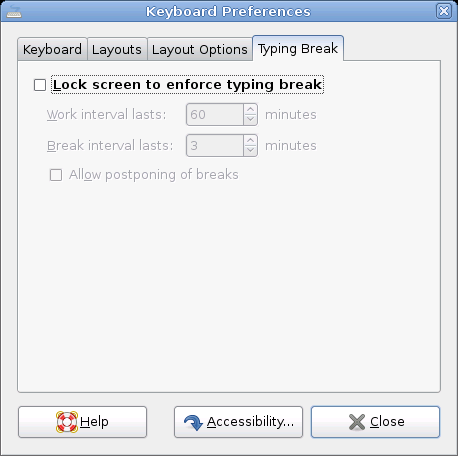
You can modify any of the following typing break preferences:
Table 2-3 Typing Break Preferences
Click the button to start the Keyboard accessibility preference tool. See Section 2.3.1, Configuring Keyboard Accessibility Settings for more information.
2.1.5 Configuring a Modem
If you connect to a network over a modem, use this option to configure your modem. The modem is configured in YaST.
NOTE:Root privileges are required for configuring your modem.
-
Click .
-
Enter the root password.
YaST opens.
-
Follow the instructions in YaST to configure the modem.
2.1.6 Configuring the Mouse
Use the Mouse Preference tool to configure your mouse for right-hand use or for left-hand use. You can also specify the speed and sensitivity of mouse movement.
Click .
You can customize the settings for the Mouse Preference tool in the following areas:
Configuring Button Preferences
Use the Buttons tabbed page to specify whether the mouse buttons are configured for left-hand use. You can also specify the delay between clicks for a double-click.
Figure 2-6 Mouse Preferences Dialog—Buttons Page
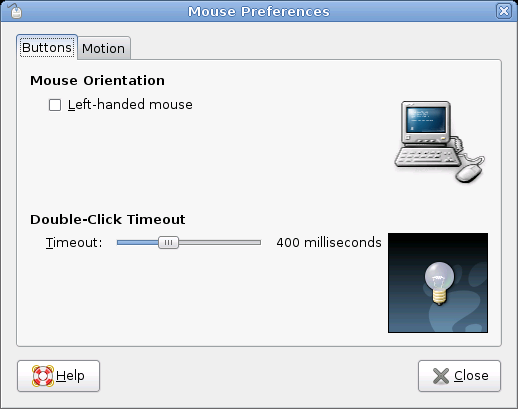
The following table lists the mouse button preferences you can modify.
Table 2-4 Mouse Button Preferences
Configuring Motion Preferences
Use the Motion tabbed page to set your preferences for mouse movement.
Figure 2-7 Mouse Preferences Dialog—Motion Page
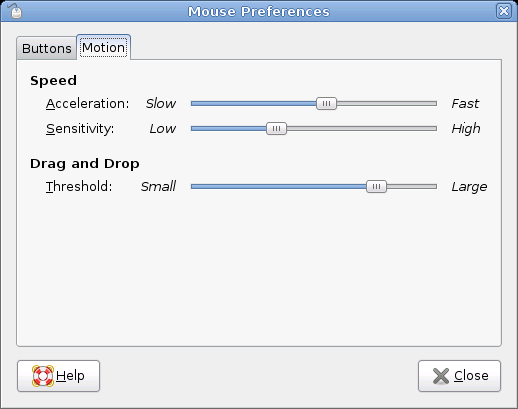
The following table lists the mouse motion preferences you can modify.
Table 2-5 Mouse Motion Preferences
2.1.7 Configuring a Network Card
If you connect to a network over a network card, use this option to configure your connection. The network card is configured in YaST.
NOTE:Root privileges are required for configuring your network card.
-
Click .
-
Enter the root password.
YaST opens.
-
Follow the instructions in YaST to configure the network card.
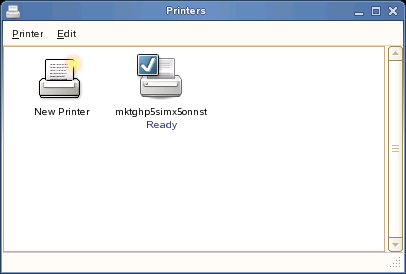
2.1.8 Installing and Configuring Printers
Use the Printers module to install and configure printers.
To start the Printers module, click .
Figure 2-8 Printers Dialog
2.1.9 Configuring Removable Drives and Media
You can use a wide variety of removable drives and media, including storage devices, cameras, scanners, and more. The configurations for many of these devices are set up automatically during installation. To change the configuration for a drive or other removable device, click .
Some of the possible configuration settings include:
-
What happens when a blank CD is inserted in the CD drive
-
What happens when an audio CD is inserted in the drive
-
Whether images are automatically imported from a digital camera when it is attached to the computer
-
Whether removable storage devices are mounted when they are plugged in to the computer
-
Whether PDAs are automatically synced when attached to the computer
In general, you do not need to change the settings that are already configured unless you want to change the behavior when a device is connected or if you want to connect a new device that is not yet configured. If you attach a device for the first time and it behaves in an unexpected or undesired way, check the Removable Drives and Media settings.
2.1.10 Configuring a Scanner
The Scanner configuration enables you to attach and configure a scanner, or to remove an already-attached scanner.
NOTE:Scanner configuration is done in YaST2 and requires root privileges.
To open YaST2 and configure a scanner, click . Refer to the instructions on the screen for information about the available options.
2.1.11 Specifying Screen Resolution Settings
Use this module to specify the resolution settings for your screen, including Resolution and Refresh Rate.
Click .
Figure 2-9 Screen Resolution Preferences Dialog
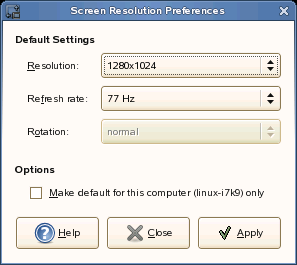
The following table lists the screen resolution preferences you can modify.
Table 2-6 Screen Resolution Preferences
If you cannot find a setting you want, you might need to use the Administrator Settings to reconfigure your graphics card and monitor settings. See Setting Up Graphics Card and Monitor in the openSUSE 103 Start-Up Guide for more information.
2.1.12 Configuring a Touchpad
Use this module to configure the behavior of a touchpad. This module is only available on computers containing touchpads, such as laptops. In most cases, the default behavior should remain unchanged. Click to start the Touchpad module.