2.2 Customers
2.2.1 Customers
The Customers tab is used to create, modify and delete Customer Accounts within the system.
A Customer is a User assigned the Customer Role. They can be internal or external to the organization. Customers can raise requests, update, and if relevant approve requests, through the Customer Portal or via email. Service Desk staff can also generate requests on behalf of the Customer.
Customers can be created within this tab, imported from a CSV file, or imported and synchronized using a directory server. See Authentication.
NOTE:If Customers are imported using a directory server and the mixed mode authentication method is disabled, the option to create Customers within the Users tab is not available.
If using Organizational Units (configured by a Supervisor User) or Customer Custom fields (configured by an Administrator User), it is recommended that these be configured prior to creating Customers.
See: Creating a Customer Account (Internal Authentication)
See: Importing Customers Using a CSV File
See: Importing Customers using LDAP/Active Directory Server.
2.2.2 Creating a Customer (Internal Authentication)
Use the Customer Information Tab to view and edit Customer details. It is also possible to set Customer Roles, line managers and default login details.
Creating a Customer Account
When creating a Customer, the following four tabs are available:
-
Contact
-
Aliases
-
Items
-
Contracts.
Information Tab
This tab is used to enter contact information for a Customer, when creating a new customer account.
NOTE:If Custom Fields are to be created for Customer Information it is recommended that the Administrator complete the configuration prior to creating Users. See Custom Fields.
To create a Customer account using internal system authentication:
-
Select User>Customers
-
Select New
-
The Customer Information screen appears, with the following fields:
-
Customer Information Fields
Access
Title
If enabled, select the appropriate title from the drop-down options. (This field is displayed if the Enable Titles option is set to Yes in the Admin>Setup>Setup>Privileges>Customer tab.)
First Name*
Customer's First Name.
Last Name*
Customer's Last Name.
User Name*
The login User name credentials for the User. If this is imported via LDAP or Active Directory, it can not be edited. Otherwise, enter a Username. Note that the value must be unique.
Password/ Confirm Password
The Default Password is set to the Customer's email address or a random string can be enabled by the Administrator in Setup>Privileges>System. See Authentication.
Customers can reset their password from the Customer Portal, or a Service Desk User can reset it in the customer account details using the Reset Password button through the Customer> Information tab.
Web Access
Web Access allows Customers to view their account information and Incidents via the Customer Portal.
Contact
Primary Email*
The Customer's Email address. System messages are sent to this address.
Send To
This field becomes when alternate email addresses are entered on the Aliases tab.
Select the most appropriate email address to be set as the default address applied to Customer correspondence. When the Send To field is set to an alias address, the Primary Email address is not included in the cc list, unless specified in the request Information tab cc list.
Org. Unit
The Organizational Unit, be it a Company or Department with which the Customer is associated.
(Organizational Units are created by the Supervisor, in Users >Organizational Units.)
Line Manager
If relevant, assign a system user with the Customer Role who can approve/reject requests made by this Customer, as part of the Change Management or Service Request approval process. (This information can not be edited if the line manager details are set by the LDAP synch.)
Room
This field is visible if the Display Rooms option is set to Yes in the Setup>Privileges>Customer screen and there are Room details configured in Organizational Units.
Address 1
First line of Customer's address.
Address 2
Second line of Customer's address.
City
Customer's city details
State
Customer's State details. Options will be displayed for the State, once the Country is selected, if Regions are configured for the Country in the system.
Zip/Postcode
Customer's area code.
Country
Customer's country. The country selected will determine the time zone and state options for the Customer.
Email Locale
Set the default language for email correspondence.
Phone
Enter Phone details.
Fax
Enter the Customer's fax number, if relevant.
Pager
Enter the Customer's pager details, if relevant.
Mobile
A mobile number can be entered as a contact number or for use with SMS (Short Mail Service message). An SMS can be sent to notify the assigned Technician when a request is created.
SMS Messaging options:
-
From the drop-down list, select the SMS Service Provider.
-
Override SMS Address. If your service provider does not appear in the list, click this checkbox and enter an alternate Service Provider.
SMS Override
Enter SMS Gateway override details for the Customer, if a number other than the one entered in the Mobile field is to be used to send/receive updates via SMS. Enter the complete SMS details in email address format, i.e., 000777891@smsgateway.provider.com.
Partner
Customer of
Nominate the Partner Organization associate with the Customer. This is an external service provider who manages the Customer's request.
(The option is enabled by the Administrator in Setup Privileges> Use >Edit Customer Partner. The Partner Organizations are defined by the Supervisor in the User>Partner Organizations tab.)
Locale
Time zone
The Customer automatically adopts the default Timezone set for the system. However, the Timezone can be manually adjusted here for the specific Customer.
Last Login
Auto-populated with the date the Customer last logged into the system.
Host
The IP address of the last login for the Customer
GPS
The GPS coordinates of the last known address for the Customer. (This field is displayed when the Record GPS option is enabled in Admin>Setup>Setup>Privileges>Customer tab.)
Roles
Current*
Multiple Roles can be assigned to a User. Select other Roles the Customer will use, by ticking the check boxes.
Note: If the Technician Role is selected, a Supervisor must be allocated.
Default Portal
The Default Portal is the user interface a Customer, who is assigned multiple Roles, accesses by default when they log into the system.
NOTE:If the Users Default Portal is set to Customer, the User details will not be accessible in the Users list, but included in the list within the User>Customer tab.
Details
Notes
Click on the field to enter any Customer relevant information.
-
* Denotes mandatory fields
-
Click Done.
Emailing Customers Credentials

To email a newly created Customer details regarding their system log in details, click the Email button within the Customer Information screen. If Random Passwords is enabled, selecting Email will reset the Password and forward the details to the Customer. If Password Questions is enabled in Setup>Privileges>System, selecting Email will send a link to the Customer directing them to a page that includes the security questions set for their account and reset the password based on the answers provided. Customers must complete this process within an hour of the email being sent.
vCard Button

Select this option to download and open the Customer's information in an electronic business card format, to email or save outside the system.
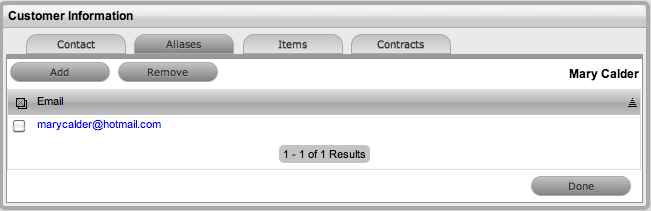
Aliases Tab
The Aliases tab is used to enter additional email addresses. Email addresses in the Aliases tab allow the Customer to send emails to the System or Team support addresses from more than one address. The system creates requests from these emails. Notifications for requests created using an address in the Aliases tab, are sent to the main email address and cc'd to the alias address that was used to create the request.
When one or more alias email addresses have been created for a Customer, a Send To field is displayed on the Customer Information screen, which allows the most appropriate email address to be set as the default address applied to Customer correspondence. When the Send To field is set to an alias address the Primary Email address is not included in the cc list, unless specified in the request Information tab cc list.
To add an alias email address:
-
Select User>Customers
-
Click on the Customer name
The Customer Information screen appears.
-
In the Information tab, click Edit
-
In the Aliases tab, click Add
-
Enter an alias email address
-
Click Save
-
Select Done.
When an alias email address has been created for a Customer, a Send To field is displayed on the Customer Information screen, which allows the alias email address to be set as the default address applied to Customer correspondence.
To remove an alias email address, in Edit mode, tick the checkbox next to the relevant email address and then click Remove.
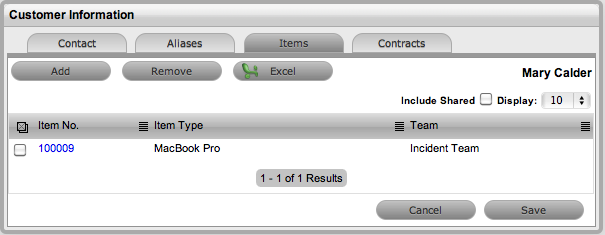
Items Tab
The Items tab defaults to list of Items assigned to the Customer. To view Shared Items, tick the Include Shared option. To view the Item details, select the Item Number hyperlink. Select the Excel button to output the Item List to Excel format.
To add an Item:
-
Select User>Customers
-
Click on the Customer name
The Customer Information screen appears.
-
In the Information tab, click Edit
-
In the Item tab, click Add
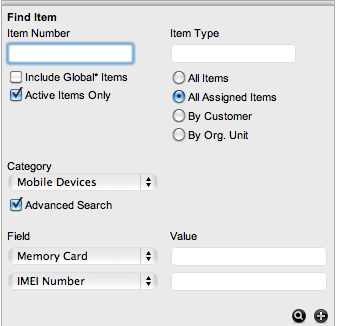
The Find Item editor is displayed.
-
Search for the relevant Item
For details regarding an advanced Item search see: Advanced Search.
-
Select the Item # hyperlink
The selected Item will be associated with the Customer.
-
Click Save
-
Select Done.
To remove an Item, in Edit mode, tick the checkbox next to the relevant Item and then click Remove.
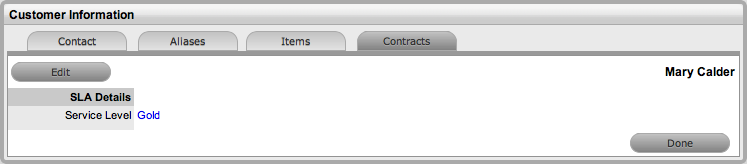
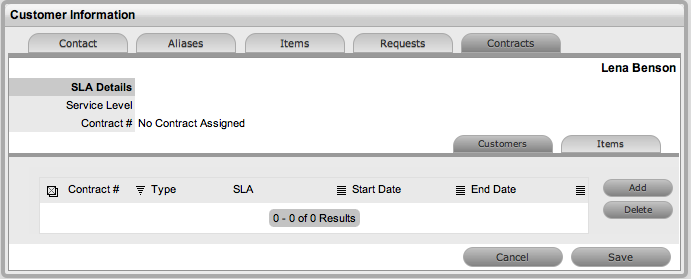
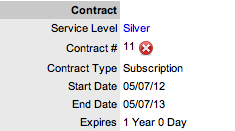
Contracts Tab
The Contracts tab displays a Customer's current contract status. A Customer can be assigned an SLA or Contract when Billing>Contracts is enabled. A Customer can only have one active Contract.
To create a new Contract for a Customer:
-
Select User>Customers
-
Select the Customer Name
-
Move to the Contracts tab
-
Click Edit
The system will display the Add button in the Customers tab
-
Click Add
The SLA options are displayed.
-
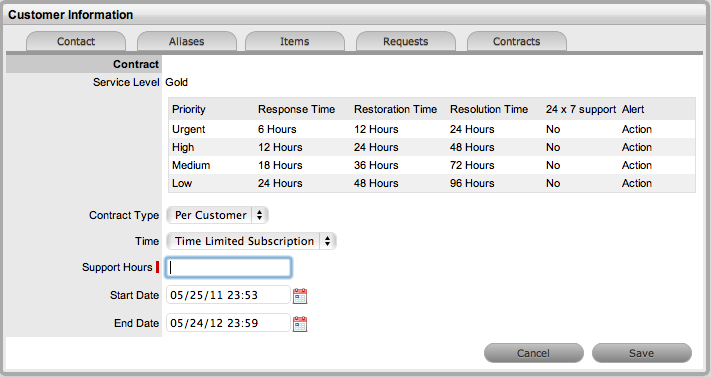
Select a Service Level from the list
When selected, the screen expands to display the Time, Start and End date fields.
-
Define the Contract Time period
For the Per Customer Contract Type the Time Period for the Contract can be defined:
If Subscription is selected, the Start and End Dates are automatically completed by the system, but can be edited if required.
If Time Limited Subscription is selected, the Support Hours field is displayed and the number of support hours purchased by the Customer should be entered. Also, the Start Date and End Date fields should be completed manually, entering the length of time for the subscription period.
If Support Hours is selected, the number of support hours purchased by the Customers should be entered
If Support Hours By Month is selected, define the number of Support Hours covered per month and on which day of the month the Contract is designated as the Rollover Day. The Start Date and End Date fields are automatically completed as an annual contract subscription but can be edited, as required.
If the Start Date is set as a future date, the Pending Contract status is assigned. See Pending Contracts.
-
Click Save
-
Click Next to continue
The system reverts to the Contracts summary screen.

-
Click Save. Click Done.
To delete a current Contract select  next to the Contract Number. Alternatively, to delete a current or queued Contract, within the Contract>Customers tab check the field next to the relevant Contract # and select the Delete button.
The Items tab within the Customer>Contracts screen is used to list all the Items with a Contract that are owned by a Customer.
The list of requests with the time recorded against the Contract is displayed within the Audit tab. The Summary view displays the list of requests with total number of Notes and Time allocated to the Contract, while the Detail view includes a breakdown of all Notes and the associated time related to each request.v
Searching for Customers
To search for Customers within the Users>Customers tab:
-
Go to Users>Customer
-
Click
-
Enter any known Customer details
Or, for a complete Customer list enter a before or after date for Customer creation
-
Click Search
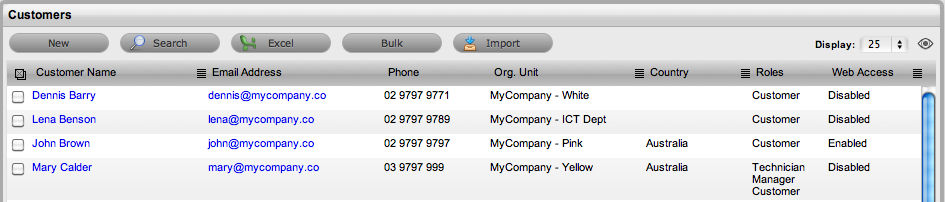
The results will be displayed in a table with the Customer Name and contact information.
-
Click on the Customer Name to open the Customer Information module or select the Email Address to send an email.
Re-enabling Deleted Accounts
Administrators have the ability to reactivate deleted Customer accounts.
To enable a deleted account:
-
Within the User > Customers tab select
-
Toggle the Account Status option to Deleted
-
Click Search
A list of deleted Customers is displayed.
-
Select a Customer to re-enable
The Customer information page appears.
-
Click the Enable button, to reactivate the account.
The Customer account becomes active and is available within the system.
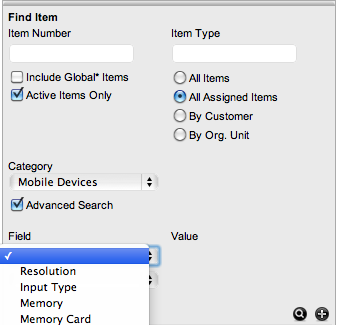
2.2.3 Advanced Search Option
To search for a Customer or an Item based on custom field information, use the Advanced Search option. The Advanced Search enables the User to search on Customer or Item custom fields, if they have been enabled.
During request creation the option Advanced Search will be visible within the Find Customer and Find Item screens.
To use the search option:
-
Tick the Advanced Search option
For the Find Customer, a custom field list will appear. For Find Item, an Item Category drop-down list is displayed.
-
For Find Item, select the Category. Two custom field lists appear
-
Select the custom field/s to search on
-
In the Value field, enter the details to be searched
-
Click
 to return a list of Customers/Items based on the custom field value entered
-
Click the relevant Customer Name or Item number to assign it to the request.
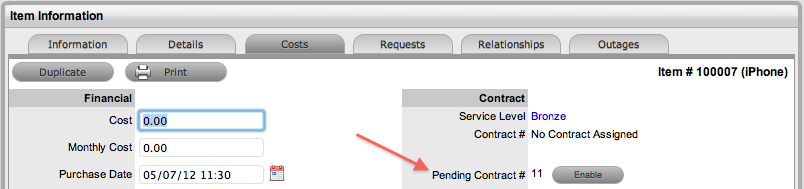
2.2.4 Pending Contracts
Contracts that have been forward dated on creation or that require invoice payment before they can become active in the system, are recorded as Pending Contracts. The list of Pending Contracts can be viewed in the All Agreements filter within the Service Level > Contracts screen.
A Pending Contract will automatically become active in the system on the start date assigned to the contract, if an invoice is not associated with the contract.
To enable a Contract before the start date:
-
Go to the Costs tab of the Item or Contracts tab of the Org Unit or Customer
The tab is available relative to where the contract is being activated. It will be Costs within the Item screen, or Contracts within the Customer or Org Unit Information screen.
-
Select Edit
The Enable button is displayed next to the Pending Contract Field
-
Click Enable
The system prompts that the start date will be updated.
-
Click OK
The Contract is created with the new start date.
-
Click Save.
-
NOTE:Requests raised against a Customer/Org Unit/Item with a Pending Contract, are assigned a Pending-No Contracts status. The Item/Customer/Org Unit’s Contract needs to be activated before a Technician can work on the request.
2.2.5 Importing Customers using a CSV File
Using a .CSV file (comma-delimited text file), Customers can be imported instantly.
The fields that are required within the text file for Customers to be imported are:
-
First Name
-
Last Name
-
Email address
-
Username (unique)
-
Password.
To import Customers using a .CSV File:
-
Select User>Customers
The Customers screen is displayed.
-
Click
The Customer Import Wizard appears.
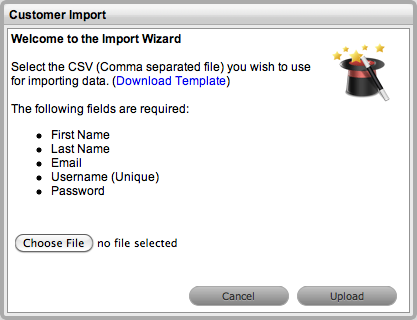
To view a template that illustrates the fields the application is looking for and the data types (see below), click the Download Template link on the Customer Import Wizard screen.
The following fields should be visible:
Title (char 128),First Name(char 64), Last Name(char 64), Email Address(char 64), Company(char 64), Department (char 64),Primary Company Contact (int 1), Primary Department Contact (int 1),Address 1(char 128), Address 2(char 128), City(char 64), State(char 32), Postcode/ Zip (char 20), Country(char 64), Phone(char 20), Mobile(char 20), Fax (char 20), Pager (char 32),Username (Unique char 64), Password (char 64), Partners Email (char 64), Custom1(char 256), Custom2(char 256), Custom3(char 256), Custom4(char 256), Custom5(char 256), Notes (clob), Locale (char 5), Line Manager Username (char 128)
The ‘char ###’ designation in parentheses after each field name signifies what type of data the import utility expects to see in each field. For instance:
-
’First Name (char 64)’ means that the first name field cannot exceed 64 characters.
-
'Company Contact (int 1)' means that a 1 in the field will assume the Customer is the Primary Contact for the Company, if the field is left empty or completed with a zero, it is assumed the Customer is not a Primary Contact.
-
Fields marked as ‘Unique’ must be unique in the system
-
Locale is the Email Locale for the Customer and will be set to the option applied in the Setup>Email>Setup>Default Locale field if the column is empty
-
Line Manager Username is the Customer's Username as recorded in the system or to be created as part of the .CSV import.
If the Partner option has been enabled in the application Setup, a Partner can be assigned to a Customer by defining the Partner email within the .CSV file.
NOTE:The Country specified must be the same as what is found within the application
If the spelling is different in the .CSV file, a Customer's Country details will not be imported.
-
Click Choose File
Select a .CSV file to be imported
-
Click Upload
Displayed are lists of fields that are mapped to the corresponding fields in the .CSV file that is to be imported.
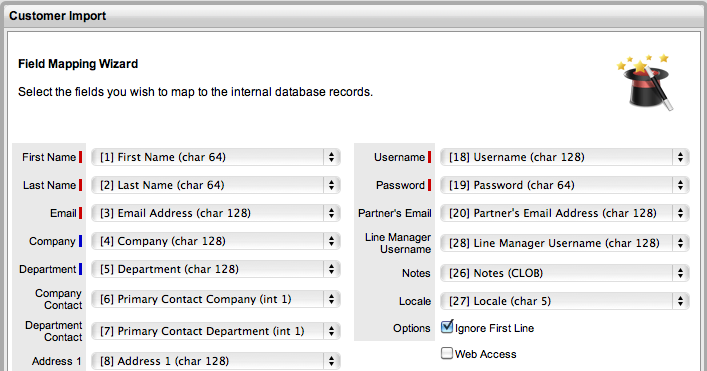
*Fields marked with a I are mandatory.
*Fields marked with a I that do not contain matching system records automatically create new records in system.
-
Adjust mapped fields, if relevant
-
Check Ignore First Line if the imported .CSV file uses its first line as a header to define the field information
Leave the box unchecked if the .CSV file begins with usable data.
-
Check Web Access if the imported Customers are to have immediate access to the Customer Portal
If this option is not selected, Customers will not be able to log into the application until they have been designated web access within the Customer Information>Contact tab.
-
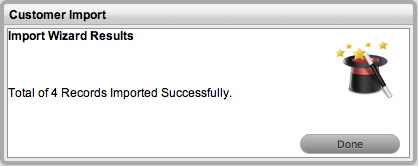
Click Import
The results of the import attempt will be displayed. If the import was successful, the new Customer details can now be accessed in the system.
-
Click Done.
After the Customer has been imported, other fields require manual configuration, including:
-
Room (if relevant)
2.2.6 Importing Customers using LDAP/Active Directory Server
Administrators can connect the application to a Directory Server for Customer and User authentication purposes. This removes the need to create Customer and User accounts as it allows the system to synchronize accounts and access levels with an existing Directory Server. It has the added benefit of allowing the Administrator to work with existing infrastructure.
As part of the mapping process, if no values exist on the authentication server for a mapped field, no drop-down menu will appear and Users cannot edit the field.
When the authentication server is used, the Customer’s password is not visible within the service management tool, regardless of whether the Customer is new or existing in the system. This is due to the Customer’s account being validated against an authentication server account rather than an internally authenticated account. The password is stored in the authentication server’s database and it is not accessible through the service management system.
Also, Customers using LDAP or Active Directory authentication are not able to edit their first name, last name, LDAP/ADS username or email address. These fields are stored on the authentication server, and cannot be modified within the service management system.
To import Customers using a directory server, see Authentication.