1.57 List Views
Application List Views are pre-sorted by ID #, and default to display ten Incidents per batch. A List can be re-sorted by clicking on a column header, and the number of elements displayed per batch can be changed using the Display pop-up option.
List Views allow Users to customize the list displayed for each screen within the application. When a List View is created, the screen editor will display only the relevant columns for the module being customized. For example, when creating an Item List View, the available columns will include only Item information.
The system includes at least one default List View for each screen within the application. These Views cannot be edited, however additional Views can be created.
To access details regarding the List View field options throughout the application, refer to:
1.57.1 Create a List View:
As an example we will create a List View for the Incident screen.
-
Select Operations>Incident
The Incidents screen appears
-
Select
 available on the far right of the screen
-
Click New
-
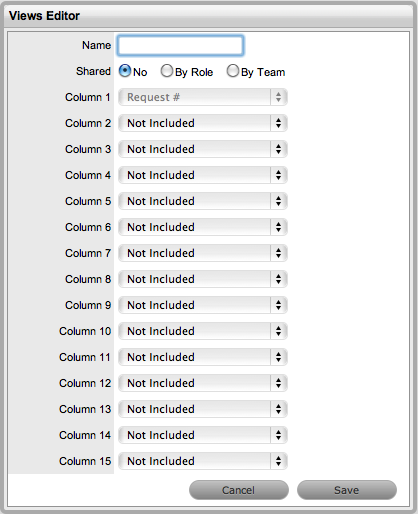
Enter the View Name and specify if the View is to be shared by other Users or between Team members
Shared Views allow other Users to apply the List View to their screen but does not permit them to edit it.
-
Select at least 8 columns
This only applies to the request list screens, all other screens require at least 6 columns.
-
Click Save.
NOTE:Create a List View that includes New Tasks and New Notes to use as the default request screen in order to have a visual cue when new Notes and requests are created.
1.57.2 Selecting a List View as the Default View
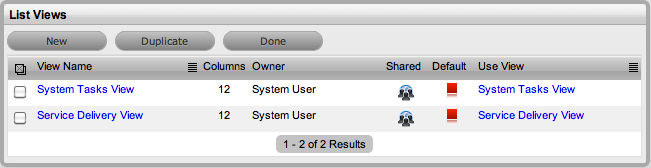
To use the same List View each time a screen is displayed, select the List View to be the default view. To do this:
-
Select
, displayed on the far right of the screen
-
Click the
 button in the Default column
-
The icon will then change to a
 , indicating that it has become the default
-
Select Done to view this List.
From this point, this will be the default List View for the selected screen.
1.57.3 Displaying a Different List View
To use a different List View:
-
Select
, displayed on the far right of the screen
-
Select the link in the Use View column.
1.57.4 Editing a List View Column
To edit a List View, and change the columns:
-
Select
, displayed on the far right of the screen
-
Select the link in the View Name column
-
Make the required changes
-
Click Save.
1.57.5 Duplicating a List View
To fast-track the creation of similar List Views, a List View can be duplicated. To duplicate a List View:
-
Select
, available on the far right of the screen
-
Click the checkbox beside the View Name to duplicate
-
Click the Duplicate button
The List View Editor appears with the columns of the original List View.
-
Complete the List View name
-
Modify the columns as required
-
Click Save.
To access details regarding the List View information options throughout the application, refer to: