4.2 Upgrading from 3.0.x to 3.1.1
The upgrade process requires you to install the NSM Engine, Event Monitors, and NSM Agents on the same machines that are hosting the components of your 3.0.x version of Novell Storage Manager. Depending on the version and component you are upgrading, you might then need to run the component configuration utilities. Finally, you must then upgrade your version of NSMAdmin where you will install the new 3.1.1product license.
4.2.1 Performing Installation Tasks as a Domain Administrator
In order to successfully install the NSM Engine, Event Monitor, NSM Agents, and NSMAdmin, you must be logged in to the computer as a domain administrator. If you are not, the rights are not sufficient.
4.2.2 Upgrading the NSM Engine
NOTE:With the exception of a now mandatory 64-bit server host, the system requirements and prerequisite tasks have not changed significantly since you installed the Novell Storage Manager 3.0.x NSM Engine. Therefore, they are excluded from this section. If you want to review them, refer to Section 5.3, Installing the NSM Engine.
-
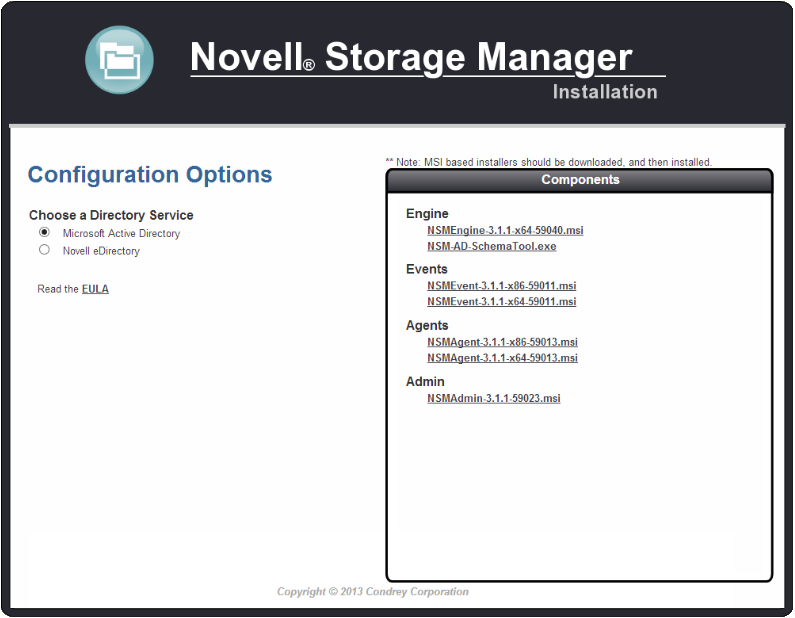
At the root of the NSM_3_1_1.iso image, click the install.html file.
-
Select
-
Click
-
When asked if you want to save or run the file, save the file to the hard drive of the server that will host the NSM Engine.
-
From the saved location, launch the NSM Engine installation file.
-
When you are asked if you want to run this file, click .
An Introduction page appears in the Novell Storage Manager Installation Wizard.
-
Read the text and click .
-
Accept the licensing terms and click .
-
Accept the installation path or indicate a new path by using the button.
To review possible locations, you can click to see all available volumes with disk size and disk availability data.
-
Click .
-
Click to begin the installation.
-
Click .
-
Do one of the following:
-
If you are upgrading from Novell Storage Manager 3.04, the NSM Engine does not need to be configured. Proceed with Section 4.2.3, Upgrading an Event Monitor.
-
If you are upgrading from Novell Storage Manager 3.0, 3.0.1, 3.0.2, or 3.0.3, proceed with the steps that follow in this section.
-
-
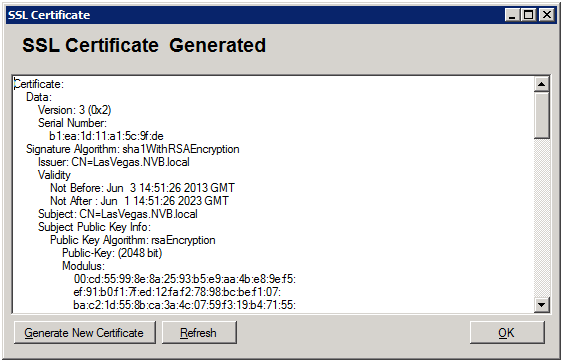
From the desktop, click the SSL Certificate icon.
Novell Storage Manager creates a unique private certificate.
-
Do one of the following:
-
If you want the server on which you are installing the Novell Storage Manager Engine to function as the certificate server, click . When asked to restart the Engine service, click , then skip to Section 4.2.3, Upgrading an Event Monitor.
If you have an existing certificate issued from a third party that you want to use, you can change the certificate later. Simply stop the Engine service, replace the certificate located in C:\ProgramData\Novell\Storage Manager\Engine\Config (the certificate is a .pem file that must be replaced by a .pem file), and then restart the Engine service.
-
If you want a different server in the network to issue the certificate and function as the certificate server, continue with Step 16.
-
-
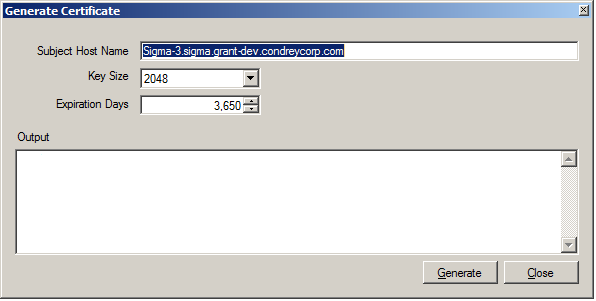
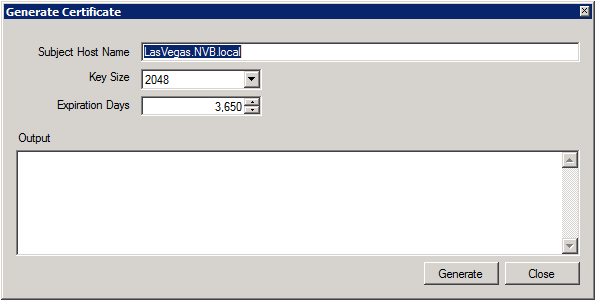
Click .
-
In the field, specify the server name.
-
In the field, leave the default setting of 2048, or select the key size you want.
-
In the field, leave the setting at 10 years (3,650 days), or specify a new setting.
-
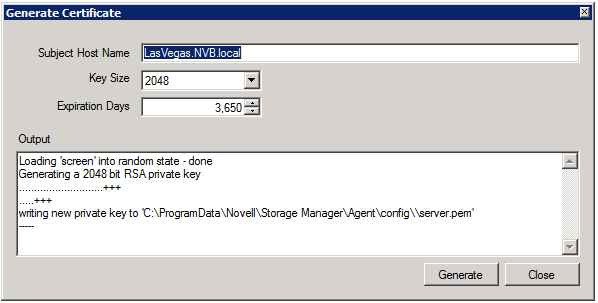
Click .
-
Click .
-
Click .
-
Proceed with Section 4.2.3, Upgrading an Event Monitor.
4.2.3 Upgrading an Event Monitor
NOTE:The system requirements and prerequisite tasks have not changed significantly since you installed the Novell Storage Manager 3.0.x Event Monitors. Therefore, they are excluded from this section. If you want to review them, refer to Section 5.6, Installing and Configuring the Event Monitor.
-
At the root of the NSM_3_1_1.iso image, click the install.html file.
-
Select
-
Click one of the following Event Monitor installation files:
-
-
When asked if you want to save or run the file, save the file to the hard drive of the server that will host the Event Monitor.
-
From the saved location, launch the Event Monitor installation file.
-
When you are asked if you want to run this file, click .
An Introduction page appears in the Setup Wizard.
-
Read the text on the screen and click .
-
Accept the license terms and click .
-
Accept the installation path or indicate a new path by using the button.
To review possible locations, you can click to see all available volumes with disk size and disk availability data.
-
Click .
-
Click .
-
Deselect the check box, as you do not need to configure the Event Monitor, and click .
-
Continue with Section 4.2.4, Upgrading an NSM Agent.
4.2.4 Upgrading an NSM Agent
NOTE:The system requirements and prerequisite tasks have not changed significantly since you installed the Novell Storage Manager 3.0.x NSM Agents. Therefore, they are excluded from this section. If you want to review them, refer to Section 5.7, Installing and Configuring an NSM Agent.
-
At the root of the NSM_3_1_1.iso image, click the install.html file.
-
Select
-
Click one of the following NSM Agent installation files:
-
-
When asked if you want to save or run the file, save the file to the hard drive of the server that will host the NSM Agent.
-
From the saved location, launch the NSM Agent installation file.
-
When you are asked if you want to run this file, click .
An introduction page appears in the Setup Wizard.
-
Read the text on the page and click .
-
Accept the license terms and click .
-
Accept the installation path or indicate a new path by using the button.
To review possible locations, you can click to see all available volumes with disk size and disk availability data.
-
Click .
-
Click .
-
Do one of the following:
-
If you are upgrading from Novell Storage Manager 3.0.4, deselect the check box, as you do not need to configure the NSM Agent. Then click , and skip to Section 4.2.5, Upgrading NSMAdmin.
-
If you are upgrading from Novell Storage Manager 3.0, 3.0.1, 3.0.2, or 3.0.3, leave the check box selected, then click .
-
-
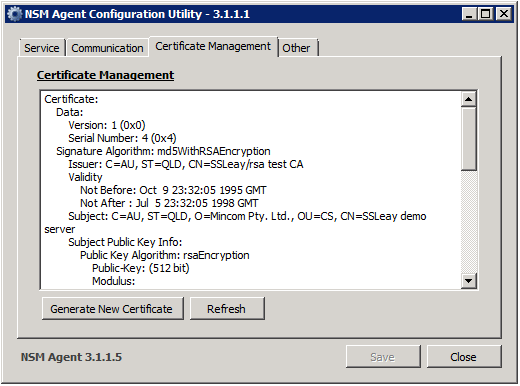
From the NSM Agent Configuration Utility interface, click the tab.
-
Click .
-
Click .
The certificate is updated to the one that you created in Step 15.
-
Click .
-
From the NSM Agent Configuration Utility interface, click .
-
Proceed with Section 4.2.5, Upgrading NSMAdmin.
4.2.5 Upgrading NSMAdmin
NOTE:The system requirements and prerequisite tasks have not changed significantly since you installed the Novell Storage Manager 3.x NSMAdmin. Therefore, they are excluded from this section. If you want to review them, refer to Section 5.4, Installing and Configuring NSMAdmin.
-
At the root of the NSM_3_1_1.iso image, click the install.html file.
-
Select
-
Click
-
When asked if you want to save or run the file, save the file to the hard drive of a computer where you will administer Novell Storage Manager.
-
From the saved location, launch the NSMAdmin installation file.
-
When you are asked if you want to run this file, click .
An Introduction page appears in the NSMAdmin Installation Wizard.
-
Read the text and click .
-
Accept the license terms and click .
-
Accept the installation path or indicate a new path by using the button.
To review possible locations, you can click to see all available volumes with disk size and disk availability data.
-
Click .
-
Leave the check box selected and click .
The old NSMAdmin shortcut is removed and a new one is installed on the desktop.
-
Leave the check box selected and click .
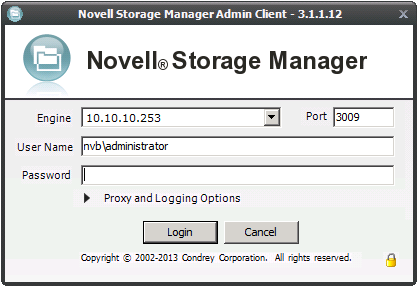
NSMAdmin is launched.
-
In the field, specify the DNS name or IP address.
-
In the field, specify the secure port number.
The default setting for Microsoft Active Directory managed networks is 3009.
-
Specify the username and password.
The user must be a member of the NSMAdmins group to be able to log in.
-
Click .
If you are unable to log in, your proxy settings might be preventing you from doing so. Until you enter a proxy exception in your proxy settings, you can click select , then click .
The Setup Wizard welcome screen appears.
-
Read the text on the screen and click .
-
Do one of the following:
-
Click to locate and select the path to the license file.
-
Click to obtain an evaluation license.
-
-
Click .
The proxy service account and security group information is displayed.
-
Click .
-
Accept or modify the NSM Administrators’ Group name, leave the check box selected, then click .
The following page appears:
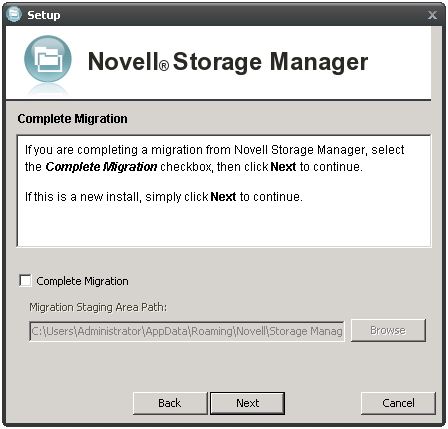
Even though this is an upgrade from an earlier version of Novell Storage Manager, the check box is applicable only when migrating policies from Version 2.5.x.
-
Leave the Complete Migration check box deselected and click .
You are notified that Novell Storage Manager needs to initialize its engine and susbsystems.
-
Click .
-
When prompted, enter your password and click .
-
Proceed with Section 4.2.6, Verifying that Upgraded Components Are Operating.
4.2.6 Verifying that Upgraded Components Are Operating
-
From NSMAdmin, click the tab.
-
Click and verify that the updated Event Monitors are operating.
-
Click and verify that the updated NSM Agents are operating.