5.3 Installing the NSM Engine
Novell Storage Manager uses only one NSM Engine per forest. The NSM Engine can be installed on a Windows Server 2008 machine that meets the following minimum requirements:
-
Microsoft Windows Server 2012 (Member or DC Server)
-
Microsoft Windows Server 2008 R2 (Member or DC Server)
-
.NET 3.5 Framework and .NET 4.0 (Full) Framework installed
-
For quota management, Microsoft File System Resource Manager (FSRM) must be installed; see Section 1.1, File Server Resource Manager.
-
Forest functional level of Windows Server 2003 or later
IMPORTANT:In cases where managed storage may include redirected folders, such as “My Documents” or similar types commonly seen with managed Profile Paths, a Windows Server hotfix (http://support.microsoft.com/kb/973278) will need to be applied to any Engine and Agent servers involved in the data copy process. This hotfix only applies to the following platforms where the Engine or an Agent is installed:
-
Windows Server 2008
-
Windows Server 2008 SP1
In cases where this hotfix has not been applied to the affected systems, symptoms may include stuck Copy Data pending events with the message: Current Error - 32: The requested operation is not supported in the properties for that event as well as the error message identified by the hotfix “0x00000032 (ERROR_NOT_SUPPORTED)” appearing in the log file of the Engine or Agent that tried processing the data copy.
Other notable information about the NSM Engine:
-
There is only one NSM Engine per forest
-
The NSM Engine runs as a native NT service that is configured to start by using the Local System account
-
The default NSM Engine port is 3009
-
The Firewall Inbound Rule is added during the NSM Engine installation
-
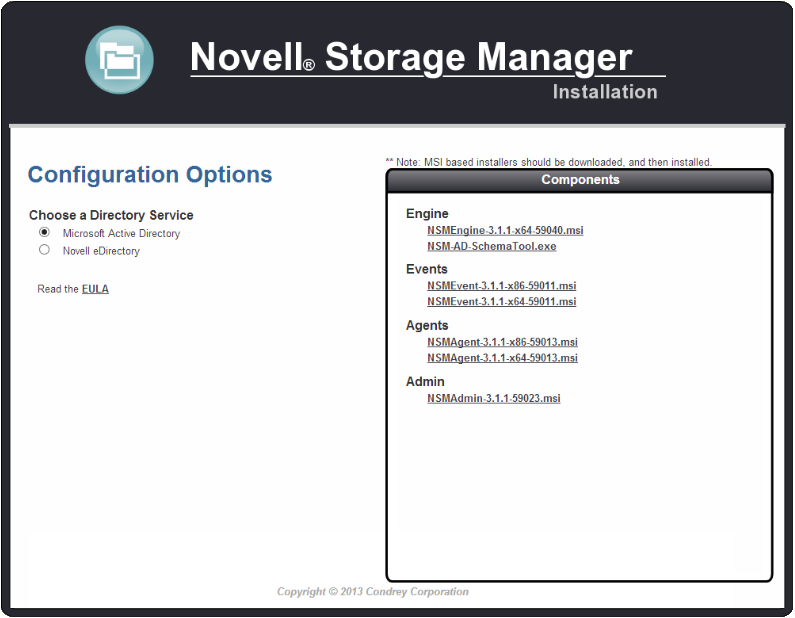
At the root of the NSM_3_1_1.iso image, click the install.html file.
-
Select
-
Click .
-
When asked if you want to save or run the file, save the file to the hard drive of the server that will host the NSM Engine.
-
From the saved location, launch the NSM Engine installation file.
-
When you are asked if you want to run this file, click .
An Introduction page appears in the Novell Storage Manager Installation Wizard.
-
Read the text and click .
-
Accept the licensing terms and click .
-
Accept the installation path or indicate a new path by using the button.
To review possible locations, you can click to see all available volumes with disk size and disk availability data.
-
Click .
-
Click to begin the installation.
-
Click .
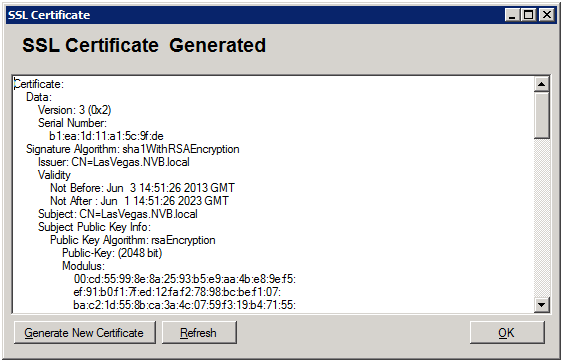
Novell Storage Manager creates a unique private certificate.
-
Do one of the following:
-
If you want the server on which you are installing the Novell Storage Manager Engine to function as the certificate server, click , then skip to Section 5.4, Installing and Configuring NSMAdmin.
If you have an existing certificate issued from a third party that you want to use, you can change the certificate later. Simply stop the Engine service, replace the certificate located in C:\ProgramData\Novell\Storage Manager\Engine\Config (the certificate is a .pem file that must be replaced by a .pem file) and then restart the Engine service.
-
If you want a different server in the network to issue the certificate and function as the certificate server, continue with Step 14.
-
-
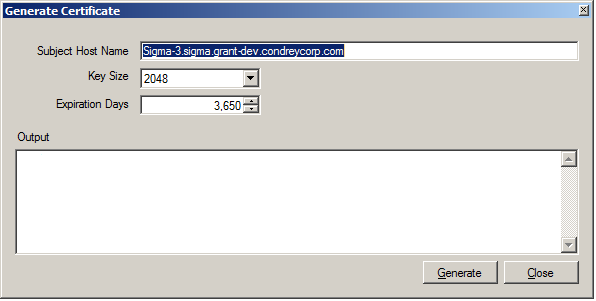
Click .
-
In the field, specify the server name.
-
In the field, leave the default setting of 2048 or select the key size you want.
-
In the field, leave the setting at 10 years (3,650 days) or specify a new setting.
-
Click .
-
Click .
-
Click .
-
Proceed with Section 5.4, Installing and Configuring NSMAdmin.