4.7 Creating a User Home Folder Policy
A policy in Novell Storage Manager is the means by which Novell Storage Manager provisions, manages, deletes, and archives storage. The parameters within the policy dictate where user storage is created, what rights are granted, what quota to assign, what to do when a user is deleted, and much more.
IMPORTANT:Only one policy of the same type can be associated with a domain, organizational unit, group, or user.
-
In NSMAdmin, click the tab.
-
Click .
-
In the menu, select .
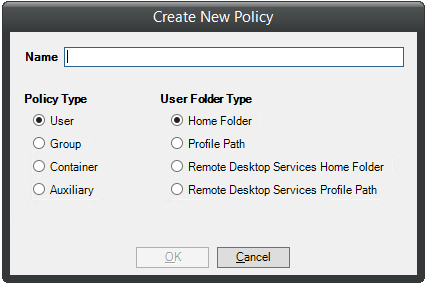
The following screen appears:
-
Specify a descriptive name for the policy, such as “Los Angeles Division,” then click .
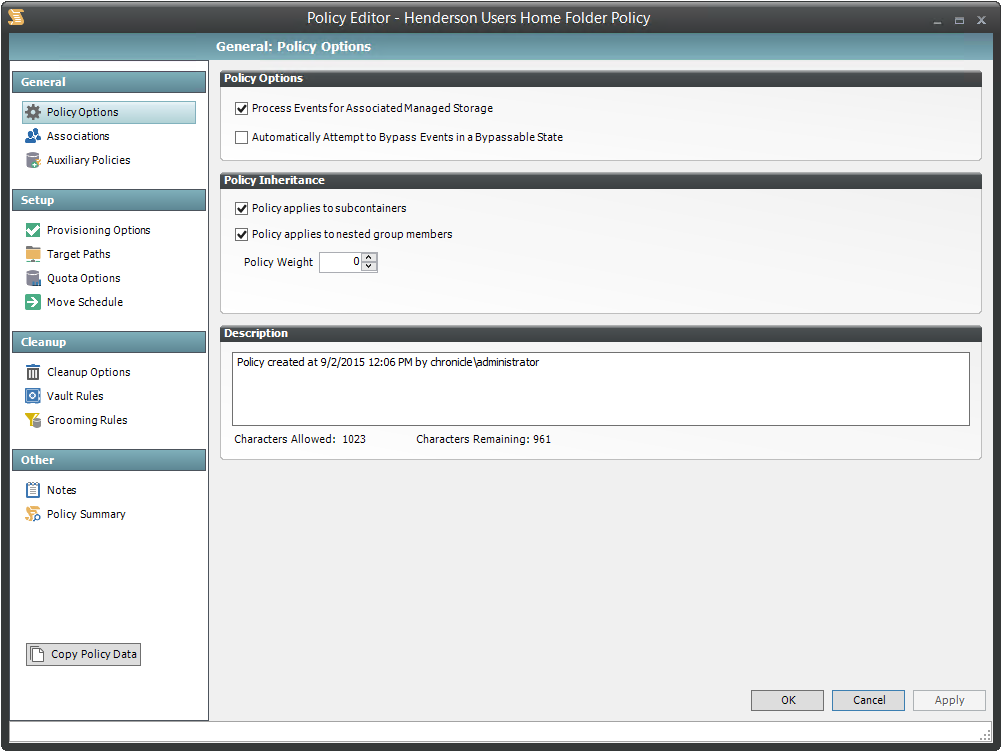
The Policy Options page appears.
-
Set the Policy Options specifications for the policy:
-
If you want the container’s subcontainers to inherit the policy settings, leave the check box selected. Otherwise, deselect it.
-
If you will have users that are members of multiple groups, which means they could be affected by multiple policies, use the field to indicate a weight for this policy.
When multiple policies pertain to a user, Novell Storage Manager uses the highest weight number to determine which policy to apply.
-
Click to save your settings.
-
-
Set the associations:
-
In the left pane, click .
-
Click .
-
Browse to and locate the domain, organizational unit, Group object, or User object you want the policy applied to, then drag it to the Selected Items pane.
-
Click to save the settings.
-
-
Set the provisioning specifications:
-
In the Folder Properties region, specify the settings you want for the rights to be applied to network home folders that are created through this policy. Select the check box, to activate additional check boxes.
-
In the Template Folder region, click the button to locate and place a path to a template directory that can be copied into each home folder.
For more information on templates, see Step 3.
-
In the Home Folder region, indicate the network drive letter to assign to your users.
-
Click to save the settings.
-
-
Set the target paths:
-
In the left pane, click .
-
Click , browse to the share or folder where you want your home folders to reside, right-click and choose to add the target path to the pane.
-
If you want to set the location of home directories among different paths, repeat Step 8.b to include all the paths you want.
-
If you have multiple paths listed, select a distribution method from the drop-down list.
For an explanation of storage distribution, see Section 5.5.4, Setting Target Paths.
-
Leave the other fields as they are currently set.
-
Click to save your settings.
-
-
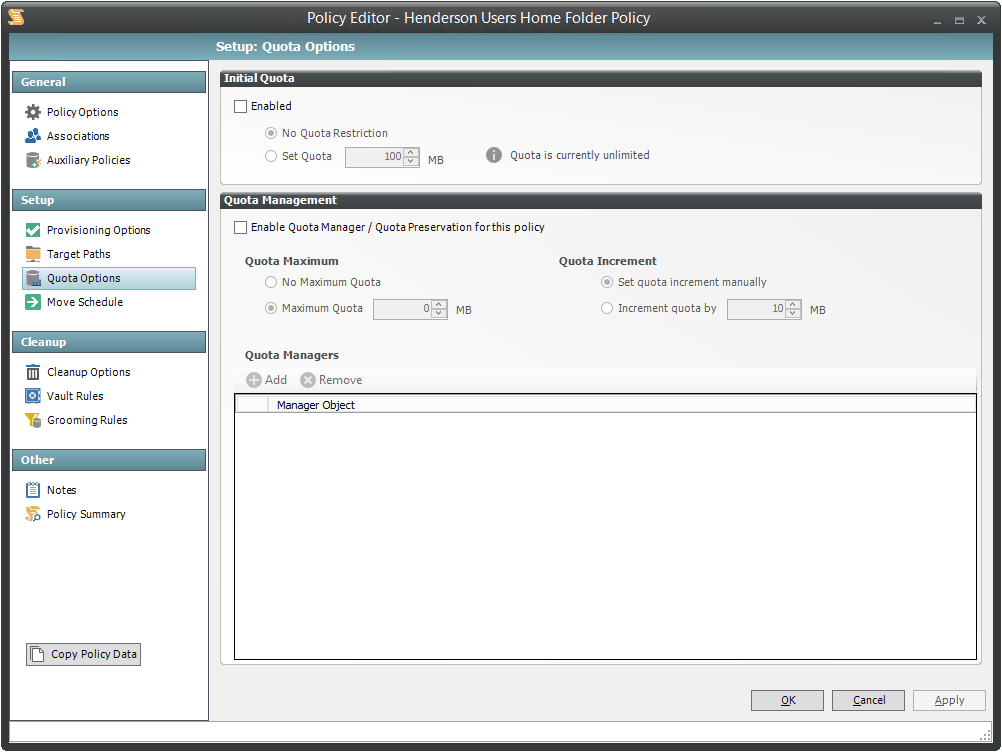
Set the quota options:
-
In the left pane, click .
-
In the Initial Quota region, specify the amount of initial storage space to be allocated to all users associated with this policy.
-
(Optional) In the Quota Management region, click the check box, to display additional options.
-
Select one of the following Quota Maximum options:
-
Use the option to specify that the users managed by this policy will be granted additional storage quota when they need more.
-
Use the field to specify the maximum amount of storage that is allocated to a user. This allocation comes through the quota increment settings below.
-
-
(Optional) Select one of the following Quota Increment options:
-
Select the option to allow users who are designated as quota managers to set quotas manually.
-
Select the option to indicate the size in MB for each new allocation of additional storage quota.
-
-
Click to save your settings.
-
-
Set the move schedule:
-
In the left pane, click .
-
Specify the hours when Novell Storage Manager can perform data migrations.
For more information on data migrations, see Section 5.5.6, Setting the Move Schedule.
-
Click to save the settings.
-
-
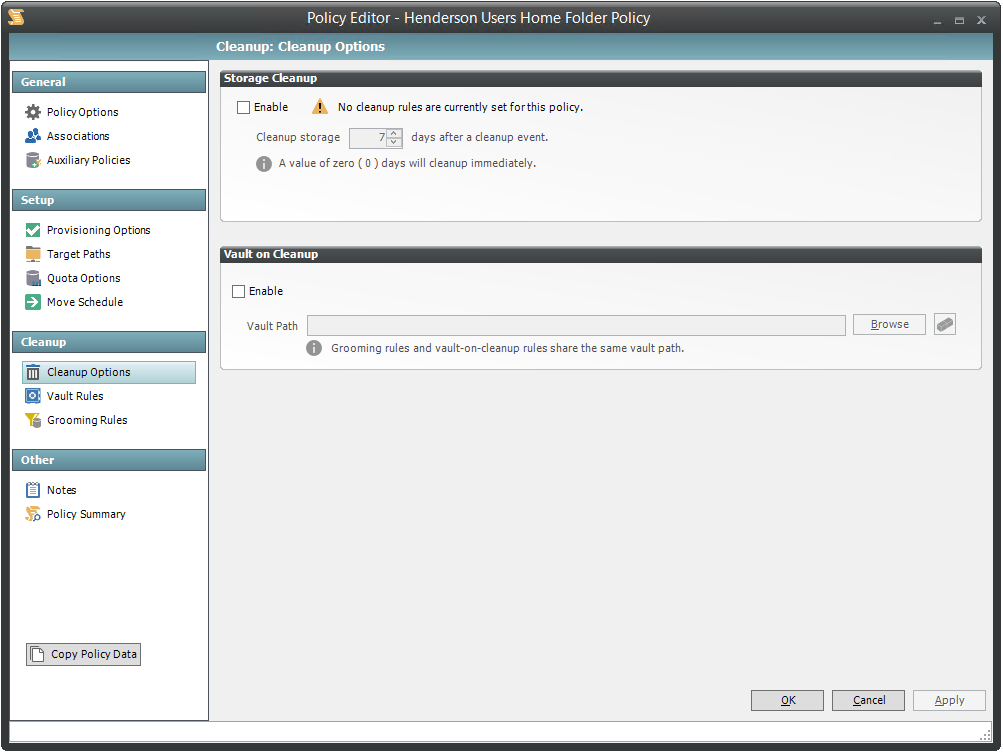
Set the cleanup options:
-
In the left pane, click .
-
In the Storage Cleanup region, select the check box to indicate if you want user storage associated with this policy deleted when a user is removed from Active Directory.
If you select the check box, you can specify the number of days a user home folder and its contents will remain before it is deleted.
-
If you want user storage associated with this policy vaulted, in the Vault on Cleanup region, select the check box and use the button to indicate a path to the vault location.
-
Click to save your settings.
If you have both Storage Cleanup and Vault on Cleanup enabled, Novell Storage Manager vaults the data and then deletes it after the specified period of time. If you have Vault on Cleanup but not Storage Cleanup enabled, Novell Storage Manager vaults the data immediately and never cleans it up.
-
-
Set the vault rules:
-
In the left pane, click .
-
Click to create vault rules.
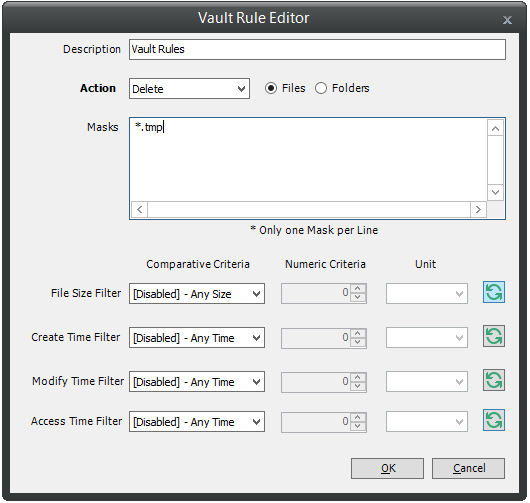
For example, in the rule above, all .tmp files are deleted prior to their home folder being vaulted. When the specified number of days in the field has passed, the home folder is deleted from the specified vault location.
-
Click to save your settings.
-
-
Set the grooming rules:
-
In the left pane, click .
-
Click .
-
Select either , , or from the drop-down menu to specify whether to vault, delete, or ignore files or folders.
-
In the field, indicate the type of file or the name of a folder for which this grooming rule will take action. For example, *.mp3 and *.mp4.
If you choose to vault files, you must have a specified vault path in the field of the Vault Rules page.
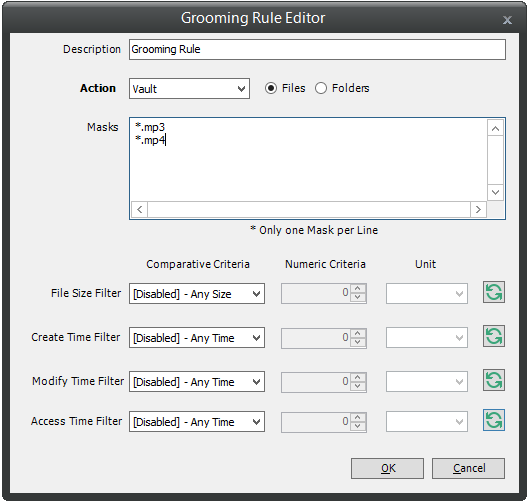
To narrow the scope of the grooming rule, you can use the filter settings in the lower portion of the dialog box.
For example, if you select from the drop-down menu, enter 2 as the Numeric Criteria, and select as the Unit setting, the grooming rule in this example vaults all MP3 files greater than 2 MB. Setting additional filters narrows the scope of the grooming action even more.
-
Click to save the grooming rule.
-
Repeat Step 13.a through Step 13.e to create additional grooming rules.
-
Click to apply the grooming rules.
-
-
Click to save the policy settings.