| SUSE LINUX – Administration Guide Chapter 12. Special Features of SUSE LINUX / 12.4. linuxrc | ||||
|---|---|---|---|---|
 | 12.3. Booting with the Initial Ramdisk | 12.5. The SUSE Rescue System |  | |
| SUSE LINUX – Administration Guide Chapter 12. Special Features of SUSE LINUX / 12.4. linuxrc | ||||
|---|---|---|---|---|
| 12.3. Booting with the Initial Ramdisk | 12.5. The SUSE Rescue System | | |
linuxrc is a program that is started in the start-up stage of the kernel prior to the actual boot process. This allows you to boot a small modularized kernel and to load the few drivers that are really needed as modules. linuxrc assists in loading relevant drivers manually. However, the automatic hardware detection performed by YaST is usually quite reliable. The use of linuxrc is not limited to the installation; you can also use it as a boot tool for installed system and even for an independent RAM disk–based rescue system. Refer to Section 12.5. “The SUSE Rescue System” for more details.
After selecting the language and keyboard, you will be taken to the main menu of linuxrc (see Figure 1.2. “The Main Menu of linuxrc”). Normally, linuxrc is used to start Linux. Go to . Depending on the hardware and the installation procedure, you may be able to access this item directly. Refer to Section 1.1. “Text-Based Installation with YaST” for more information.
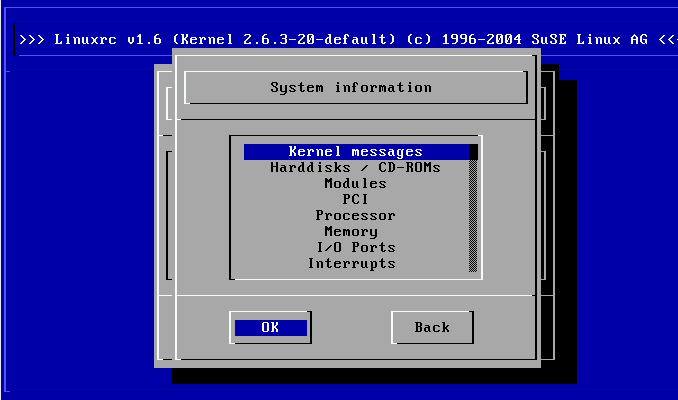
You can check some system information in , shown in Figure 12.1. “System Information”. For example, check the used interrupts, I/O ports used, main memory, and recognized PCI devices as detected by Linux.
The next lines show how a hard disk and a CD-ROM connected to an (E)IDE controller announce their start. In this case, you do not need to load additional modules:
hda: ST32140A, 2015MB w/128kB Cache, LBA, CHS=1023/64/63
hdb: CD-ROM CDR-S1G, ATAPI CD-ROM drive
Partition check:
 hda: hda1 hda2 hda3 < hda5 >
If you booted a kernel that already had a SCSI driver compiled, you do not need this SCSI driver as a module as well. Announcements when loading SCSI adapters and connected devices resemble:
scsi: 1 host.
Started kswapd v 1.4.2.2
scsi0: target 0 accepting period 100ns offset 8 10.00MHz FAST SCSI-II
scsi0: setting target 0 to period 100ns offset 8 10.00MHz FAST SCSI-II
  Vendor: QUANTUM   Model: VP32210           Rev: 81H8
  Type:   Direct-Access                      ANSI SCSI revision: 02
Detected scsi disk sda at scsi0, channel 0, id 0, lun 0
scsi0: target 2 accepting period 236ns offset 8 4.23MHz synchronous SCSI
scsi0: setting target 2 to period 248ns offset 8 4.03MHz synchronous SCSI
  Vendor: TOSHIBA   Model: CD-ROM XM-3401TA  Rev: 0283
  Type:   CD-ROM                             ANSI SCSI revision: 02
scsi: detected 1 SCSI disk total.
SCSI device sda:hdwr sector=512 bytes.Sectors=4308352 [2103 MB] [2.1 GB]
Partition check:
 sda: sda1 sda2 sda3 sda4 < sda5 sda6 sda7 sda8 >
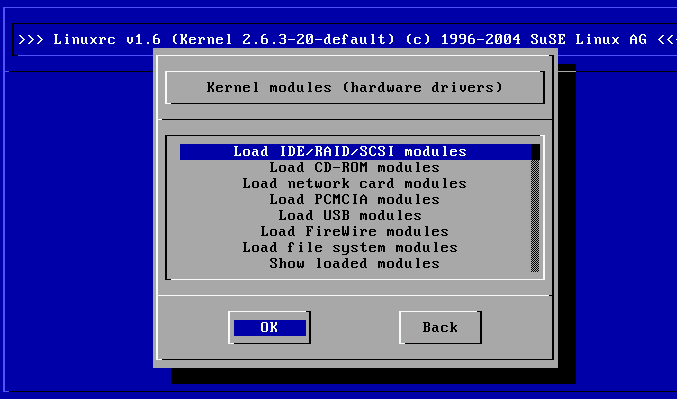
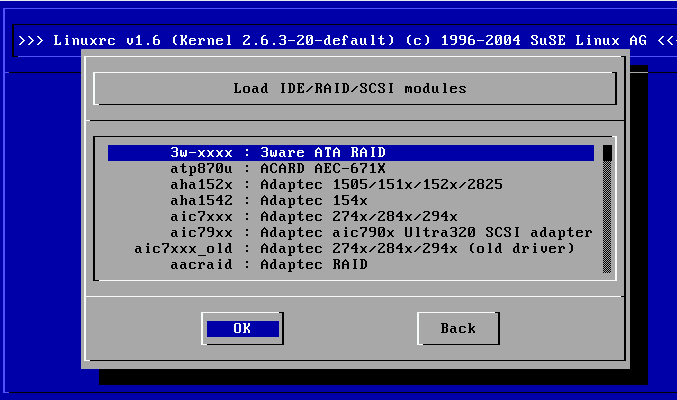
Select the modules (drivers) needed. linuxrc offers the available drivers in a list. The name of the respective module is displayed to the left and a brief description of the hardware supported by the driver is displayed to the right. For some components, there several drivers or new alpha drivers are offered.
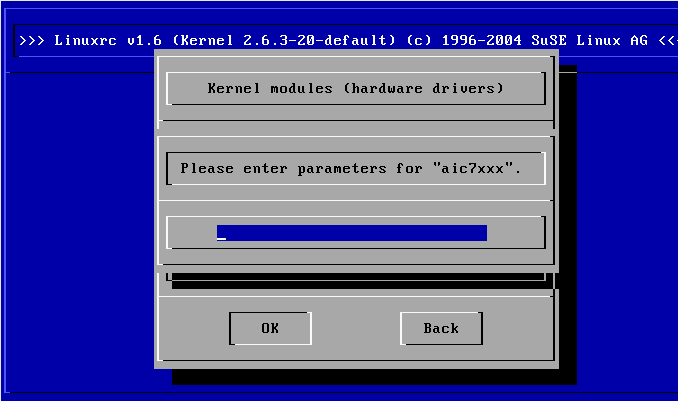
Locate a suitable driver for your hardware and press Enter. This opens a dialog box in which to enter additional parameters for this module. Multiple parameters for one module must be separated by blank spaces.
In many cases, it is not necessary to specify the hardware in detail, as most drivers find their components automatically. Only network cards and older CD-ROM drives with proprietary controller cards may require parameters. If unsure, try pressing Enter.
For some modules, the detection and initialization of the hardware can take some time. Switch to virtual console 4 (Alt + F4) to watch the kernel messages while loading. SCSI drivers especially take some time, as they wait until all attached devices respond.
If the module is loaded successfully, linuxrc displays the kernel messages, allowing you to verify that everything worked smoothly. In the event of a problem, the messages may indicate the reason.
Once you have set up hardware support via modules, proceed to . From this menu, a number of procedures can be started: (an update is also started from this item), (the root partition must be known), , and .
is only available if you booted a LiveEval CD. Download ISO images from the FTP server (live-eval-<VERSION>) at ftp://ftp.suse.com/pub/suse/i386/
![[Tip]](admon/tip.png) | Tip |
|---|---|
is very useful for testing the compatibility of a computer or laptop without installing the system on the hard disk. | |
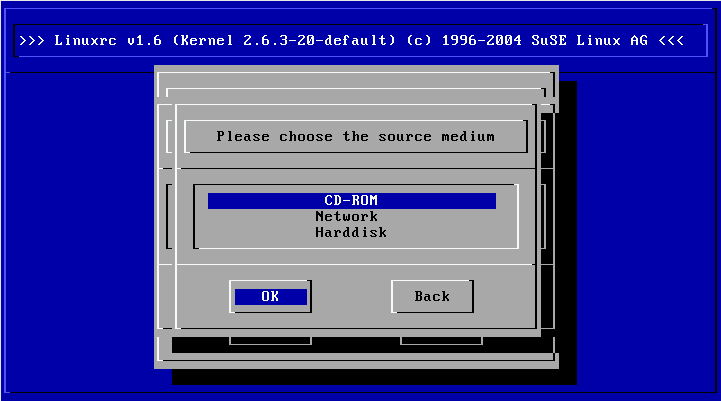
For the installation or the rescue system, choose the desired source media. Refer to Figure 12.5. “Selection of Source Media in linuxrc”.
If linuxrc does not run in the manual mode, it looks for an info file on a floppy disk or in the initrd in /info. Subsequently, linuxrc loads the parameters at the kernel prompt. The default values can be edited in the file /linuxrc.config. However, the recommended way is to implement changes in the info file.
An info file consists of keywords and values in the format key: value. These pairs of keys and values can also be entered in this form at the kernel prompt. A list of possible keys is available in the file /usr/share/doc/packages/linuxrc/linuxrc.html. The following list shows some of the most important keys with example values:
Install: URL (nfs, ftp, hd, etc.)
HostIP: 10.10.0.2
Proxy: 10.10.0.1
Netdevice: eth0
Textmode: 0|1
AutoYast: ftp://autoyastfile
VNC: 0|1
VNCPassword: password
UseSSH: 0|1
SSHPassword: password
ForceInsmod: 0|1 (use the option -f when running insmod)
Insmod: module parameters
AddSwap: 0|3|dev/hda5
If the value is 0, swap is not requested. If the value is positive, the partition with this number is activated. Alternatively, specify the name of the partition.