| SUSE LINUX – Administration Guide Chapter 12. Special Features of SUSE LINUX / 12.5. The SUSE Rescue System | ||||
|---|---|---|---|---|
 | 12.4. linuxrc | 12.6. Virtual Consoles |  | |
| SUSE LINUX – Administration Guide Chapter 12. Special Features of SUSE LINUX / 12.5. The SUSE Rescue System | ||||
|---|---|---|---|---|
| 12.4. linuxrc | 12.6. Virtual Consoles | | |
SUSE LINUX contains a rescue system for accessing your Linux partitions from the outside in the event of an emergency. The rescue system can be loaded from CD, the network, or the SUSE FTP server. Furthermore, there is a bootable SUSE LINUX CD (the LiveEval CD) that can be used as a rescue system. The rescue system includes several help programs with which you can remedy large problems with inaccessible hard disks, misconfigured configuration files, or other similar problems.
Another component of the rescue system is Parted, which is used for resizing partitions. This program can be launched from within the rescue system, if you do not want to use the resizer integrated in YaST. Information about Parted can be found at http://www.gnu.org/software/parted/.
The rescue system is launched from CD (or DVD). The CD-ROM or DVD drive must be bootable. If necessary, change the boot sequence in the BIOS setup.
Proceed as follows to start the rescue system:
Insert the first SUSE LINUX CD or DVD in the respective drive and turn on your system.
Allow the system to boot or select to enter special boot parameters under .
In linuxrc, select the correct language and keyboard layout.
Load the kernel modules required for your system. Load all modules you need for the rescue system. Due to limited space, the rescue system itself contains only very few modules.
Select in the main menu.
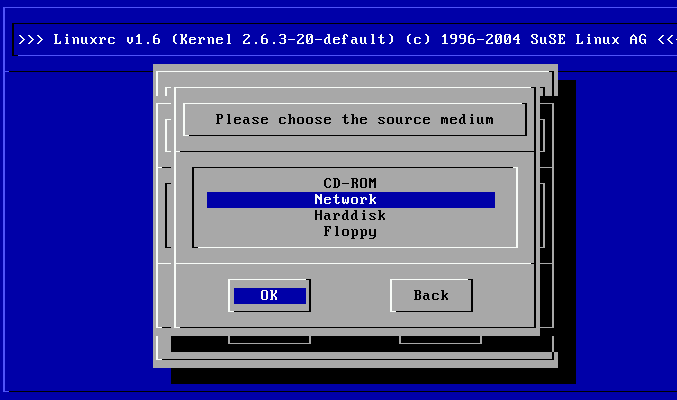
Select (see Figure 1.3. “linuxrc Installation Menu”) and specify the desired source medium (Figure 12.6. “Source Medium for the Rescue System”).
Uses the rescue system on the CD-ROM.
Starts the rescue system over a network connection. The kernel module for the network card must be loaded first (see Section 1.3.2. “Installation from a Network Source”). A submenu offers protocols such as NFS, FTP, and SMB (see Figure 12.7. “Network Protocols”).
If you previously copied a rescue system to a hard disk to which you have access, its location can be specified here. Subsequently, this rescue system will be loaded.
Regardless of the medium chosen, the rescue system will be decompressed, loaded onto a RAM floppy disk as a new root file system, mounted, and started. Now it is ready for use.
Under Alt + F1 to Alt + F3, the rescue system provides at least three virtual consoles. You can log in as root without a password. Press Alt + F10 to enter the system console displaying the kernel and syslog messages.
A shell and many other useful utilities, such as the mount program, can be found in the /bin directory. The sbin directory contains important file and network utilities for reviewing and repairing the file system (e.g., e2fsck). This directory also contains the most important binaries for system maintenance, such as fdisk, mkfs, mkswap, mount, mount, init, and shutdown, as well as ifconfig, route, and netstat for maintaining the network. The directory /usr/bin contains the vi editor, grep, find, less, and telnet.
To mount your SUSE LINUX system using the rescue system, use the mount point /mnt. You can also use or create another directory. The following example demonstrates the procedure for a system with the /etc/fstab details shown in File 12.4. “Example /etc/fstab”.
Example 12.4. Example /etc/fstab
/dev/sdb5    swap   swap    defaults   0   0
/dev/sdb3    /      ext2    defaults   1   1
/dev/sdb6    /usr   ext2    defaults   1   2
![[Warning]](admon/warning.png) | Warning |
|---|---|
Pay attention to the order of steps outlined in the following section for mounting the various devices. | |
To access your entire system, mount it step by step in the /mnt directory using the following commands:
mount /dev/sdb3 /mnt
mount /dev/sdb6 /mnt/usr
Now, you can access your entire system and, for example, correct mistakes in configuration files, such as /etc/fstab, /etc/passwd, and /etc/inittab. The configuration files are now located in the /mnt/etc directory instead of in /etc.
Before you recover lost partitions with the fdisk program by simply setting them up again, you should first make a printout of /etc/fstab and the output of fdisk -l.
Damaged file systems are tricky problems for the rescue system. Generally, file systems cannot be repaired on a running system. If you encounter serious problems, you may not even be able to mount your root file system and the system boot may end with kernel panic. In this case, the only way is to repair the system from the outside using a rescue system.
The SUSE LINUX rescue system contains the utilities e2fsck and dumpe2fs (for diagnosis). These should remedy most problems. In an emergency, man pages often are not available. For this reason, they are included in this manual in Appendix C. Manual Page of e2fsck.
If mounting a file system fails due to an invalid superblock, the e2fsck program would probably fail, too. If this were the case, your superblock may be corrupted, too. There are copies of the superblock located every 8192 blocks (8193, 16385, etc.). If your superblock is corrupted, try one of the copies instead. This is accomplished by entering the command e2fsck -f -b 8193 /dev/damaged_partition. The -f option forces the file system check and overrides e2fsck's error so that, since the superblock copy is intact, everything is fine.