3.12 Meeting Window Menus
The following Meeting Window menus are available:
Figure 3-8 Meeting Window Menus

3.12.1 Meeting Menu
The Meeting menu in the Meeting Window offers options that affect or provide information about the whole meeting. Some menu items are only available to moderators. These options show up as dimmed under the Meeting menu if you are not a moderator or administrator.
Figure 3-9 Meeting Menu

-
Change Options (Moderators only): Select this option to edit the and options. SeeEditing the Meeting Options for details.
-
Show Details: Select this option to view the Meeting Information window.
-
Lock (Moderators only): Select this option to lock the meeting so that no new participants can join (a check mark appears to the left of the menu item to indicate that the meeting is locked). Select the menu item again to unlock the meeting (the check mark disappears).
-
Lecture Mode (Moderators only): Select this option to mute all non-moderator (and host) participants and disable phone exit and entry announcements and tones (a check mark appears to the left of the menu item to indicate that it is active). Select the menu item again to deactivate this option (the check mark disappears).
In lecture mode, a moderator can un-mute any meeting participant. Large meetings can be conducted by turning lecture mode on, and setting the meeting options so that chat is limited to moderators only and participants are only displayed to the moderators. See Editing the Meeting Options for details.
-
No Join/Exit Tones (Moderators only): Select this option to disable phone exit and entry announcements and tones (a check mark appears to the left of the menu item to indicate that it is active). Select the menu item again to deactivate this option (the check mark disappears).
-
Roll Call (Moderators only): Select this option to play a list of the recorded names for all the participants via the phone. Each name is recorded when a participant joins a meeting if the option in your is set.
-
Hand Up: Select this option to raise your hand in the meeting and let the moderator know that you have a question or comment. This option is very important in large meetings where participants might be muted and you can only speak when the moderator un-mutes you.
-
Record Meeting (Moderators only): Select this option to take an audio recording of the conversation in the Main Meeting Group of the Meeting Window (a check mark appears to the left of the menu item to indicate that it is recording). Select the menu item again to stop recording (the check mark disappears).
The feature does not record any conversation inside of sub-meetings with one exception: if the meeting was started with a 1-to-1 call so there is only , this sub-meeting is recorded until the moderator who initiated the recording is moved from the sub-meeting into the main meeting, at which time the main meeting is recorded. If a recording for a given meeting is stopped and started multiple times, each subsequent recording is appended to the previous recording.
-
Preview Recording (Moderators only): Select this option to have a link to the recording e-mailed to you.
-
Reset Recording (Moderators only): Select this option to erase any previous recordings for this meeting.
-
Exit Meeting: Select this option to leave the meeting.
If you are a moderator and there are participants left in the meeting, the dialog appears:
-
Select the option to end the meeting for all participants immediately.
-
Select the option to allow the meeting to continue (if there are no moderators left in the meeting, select the sub-option to allow the meeting to continue).
-
3.12.2 My Phone Menu
The menu items control your phone options.
Figure 3-10 My Phone Menu

My Phone Menu Items:
-
Call Me: Select this menu item to have the meeting server call your phone. Select the number you want the server to call from the drop-down list that appears, or select to type in the number you want the server to call.
-
Mute: Select this menu item to mute your phone.
-
Volume: Select this menu item to change the volume on your phone.
-
Hangup: Select this menu item to hang up your phone connection.
-
PC Phone: Select this item to connect via a PC Phone.
3.12.3 Participants Menu (Moderators only)
The menu items are only available to moderators.
Figure 3-11 Participants Menu

Moderators can use the following Participants menu items:
-
Invite New: Select this menu item to invite a new participant to the meeting. The Meeting Setup Window opens.
-
Invite Selected: Select one or more participants who have not yet joined the meeting, and then select this menu item to invite them to the meeting. The Meeting Setup Window opens.
NOTE:To invite everyone who has not yet joined the meeting, select the group, and then use the menu item.
-
Make Presenter: Select a participant, and then select this menu item to make the participant a presenter. appears next to the participant’s name. There can only be one presenter at a time.
-
Grant Moderator Privilege: Select one or more participants, and then select this menu item to grant them moderator privileges for the current session of this meeting. appears next to the participant’s name. See Meeting Roles for details on the moderator role.
-
Revoke Moderator Privilege: Select one or more participants who have moderator privileges, and then select this menu item to revoke their moderator privileges.
-
Grant Remote Control: Select one or more participants, and then select this menu item to grant the participants remote control rights over your share session. [Remote Ctl] appears next to the participants’ names.
NOTE:A participant clicks in the share window to take remote control of the share session. If you click your mouse or press a key on your keyboard, you automatically take back control of the share session.
-
Revoke Remote Control: Select one or more participants who have remote control, then select this menu item to revoke their remote control rights.
-
Remove Selected Participants: Select one or more participants, then select this menu item to remove them from the meeting.
NOTE:Removed participants can rejoin meetings that are not locked or private.
3.12.4 Sub-Meetings Menu (Moderators only)
The menu items are only available to moderators.
Figure 3-12 Sub-Meetings Menu
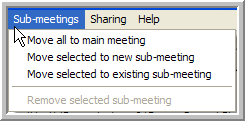
Moderators can use the following menu items:
-
Move All to Main Meeting: Select one or more sub-meetings, and then select this menu item to move all the participants in any selected sub-meetings into the meeting.
NOTE: If you use this menu item on a single participant in a sub-meeting, all the participants in that sub-meeting are moved into the meeting.
-
Move Selected to New Sub-meeting: Select the participants for the new sub-meeting, and then select this menu item to move them into a new sub-meeting.
-
Move Selected to Existing Sub-meeting: Select one or more participants, select this menu item, select a sub-meeting from the window that appears, and then click to move the selected participants to the existing sub-meeting.
-
Remove Selected Sub-meeting: Select a sub-meeting, and then select this menu item. The sub-meeting is removed and all participants in that sub-meeting are moved into the Main meeting.
3.12.5 Sharing Menu (Moderators only)
The menu items are only available to moderators.
Figure 3-13 Sharing Menu

NOTE:The administrator might have assigned a policy that prohibits or limits the sharing of your desktop, applications, or data. Consult with your administrator for more information about policies and the features available to you within a meeting.
Moderators can use the following menu items:
-
Share Desktop: Select this menu item to share your desktop with all the participants in the meeting.
Your desktop appears under the tab in each participant’s Meeting Window.
-
Share Application: To use the Share Application:
-
Select this menu item to share an application with all the participants in the meeting.
-
In the window that appears, select the application you want to share.
-
Click .
The application you are sharing appears under the tab in each participant’s Meeting Window.
-
-
Stop Sharing: Select this menu item to end the share session, or click in the Conferencing Toolbar.
-
Open Whiteboard: Select this menu item to open a Whiteboard session where all the participants can work together on the whiteboard document at the same time.
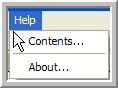
3.12.6 Help Menu
Use the menu to access the Conferencing online help ( menu item) or to get information about the Conferencing version you are using ( menu item).
Figure 3-14 Help Menu