5.1 Reviewing the Workflow Features
This section demonstrates and defines the various workflow features.
To open the workflow designer:
-
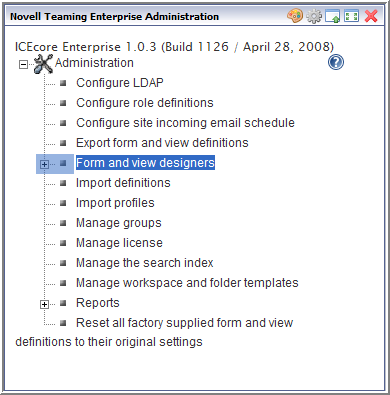
From the portlet on the initial Liferay portal window, click the plus sign (+) to the left of to expand this section and view the available designers.
To add the portlet to the Liferay portal window, see Adding the Teaming Administration Portlet to Your Home Page.
-
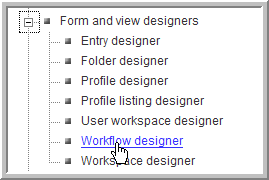
Click .
-
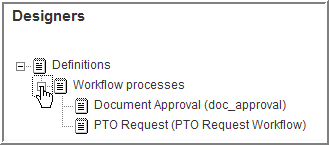
Expand .
-
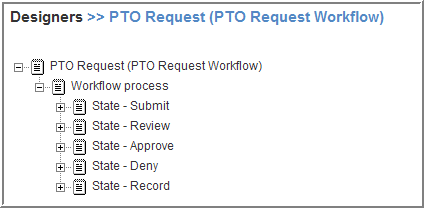
Click .
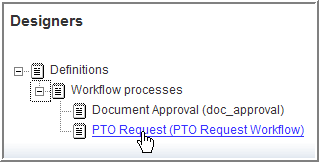
This workflow process is created in Creating a Workflow.
-
Now that you are viewing the workflow, continue this procedure to walk through all the available features and options in a workflow.
-
Click to view your options (they appear in a dialog box to the right of the designer tree):
-
Add: Allows you to add a new state (see Adding States to a Workflow) or a parallel workflow thread if you have Advanced Workflow.
States are created at the level. If you create states specifically for use in your parallel workflow threads, use the Move feature to move these states into your parallel workflow threads.
-
Modify: Allows you to set the initial and end states for your workflow.
-
Move: Allows you to move a parallel workflow thread. You can not move the workflow process.
-
-
Click a state to view your options:
-
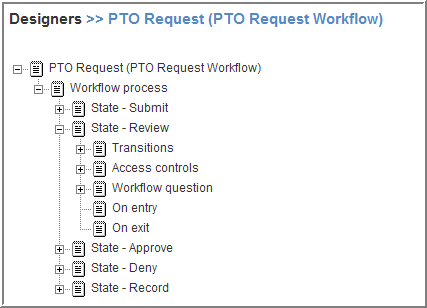
Add: Allows you to add features to this :
-
Access controls: Allows you to set the user access controls for this state.
-
On entry: Allows you to add On Entry options for this state.
-
On exit: Allows you to add On Exit options for this state.
-
Workflow question: Allows you to add questions for this state. See Adding a Question to the Workflow.
-
-
Modify: Allows you to you to modify the . See Adding States to a Workflow.
-
Delete: Allows you to delete the state.
-
Move: Allows you to move the state.
-
-
Expand the state:
-
Click , then click to review the types of transitions you can add to your workflow:
-
Manual transition: Creates a workflow drop-down list in the entry. It is used to manually transition the entry to a new state.
NOTE: This is the only transition type in basic workflow.
-
Transition after time elapsed: Allows you to automatically transition an entry to a new state after a designated time period.
-
Transition on a variable: Allows you to transition an entry to a new state based on a variable’s value. You can create and change variable values using the and options.
-
Transition on comment: Allows you to transition an entry to a new state when a comment is added to the entry (this is useful for review purposes).
-
Transition on entry data values: Allows you to transition an entry to a new state based on the value that a user specifies for a custom element in the entry.
For example:
-
If you wanted to assign an entry to a specific state based on a value the user selects, you define a custom element with multiple values from which a user selects (from a drop-down list on the form). Map each of these values to specific states in the initial workflow state by using the option. This option is useful for assigning help tickets in a help desk, assigning entries to the appropriate review contact, etc.
-
If you wanted to transition an entry at a specific time, you could transition the entry based on a custom date element.
-
-
Transition on modify: Allows you to transition an entry to a new state when it is modified (this is useful for review purposes).
-
Transition on response: Allows you to transition an entry to a new state based on a response to a question in the entry. Map each possible answer to a workflow question to one of these transitions using the of for each . See Adding Transitions on Response.
-
Wait for parallel thread(s) to end: Allows you to transition an entry to a new state when one or more specified parallel workflows end.
-
-
Click , then click to review the types of access controls you can add to each state (only use these features to limit access):
-
Read access: Grants read access to an entry in this state to the users and groups you specify.
-
Transition into this state: Grants the ability to move an entry into this state to the users and groups you specify. This state appears in the manual transitions drop-down list in an entry only if the user has the appropriate access rights.
-
Transition out of this state: Grants the ability to move an entry out of this state to the users and groups you specify.
-
Modify access: Grants modify access to an entry in this state to the users and groups you specify.
For more information, see Setting Access Controls.
-
-
Click to add a response to a workflow question. See Adding a Question to the Workflow.
-
Click or , then click to review the types of on entry and exit features you can add to each state:
-
Move entry: Allows you to move an entry to a new location in Novell Teaming when it transitions into or out of a specific state.
-
Notifications: Allows you to notify specific users or groups about a specific entry when it enters or exits a specific state.
-
Start a parallel workflow thread: Allows you to start a parallel workflow when an entry enters or exits a specific state.
-
Stop a workflow thread: Allows you to stop a parallel workflow when an entry enters or exits a specific state.
-
Workflow variable: Allows you to create or change the value of a variable when an entry enters or exits a specific state. This is used with the option to create automated workflows.
-