3.2 Setting Up Users’ Personal Workspaces
See also Section 2.3.1, Controlling User Access to Personal Workspaces.
3.2.1 Understanding Personal Workspaces
When you create your Novell Teaming site, a workspace named Personal Workspaces is automatically created.
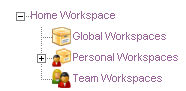
Initially, when you expand it, Personal Workspaces includes only two personal workspaces, even after you have created Teaming users, as described in Adding Users to Your Teaming Site
in Basic Installation
in the Novell Teaming 2.0 Installation Guide.

Users’ workspaces appear in the Workspace tree after the users log in for the first time. However, you can still see what users have been added to the Teaming site by clicking .

You can manually add Teaming users from this user list, as described in Section 13.2, Listing Teaming Users.
You can also create new Teaming users by using the method described in Creating a User
in Basic Installation
in the Novell Teaming 2.0 Installation Guide.
As the Teaming administrator, you can access any user’s personal workspace by clicking on it in the user list. Before the user has logged in, the user’s personal workspace includes only very basic information.

After the user has logged in, more information displays in the personal workspace; it is ready for the user to personalize.

For information on how users can customize and populate their personal workspaces, see Setting Up Your Personal Workspace
in the Novell Teaming 2.0 User Guide.
3.2.2 Customizing the Default Personal Workspace View
As a Novell Teaming administrator, you have the ability to customize the default view for all personal workspaces in your Teaming site.
Customizing the Default View for Existing and Future Personal Workspaces
-
In the Workspace or Folder toolbar, click > , then click .

-
Expand , then click .

-
Add the form and view elements that you want your existing and future personal workspaces to contain by default.
For information on the kinds of elements that you can add and how to add them, see
Designing a Custom Folder Entry Form
in the Novell Teaming 2.0 Advanced User Guide.
Customizing the Default View for Future Personal Workspaces
The procedure in this section affects only future personal workspaces (workspaces that have not yet been created). For information on how to change the default view for existing workspaces as well as future workspaces, see Customizing the Default View for Existing and Future Personal Workspaces.
-
In the Workspace or Folder toolbar, click > , then click .
-
Click .
-
For information on the types of modifications that you can make to the User Workspace template, see Section 15.1, Modifying Workspace and Folder Templates.
3.2.3 Customizing the Default View of the Profile Tab
You can customize the default user profile view. This is the view that appears in the tab of a user’s personal workspace. This view determines what information is displayed in all user profiles.
Figure 3-1 User Profile Tab

To modify what information is displayed in the tab:
-
In the Workspace or Folder toolbar, click > , then click .
-
Expand , then click .
The User Designer page is displayed.

-
Depending on how extensively you want to customize the information in the tab, continue with either of the following sections:
Adding Elements to the Profile Tab
If you are mostly satisfied with the layout and elements that are included in the tab, and simply want to add additional elements to the current view (elements that you add must appear after the default elements), then you can add elements to the profile view in the same way that you add elements to any other view.
For information on how to add form and view elements, see Designing the Workspace View
in the Novell Teaming 2.0 Advanced User Guide.
If you want to change the order of the elements, delete elements, or change the layout of the profile view, follow the instructions in Adding, Deleting, and Modifying Elements in the Profile Tab.
Adding, Deleting, and Modifying Elements in the Profile Tab
If you want to modify the profile view in any of the following ways, then you must follow the instructions in this section:
-
Delete elements
-
Modify elements
-
Modify the layout of elements
To modify the profile view:
-
Expand , then click .
-
In the window on the right side of the page, click .

-
In the section, select , then click .
-
Modify the elements and layout option of the profile view to suit your needs.
For information on how to add form and view elements, see
Designing the Workspace View
in the Novell Teaming 2.0 Advanced User Guide.
3.2.4 Adding LDAP Elements to the Profiles Tab
If there is information in your LDAP source that does not have a corresponding element in Teaming, and you want that information to be displayed in the Teaming tab, then you can create an element in the profile view as described in Section 3.2.3, Customizing the Default View of the Profile Tab. After you have created the element, you can synchronize that element with the corresponding information from LDAP, as described in Section 13.1.2, Synchronizing Additional LDAP Attributes.