3.2 Building a Virtual Machine
VM Builder is used to define the components required in a VM. When these components are defined, a request is sent to the Orchestrator Server which in turn sends the request to a VM host machine that is part of the VM Builder group.
When a VM Builder installation request is made, it is sent to the Orchestrator Server, which sends the request to a build machine. If a machine that meets the build requirements of the VM is found, then the Orchestrator Server launches the build job on that machine. You should not build a machine that exceeds the capability of the build machines in your VM Builder group.
For more information on the Orchestrator Server and its installed components, see Software Architecture
in the Novell ZENworks Orchestrator 1.3 Installation and Getting Started Guide.
Do the following tasks in order:
3.2.1 Launching the Virtual Machine Builder
One of the functions provided by the ZENworks VM Management Console is the Virtual Machine Builder (VM Builder) Wizard. To launch the VM Builder Wizard:
-
In the ZENworks VM Management Console, do one of the following actions to open the VM Builder Wizard:
-
Click the button (
 ) on the toolbar.
-
Click > .
-
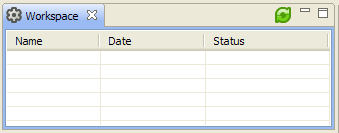
Right-click in the Workspace panel and select :
-
Double-click a blank space in the Workspace panel.
-
-
Continue with Section 3.2.2, Defining the Virtual Machine.
3.2.2 Defining the Virtual Machine
The VM Builder Wizard has four pages. As you progress through the pages, you can refer to this documentation or you can use the dynamic help displayed in the white bar at the top of the Wizard.
To define a VM:
-
In the VM Build Wizard, fill in the necessary information on the wizard pages to define your VM.
Review the following sections for information on the wizard pages:
Click to make changes on any wizard page.
-
When you have completed defining the VM in the VM Builder Wizard, do one of the following to exit the wizard:
-
Click on any wizard page, which saves your changes.
The defined VM is listed in the Workspace panel as , which means it is not yet installed. To install the VM at a later time, review Section 3.2.3, Installing a Defined Virtual Machine.
-
To install immediately, click on any wizard page, then continue with Section 3.2.3, Installing a Defined Virtual Machine.
-
Description
The following figure shows the VM Builder Wizard window when you first launch VM Builder:
Figure 3-2 VM Builder Wizard
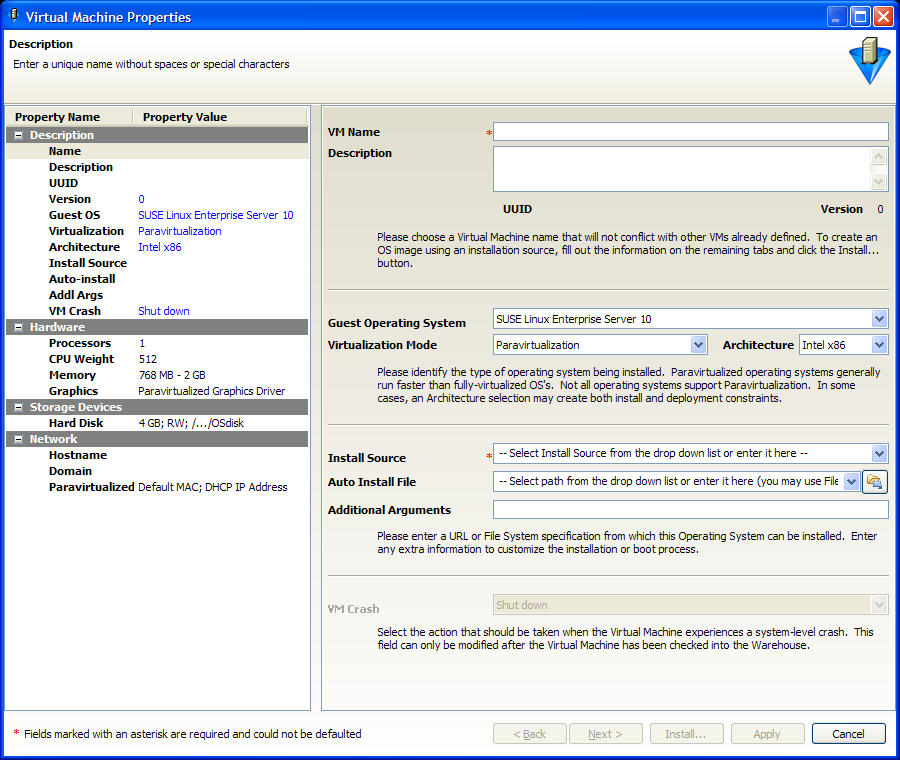
The Description page is used to define the VM’s descriptive parameters and operating system:
-
VM Name: (Required) Give the VM a unique name. This name applies to all versions of the VM.
-
Description: Note the purpose and any other specifics you might require of the VM. These notes apply to all versions of this VM.
-
Guest Operating System: The operating system you want to install on your VM.
-
Virtualization Mode: means that all the hardware components are emulated by the hypervisor. means that the operating system directly accesses elements of the hardware, including processor, display, memory, network interface card, and hard drive, and uses the hypervisor to emulate other hardware interactions. Paravirtualization performs much faster and with better hardware efficiency than full virtualization.
NOTE:Please refer to the SLES and RHEL documentation to verify supported platforms in each virtualization mode.
-
Architecture: The type of processor you want to have as the virtual processor for the VM.
-
Install Source: (Required) The path to the installation media for your guest operating system. For a fully virtualized VM, the install source must be an ISO. For a paravirtualized VM, an ISO or network install source is required. For more information, see Section B.0, VM Management Installation Sources.
-
Auto Install File: This field applies only to paravirtual installations. The file listed here is used to populate the answers needed during the installation of the guest operating system (some examples include time zone, language, firewall, and other settings given in response to the user interactive areas of the installation). An AutoYaST file listed here can contain network settings that are applied during the VM Builder job. For RHEL the file would be a kickstart file.
-
Additional Arguments: This field applies only to paravirtual installations. These are Linux install arguments, which are operating system parameters similar to the information entered in a GRUB boot loader when running on bare hardware in SLES and SLED. Additional network installation information can be added here, which will be used during the build process to find the installation source for the VM Build process.
Hardware
The hardware section defines the kind of actual hardware to be virtualized for the VM. The following graphic displays the Hardware page.
Figure 3-3 VM Builder Hardware Properties
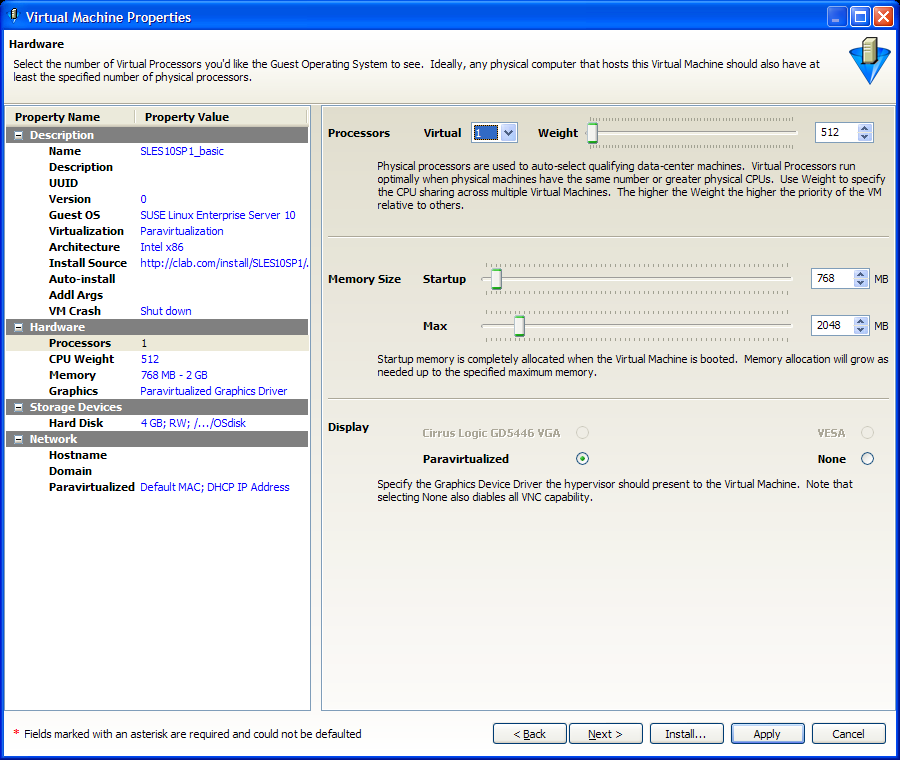
These hardware constraints are:
-
Virtual Processors: The number of virtual processors the VM has.
-
Processor Weight: The priority of the selected virtual processor over other virtual processors on the same VM host.
-
Memory Size: The amount of virtual RAM the VM has, or paravirtualized memory that can be used by the VM if it is paravirtualized.
-
Display: The properties of the VM’s display. If you have chosen paravirtualization for this VM, your only option is . If you have chosen full virtualization, you can select between or the on-board VGA. If you do not need a display, you can turn off the display on a fully virtualized machine.
Storage Devices
The storage devices are the hard drives and CD or DVD drives you want to include in the VM profile. The first device must always be a hard disk that cannot be removed unless another hard disk has been put into the first slot. This is the only disk (Disk 0) that is stored and version controlled. All other disks added are virtual and are created upon the launch of the VM. You can add any other storage devices you want to the VM and move them according to priority in the list. The following figure shows the Storage Devices page.
Figure 3-4 VM Builder Storage Device Definition
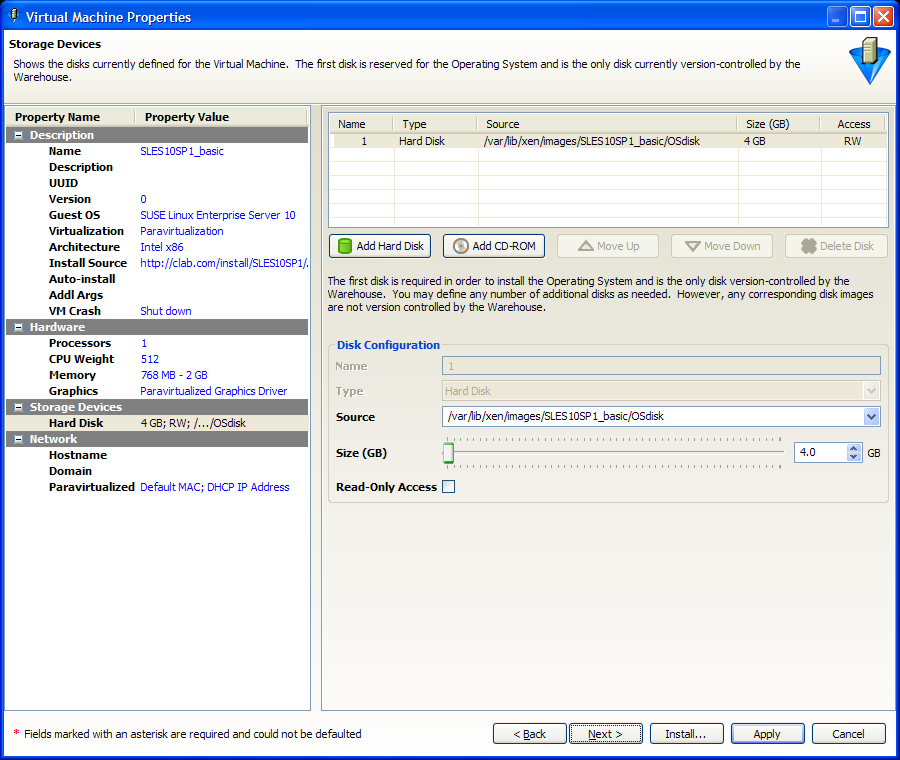
The elements of the Storage Device Definition page are:
-
Add, Move, and Delete Control Buttons: These buttons control disk order beyond the initial required hard disk in the VM. The first disk must be a hard disk and is the only one that is actually stored in the VM image.
-
Name: The name is the number in the order the drive appears in its VM image listing.
-
Type: Select either or . Selecting allows you to add a CD-ROM or DVD ROM to your VM. Selecting allows you to add an additional hard disk to your VM.
-
Source: The storage location of the hard disk of the VM.
-
Size (GB): The VM size, ranging from 0.25 GB (250 MB) to 4 TB. This is the maximum allowable size of the VM.
-
Sparse Image File: Select this option to make the file sparse. This makes the whole image file capable of taking up its maximum size, but the actual size is only the size of the guest operating system and any installed files.
-
Read Only Access: Select this option to give the drive Read-Only access.
Network
The Network page contains network settings that are stored as VM Personality Data when VM is checked into the warehouse. When the VM is provisioned through ZENworks Orchestrator, these Network settings are used. If this data does not exist, the provisioned VM uses the existing VM for network settings. The network devices are added, deleted, and defined on the Network page, where you add specific information about your network connections or intended network connections for your VM. The following graphic represents the Network Devices page.
Figure 3-5 VM Builder Network Interface Definition
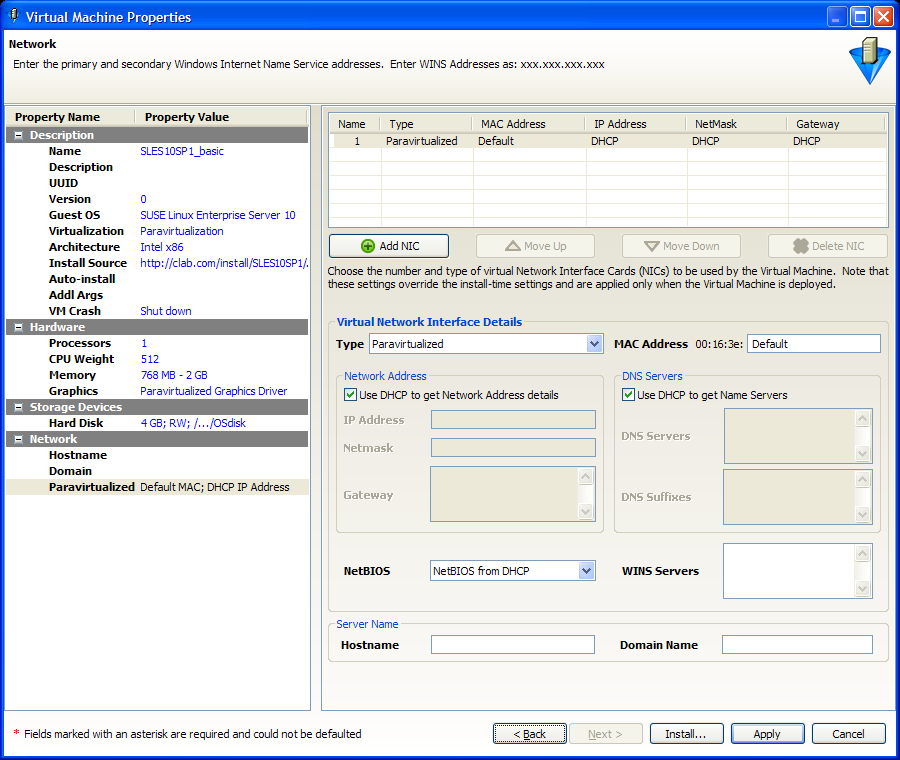
The Network Device definition sections are:
-
Add, Move, and Delete Control Buttons: These buttons control the list order and number of virtual NICs in your VM.
-
Type of Virtual Network: Indicates whether the VM has direct access to the NIC. If the NIC should only interface with the hypervisor, you can select the specific type of full virtualization. You should have a paravirtualized NIC with a paravirtualized VM.
-
MAC Address: Unless you have a specific MAC address you want to assign to this VM, leave this set to , and Xen assigns it a MAC address when you launch the VM.
-
Network Address: The default selection allows DHCP to get a network address for your VM when it starts. You can designate a static IP address in the field, a network mask in the field, and the gateway in the field by deselecting the DHCP check box.
-
DNS Servers: The default selection allows DHCP to get name servers for your VM when it starts. You can deselect the DHCP check box, then designate DNS servers in the field and DNS suffixes in the field.
-
NetBIOS: The default setting gets NetBIOS information from the DHCP, or you can use this drop-down menu to completely enable or disable NetBIOS.
-
WINS Servers: Designate any WINS servers your VM needs.
-
Server Hostname: The default is the name you gave to the VM. You can change this to anything you want the hostname to be.
-
Server Domain Name: Designate the domain to which the VM will belong.
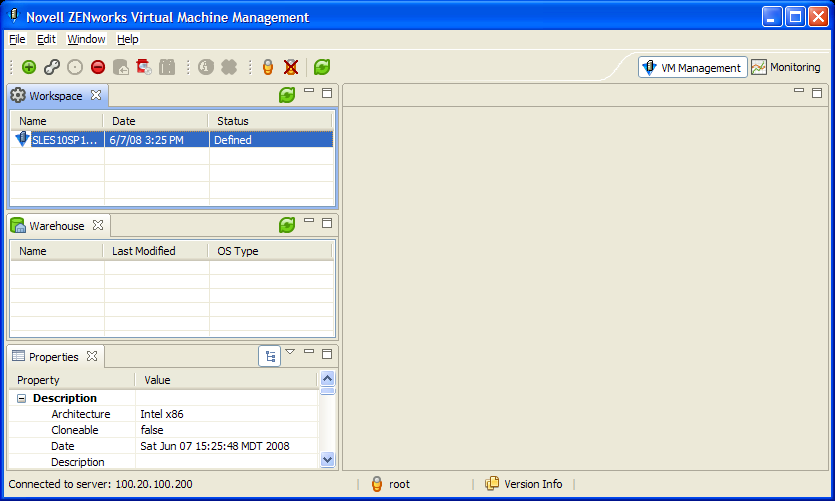
3.2.3 Installing a Defined Virtual Machine
The Xen hypervisor is used to build all VMs built with the VM Builder. The following illustrates a defined VM:
The VM installation can also be automated using a response file. For more information, see Automating the Installation Responses.
To manually install a defined VM:
-
In the ZENworks VM Management Console, do one of the following:
-
Install directly by clicking .
-
Select the VM, then select > .
-
Select the VM, then click the button in the toolbar.
-
Right-click in the Workspace window and select from the menu.
-
Double-click the VM to open the VM Builder Wizard, then click .
-
Select the VM, select > , then click .
-
Select the VM, click the button in the toolbar, then click .
-
Right-click the VM, select , then click .
-
-
To monitor the progress of the VM installation, open the Virtual Network Console (VNC) by clicking the icon (
 ).
).
For information on opening a VNC, see Viewing and Interacting with the Installing Virtual Machine.
For information on monitoring the installation progress in the VNC, see Monitoring Installation Progress.
For information on viewing and interacting with the VM as it’s being installed, see Viewing and Interacting with the Installing Virtual Machine.
To cancel a VM installation that is in progress, open the Progress view and click the red square at the end of the moving progress bar.
-
After the VM has been installed, continue with one of the following:
Monitoring Installation Progress
When you click , you see a progress indicator on the lower right side of the ZENworks VM Management Console, and you see areas that indicate activity in the build and what is being built. In the ZENworks VM Management Console, click > > to display the Progress panel.
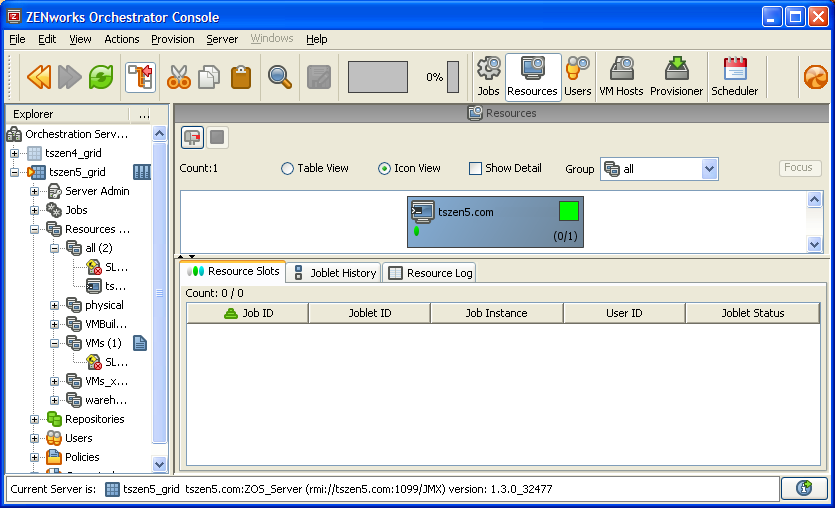
You can also monitor the Orchestrator Server interaction with Xen during the build process. If you look at the Resources view, select the button to see the resource chosen to be used for the VM Builder job as displayed in the following figure.
Figure 3-6 ZENworks Orchestrator Console Resource View in a VM Build Job
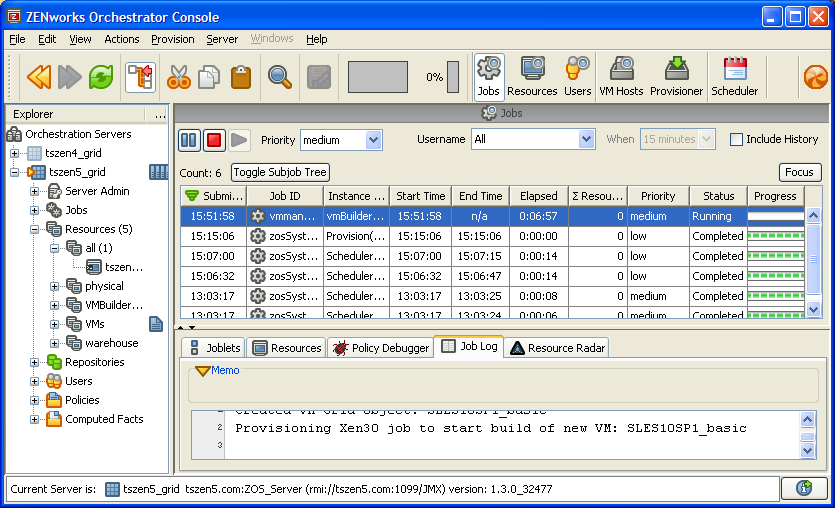
You can also select the Jobs view to see the job, and all of its job-related monitored data as displayed in the following figure.
Figure 3-7 ZENworks Orchestrator Console Job View in a VM Build
Viewing and Interacting with the Installing Virtual Machine
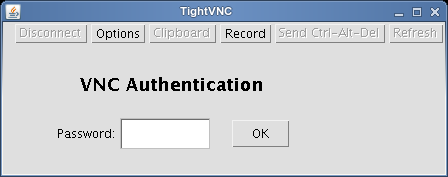
While you are installing, if you have not designated an AutoYaST file to serve as the automated response file for the installation (see Automating the Installation Responses) you are required by the operating system installation to give responses to certain configuration questions. You can use a VNC to display the console just as if you were installing the product on a physical machine.
Respond to all the questions as if you were setting up the guest operating system on a physical machine. You can even create an AutoYaST file as part of the responses, which you can use to automate future VM builds.
Figure 3-8 VNC Authentication Screen
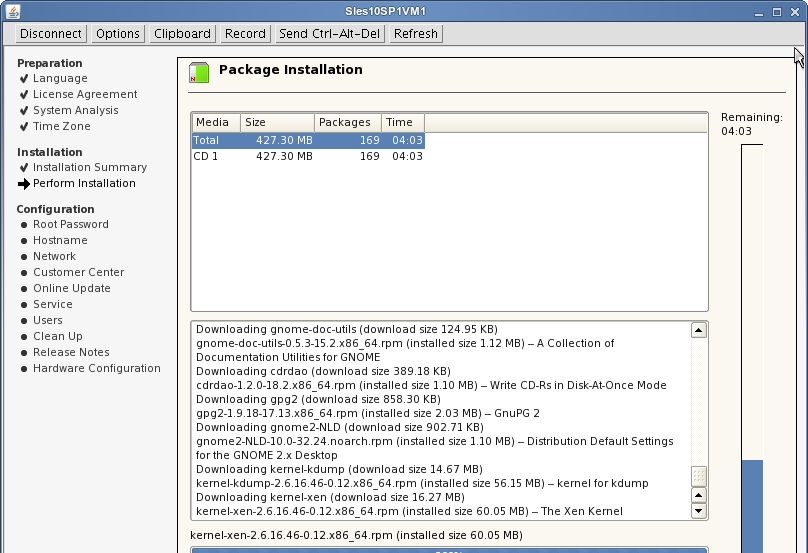
When you have logged in and given all the parameters for the actual guest operating system installation, you see a window similar to the following, displaying the install progress. This is the same as installing on a physical machine.
Figure 3-9 VNC Console During a SLES 10 SP 1 Installation
Automating the Installation Responses
To automate the responses to your VM guest operating system installation, you can use an AutoYaST response file that automatically fills in all information, such as the root password, that you are normally required to provide during an operating system installation.
If you choose to use a response file, all responses are precisely like the previous operating system. The speed by which the operating system is installed is dramatically increased.
The AutoYaST file can be designated on the Definitions page of the VM Builder Wizard. If you choose to use an AutoYaST file, you can browse to it by clicking on the button on the right of the space provided.
3.2.4 Installing the Orchestrator Agent on a Virtual Machine
For a VM to be used by the Orchestrator Server as a resource for high performance computing (HPC), it needs to have the Orchestrator Agent installed. For instructions on installing the Orchestrator Agent on a VM, see Installing the Orchestrator Agent on VMs
in the Novell ZENworks Orchestrator 1.3 Installation and Getting Started Guide.
You can also run a job to install the Orchestrator Agent on a VM. You need to set the constraints in the job to find the type of VM you want, then it automatically installs, similar to the example found at Section D.1, Installing the ZENworks Orchestrator Agent on an Apache Virtual Machine.
Continue with one of the following:
3.2.5 Installing Applications on a Virtual Machine
To install an application on an installed VM:
-
Start the VM on a VM Host outside of your production environment.
The VM can be left running after its installation if it is installed on a VM Host outside of your production environment.
-
Install whatever applications you need on the running VM.
Do this by installing the software just as you would on a physical machine.
-
After you have installed all of the applications that you need, stop the VM.
The applications remain installed the next time you start the VM.
-
Continue with Section 3.2.6, Checking a Virtual Machine into the VM Warehouse.
3.2.6 Checking a Virtual Machine into the VM Warehouse
After you have built or discovered a VM, and installed all the software you need the VM to run, the VM is ready to be checked into the VM Warehouse. This can only be performed on a VM that is shut down or stopped.
Make sure the VM is shut down before checking it into the VM Warehouse. You must have already discovered your VM host machines for the xen30 provisioning adapter.
For instructions on checking an installed VM into the VM Warehouse, see Section 3.3, Storing and Versioning a Virtual Machine.
For information on discovering VM hosts, see Section 2.2.4, Discovering Virtual Machine Hosts.