13.9 Enrolling devices using the ZENworks User Portal
This enrollment is preferable for BYOD devices. The following devices can be enrolled using the ZENworks User Portal:
-
Android Devices
-
iOS Devices
-
Windows Devices (devices with Exchange ActiveSync capabilities).
13.9.2 Procedure: Enrolling an Android Device
This scenario shows you how to enroll an Android device as a fully managed device in your ZENworks Management Zone.
NOTE:We recommend that you enroll the devices in the work profile mode. For more information, see Integrating ZENworks with Android Enterprise.
-
In the Google Chrome browser on the Android device, enter ZENworks_server_address/zenworks-eup, where ZENworks_server_address is the DNS name or IP address of the ZENworks MDM Server.
NOTE:You must use Google Chrome. The built-in Internet browser is not supported.
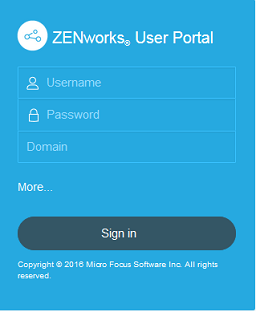
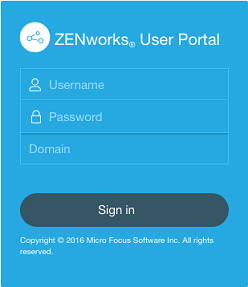
The login screen for the ZENworks User Portal is displayed. You use the user portal to enroll devices to the zone.
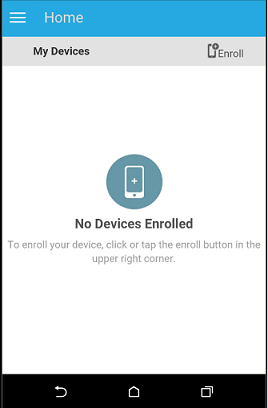
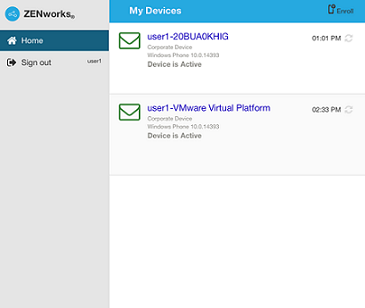
All devices associated with the user, are displayed in the ZENworks User Portal.
-
Enter the user’s user name and password. If option is selected for the user source to which the user belongs, then the registration domain need not be specified or else specify the registration domain. For information, see Section 4.2, Enabling a User Source for Mobile Device Enrollment. Tap .
NOTE:If the option is not enabled or the registration domain name is not configured, then you can specify the configured user source name in the field while enrolling a device.
-
Tap in the upper-right corner to display the enrollment options for the device.
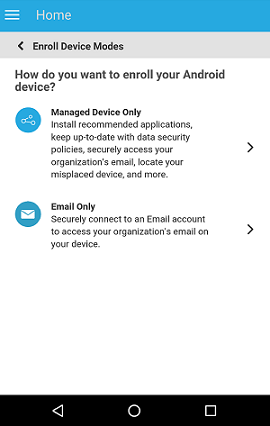
The enrollment options are determined by the Mobile Enrollment policy assigned to the user. For details, see Creating a Mobile Enrollment Policy.
-
Tap .
-
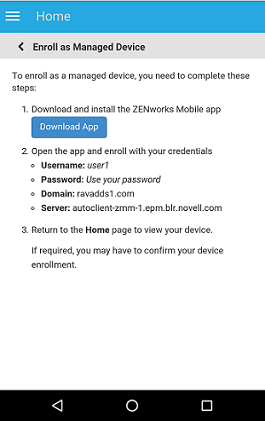
Tap . The user will be directed to the Google Play Store, where the user needs to click to install the ZENworks Agent app. After installation, click .
-
Click to enable you to manage the device by performing the operations listed in this screen.
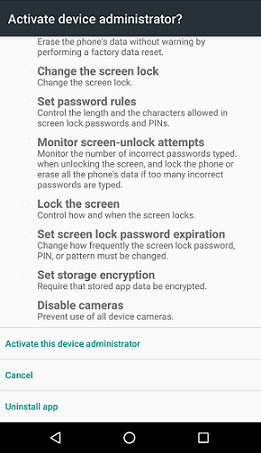
NOTE:For Android Marshmallow and subsequent versions, ensure that the user accepts the READ_WRITE_PHONE permission and WRITE_EXTERNAL_STORAGE permission after downloading and launching the app. Contrary to the statement mentioned in the dialog box, the READ_WRITE_PHONE permission does not make any calls and does not collect phone logs. This permission is required to identify the device’s information such as the serial number and IMEI number. The WRITE_EXTERNAL_STORAGE permission is required to access the device storage to create logs that can be used for troubleshooting.
-
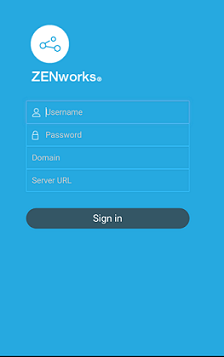
The ZENworks Agent app login screen is displayed.
-
Fill in the fields, then tap .
-
User name, Password, Domain, Server URL: Use the same user name, password, and registration domain (if required) that you had initially used to log in to the ZENworks User Portal along with the server URL of the ZENworks MDM Server. You can obtain this information from the ZENworks User Portal as displayed in Step 4.
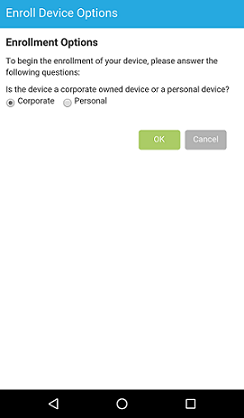
If you configured your Mobile Enrollment policy to allow the user to specify the device ownership (corporate or personal), you are prompted for that information. Tap The device will be automatically enrolled to the zone.
-
-
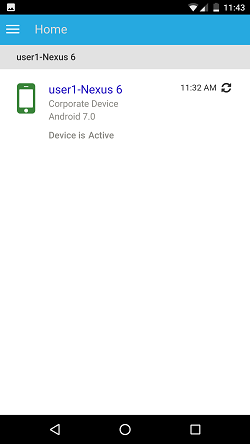
The ZENworks Agent App Home screen is displayed, showing that the device is enrolled and active.
After the device is enrolled to the ZENworks Management Zone, you can view the device information in ZCC. To view the device information, from the left hand side navigation pane in ZCC, click > (or navigate to the folder as configured in the Mobile Enrollment Policy) and select the appropriate device. The enrollment mode will be displayed as
-
After ZENworks Agent app enrollment, based on the assigned Mobile Email Policy, an email is sent to the user with the corporate email account settings. This email can be accessed from the email client’s web application or from any other device. With this information, the user needs to manually configure the email account on the device to send or receive corporate emails. You need to configure an SMTP server, to enable ZENworks to send these email notifications. For more information on configuring an SMTP server, see Event and Messaging Settings in the ZENworks Management Zone Settings Reference guide.
-
After configuring the corporate email account, the device will enroll and automatically reconcile to the device object that was initially created when the ZENworks Agent app enrollment was completed. The enrollment mode changes to on the Device Information page in ZCC. For more information, see Viewing Device Information.
NOTE:After configuring an ActiveSync account, if the device is unable to auto reconcile to the device object that was created after ZENworks Agent app enrollment and if is checked in the assigned Device Enrollment Policy, the user will be prompted to manually reconcile the device. For details, see Allowing Manual Reconciliation by User.
If a Mobile Email Policy is unassigned from the device that is enrolled to the ZENworks Management Zone, then the user receives an email stating that corporate emails cannot be sent or received on the device. You can edit the contents of this email in ZCC by navigating to > > > . Click the relevant email and edit its contents.
13.9.3 Procedure: Enrolling an iOS Device
This scenario shows you how to enroll an iOS device as a fully managed device in your ZENworks Management Zone.
-
In the Safari browser on the iOS device, enter ZENworks_server_address/zenworks-eup, where ZENworks_server_address is the DNS name or IP address of the ZENworks MDM Server.
NOTE:Ensure that the Safari browser is not running in the private mode if the iOS version of the device is less than 11.
iOS devices 10.3 and later versions no longer use SHA-1 signed certificates. You need to move to SHA-256 certificates to ensure that the device enrolls to ZENworks successfully. For more information, see Apple Support.
The login screen for the ZENworks User Portal is displayed. You use the ZENworks User Portal to enroll devices to the zone.
-
Enter the user’s user name and password. If option is selected for the user source to which the user belongs, then the registration domain need not be specified or else specify the registration domain. For information, see Section 4.2, Enabling a User Source for Mobile Device Enrollment. Tap .
NOTE:If the option is not enabled or the registration domain name is not configured, then you can specify the configured user source name in the field while enrolling a device.
All devices associated with the user, are displayed in the ZENworks User Portal.
-
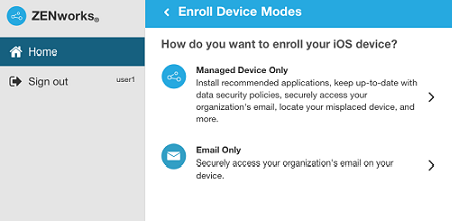
Tap in the upper-right corner to display the enrollment options for the device.
The enrollment options are determined by the user’s Mobile Enrollment policy. For details, see Creating a Mobile Enrollment Policy.
-
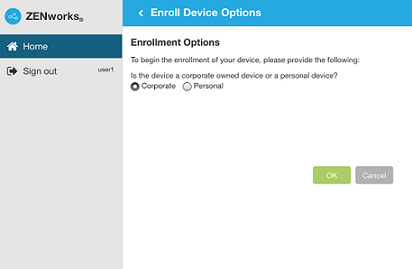
Tap to display the screen. If you have configured your Mobile Device Enrollment policy to allow the user to specify the device ownership (corporate or personal), you are prompted for that information. Select the appropriate device ownership option and click .
-
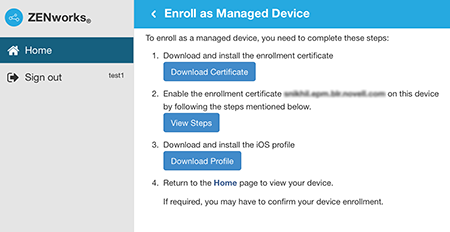
Tap to display the screen.
-
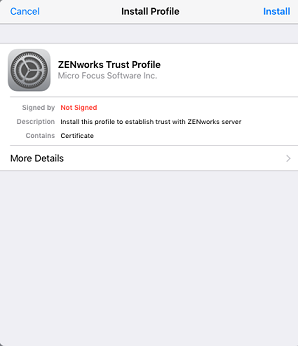
Tap and follow the prompts to install the certificate and return to the Enroll as Managed Device screen.
The ZENworks Trust Profile contains the certificate required for secure communication between the device and the ZENworks Primary Server.
-
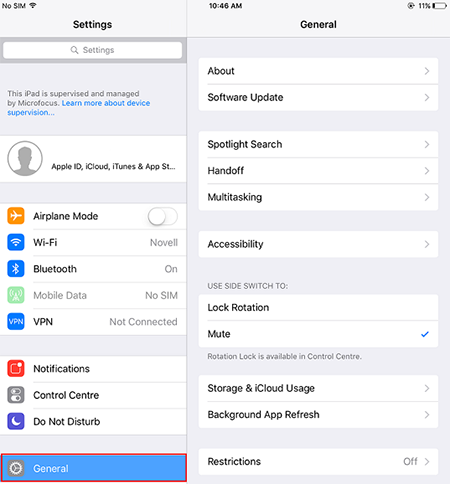
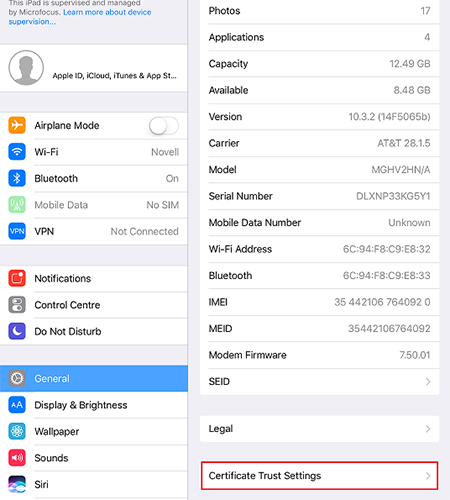
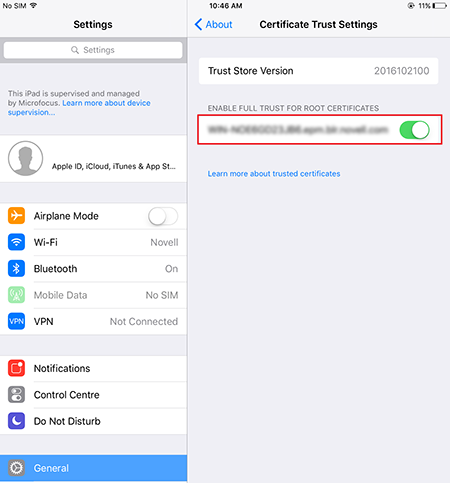
(Conditional) Enable the enrollment certificate on the device. This step will appear on devices running on iOS versions 10.3 or newer. To enable the certificate:
-
Navigate to the menu on the device and click .
-
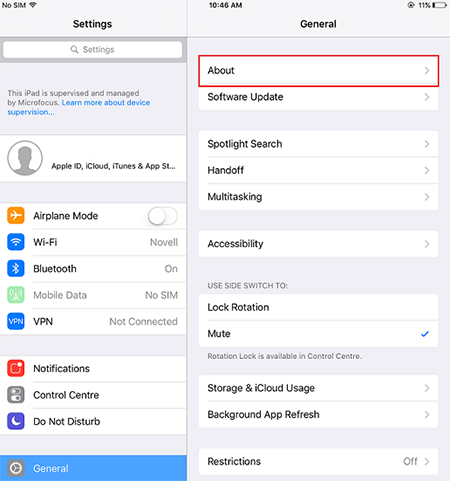
Click .
-
Click .
-
Enable the root certificate displayed on the screen.
-
-
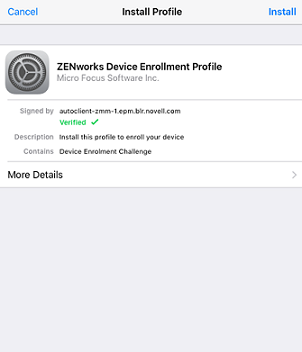
Tap in the Enroll as Managed Device screen, to display the profile install screen. Tap and follow the prompts to install the profile and return to the Enroll as Managed Device screen.
The ZENworks Device Enrollment Profile contains the MDM profile required for ZENworks to manage the device.
-
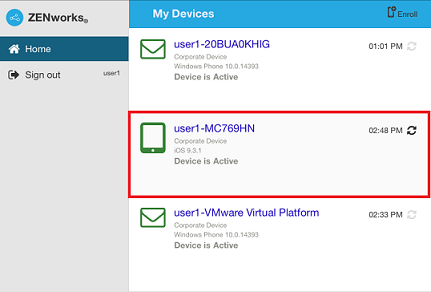
Tap to return to the Home page. The device is displayed in the My Devices list with the status as You need to refresh the browser to update the status to .
NOTE:If the device remains in state for a considerable amount of time, then in the ZENworks User Portal, tap the refresh icon appearing against the device.
At this point in time, you can view the enrollment mode on the Device Information page in ZCC. To view the device information, from the left hand side navigation pane in ZCC, click > (or navigate to the folder as configured in the Mobile Enrollment Policy) and select the appropriate device. The enrollment will be displayed as .
-
An email account is automatically set up on the device based on the Mobile Email Policy assigned to the user or the device.
NOTE:If an Exchange ActiveSync account was manually configured on the iOS device before it was enrolled, then it should be deleted as an email account will be automatically configured on the iOS device if a Mobile Email policy is assigned.
After the device is enrolled to the ZENworks Management Zone, the enrollment mode of the device is displayed as on the Device Information page in ZCC.
13.9.4 Procedure: Enrolling an Email-only Device
This scenario shows you how to enroll a device as an Email Only device in your ZENworks Management Zone. This scenario details the procedure to enroll an iOS device as an Email Only Device.
-
In a browser on the device, enter ZENworks_server_address/zenworks-eup, where ZENworks_server_address is the DNS name or IP address of the ZENworks MDM Server.
The login screen for the ZENworks User Portal is displayed. You use the ZENworks User Portal to enroll the device.
-
Enter the user’s user name and password. If option is selected for the user source to which the user belongs, then the registration domain need not be specified or else specify the registration domain. For information, see Section 4.2, Enabling a User Source for Mobile Device Enrollment. Tap .
NOTE:If the option is not enabled or the registration domain name is not configured, then you can specify the configured user source name in the field while enrolling a device.
All devices associated with the user, are displayed in the ZENworks User Portal.
-
Tap on the upper-right corner, to display the enrollment options for the device.
The enrollment options are determined by the user’s Mobile Enrollment policy. For details, see Creating a Mobile Enrollment Policy.
-
Tap to display the screen. Use the displayed information to create an email account for the user.

-
After the user configures the email account, an email is sent to the user stating that the enrollment process needs to be completed. You can edit the contents of this email in ZCC, by navigating to > > > .Click the relevant email and edit its contents.
To complete the enrollment process, click the link to the ZENworks End User Portal provided in the email or visit the ZENworks End User Portal as described in Step 1.
-
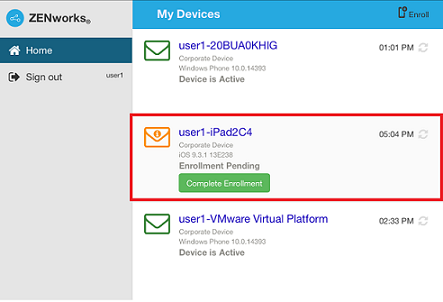
On the ZENworks User Portal, the device is displayed in the My Devices list. At this point, the device has been added to the ZENworks Management Zone but is pending enrollment.
-
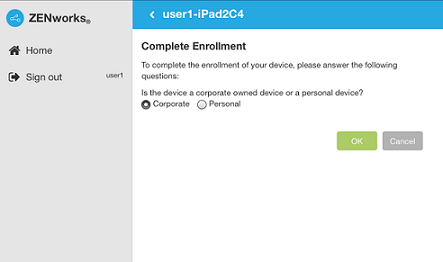
On the device, tap .
If you configured your Mobile Enrollment policy to allow the user to specify the device ownership (corporate or personal), you are prompted for that information. On the device, provide the required enrollment information, then tap .
-
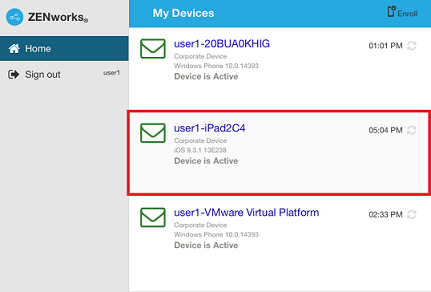
The My Devices list is updated to show that the device is enrolled and active.
-
Verify that the device is receiving emails, by sending an email to the user from another account.
NOTE:If a Mobile Email policy is not assigned to the enrolled Email Only device or is unassigned from the already enrolled Email Only device, then an email is sent to the device stating that the user will be unable to send or receive corporate emails. You can edit the contents of this email in ZENworks Control Center by navigating to > > > . Click the relevant email and edit the contents.
Also, if a Mobile Email policy is not assigned to the device enrolled as an Email Only device, the device can still be managed by the ZENworks Control Center wherein you can apply policies applicable for Email Only devices.
-
After the device is enrolled to the ZENworks Management Zone, the enrollment mode of the device is displayed as on the Device Information page in ZCC. To view the device information, from the left hand side navigation pane in ZCC, click > (or navigate to the folder as configured in the Mobile Enrollment Policy) and select the appropriate device.