6.3 Using the Software Updater, Installer, and Remover from Users’ Managed Devices
The ZENworks Linux Management Software Updater, Software Installer, and Software Remover applets are components of the desktop that work through the ZENworks Agent.
In ZENworks Linux Management, these three easy-to-use desktop applets provide users with the ability to update existing software, install new software, remove existing software from their managed devices, and view and edit system preferences. These three desktop applets replace the user interface clients used in previous versions of ZENworks Linux Management. Software Updater, Installer, and Remover provide users with a simple way to manage software, and the process is integrated into the managed device’s desktop. If a rich user interface is required, you should use the rug command line interface to accomplish these same tasks. For more information, see Section 4.4, rug.
In previous versions of ZENworks Linux Management, these three applets were combined in one user interface. In ZENworks Linux Management 6.x, the client interface was called Red Carpet. In ZENworks 7 Linux Management, the client interface was called the ZENworks Linux Management Update Client. Software Updater, Installer, and Remover replace Red Carpet and the ZENworks Linux Management Update Client.
The following sections contain information about each applet:
6.3.1 Updating Software
With the Software Updater, you can easily apply updates to your software with just a few clicks. At startup, the Software Updater automatically checks for updates to your system from the sources specified in the Software Updater configuration.
The following sections contain additional information:
Launching the Software Updater
-
Launch the Software Updater by navigating to /opt/novell/zenworks/bin and running zen-updater with root privileges. To run it as a daemon, run zen-updater &.
The Software Updater icon appears in the notification area (GNOME) or the system tray (KDE) of your panel as an icon depicting a globe, which changes to an orange circle with an exclamation point in it when updates are available.
The first time you exit the Software Updater, you will be asked if you want it to load on startup. If you choose , you can access the Software Updater from the notification area or system tray rather than by running zen-updater from the command line each time you want to launch the applet.
The rug command-line utility also lets you perform software and user management through the ZENworks Agent on a managed device. For background information on the underlying rug command and its configuration options, see Section 4.4, rug.
Configuring Package Sources
Before you can use the use the Software Updater, you need to configure it to check package sources for updates. Ask your system administrator for package sources that are available for your product and for connection details.
NOTE:The Software Updater and the Software Installer use the same configurations. If you add a service using the Software Updater configuration screen, that service will appear in the Software Installer configuration and vice versa.
To add new services:
-
Right-click the icon, then click .
If the Software Updater icon is not in the system tray, you need to launch the program. See Launching the Software Updater.
-
Click .
-
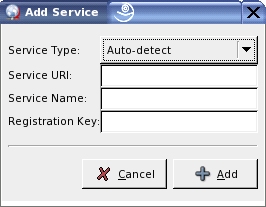
Select the type of update repository from the drop-down list. The Software Updater supports the following service types: YUM, ZYPP, NU, RCE, ZENworks, user-mounted sources (Mount), Auto-detect, and Novell Customer Center Registration.
-
Add the connection details for the source type you selected (server URI and registration key), then click . The service URI is the URL of the service. Registration keys are optional and are made available by the administrator of the service. Only ZENworks and RCE services have registration keys.
The source is listed in the tab and is ready to be used and checked for available update packages.
To remove a service:
-
Right-click the icon, then click .
If the Software Updater icon is not in the system tray, you need to launch the program. See Launching the Software Updater.
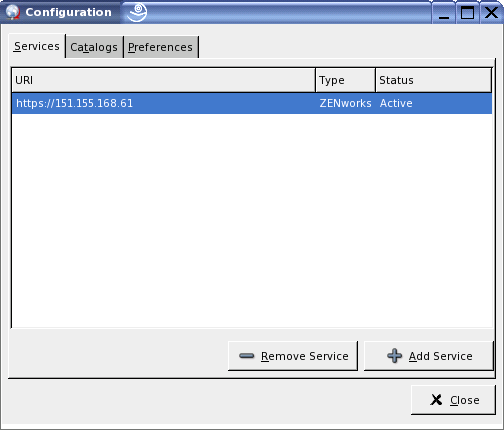
-
Select the services you want to delete, then click .
Selecting Update Catalogs
Once you have configured one or more services, you can select a set of catalogs from those sources to be checked. There may be, for example, a catalog containing all the software that came with the original release of the product and another one containing all the update packages released since.
To select additional update catalogs:
-
Right-click , then click .
If the Software Updater icon is not in the system tray, you need to launch the program. See Launching the Software Updater.
-
Click the tab.
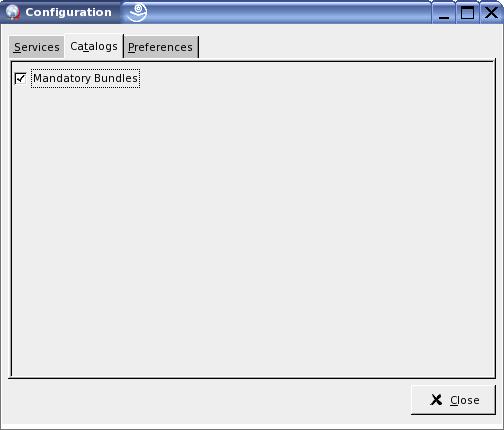
-
Select the catalogs you want or deselect those you don’t need, then click
Selecting and Applying Updates
When updates are available, the panel icon changes to an orange circle with an exclamation mark in it. When you mouse over the icon, a message pops up indicating that updates are available.
To review and apply updates:
-
Click the icon.
If the Software Updater icon is not in the system tray, you need to launch the program. See Launching the Software Updater.
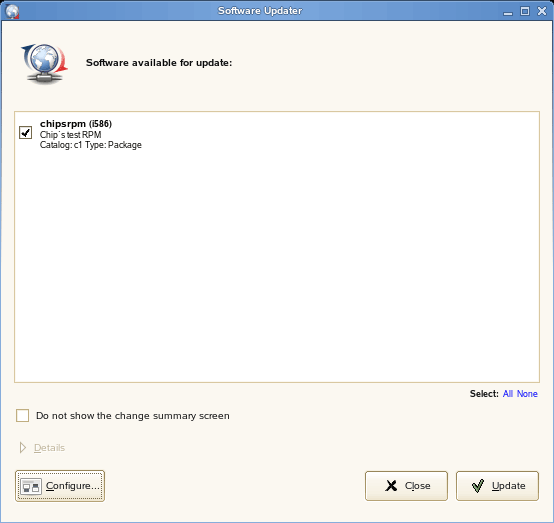
-
Select the updates you want to apply.
Click for more information about the selected update.
NOTE:To poll the services for updates, right-click the icon, and then click .
-
(Optional) If you do not want to view the change summary information, select . By default, this option is not selected.
-
Click .
If you chose to view the change summary information in Step 3, the software updater icon blinks when the change summary screen is displayed.
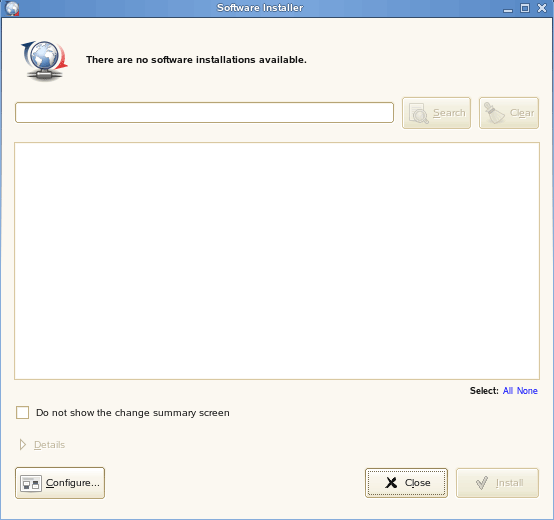
6.3.2 Installing Software
Using ZENworks Linux Management, your administrator can create catalogs containing optional software and assign them to users’ devices. Because software packages contained in catalogs are usually considered optional, users can choose whether or not to install the software. If an administrator has assigned catalogs to users’ devices, the catalogs display in the Software Installer.
Configuring Package Sources
Before you can use the Software Installer, you need to add package sources from which you can install software.
NOTE:The Software Updater and the Software Installer use the same configurations. If you add a service using the Software Updater configuration screen, that service will appear in the Software Installer configuration and vice versa.
To add a package source:
-
Launch the Software Installer by navigating to /opt/novell/zenworks/bin and running zen-installer with root privileges.
-
Click .
-
Click .
-
Select the type of the service repository from the drop-down list. The Software Updater supports the following service types: YUM, ZYPP, NU, RCE, ZENworks, and user-mounted sources (Mount), Auto-detect, and Novell Customer Center Registration.
-
Add the connection details for the source type you selected (server URI and registration key), then click . The service URI is the URL of the service. Registration keys are optional and are made available by the administrator of the service. Only ZENworks and RCE services have registration keys.
The source is listed in the tab and is ready to be used and checked for available packages.
Selecting Installation Catalogs
You can configure the Software Installer to accept various catalogs:
-
Launch the Software Installer by navigating to /opt/novell/zenworks/bin and running zen-installer with root privileges.
-
Click .
-
Click the tab.
-
Select the catalogs you want or deselect those you don’t need, then click .
Installing Software by Using the Software Installer
To install software:
-
Launch the Software Installer by navigating to /opt/novell/zenworks/bin and running zen-installer with root privileges.
-
Select the software that you want to install or search for software by typing a search term in the search field, then click . (Click to clear the search field.) Click for information about the selected software. You can select all available software by clicking .
-
(Optional) If you do not want to view the change summary information, select . By default, this option is not selected.
-
Click .
NOTE:Even though the user has been assigned rights by the administrator for installing the software, the installation of bundle fails.
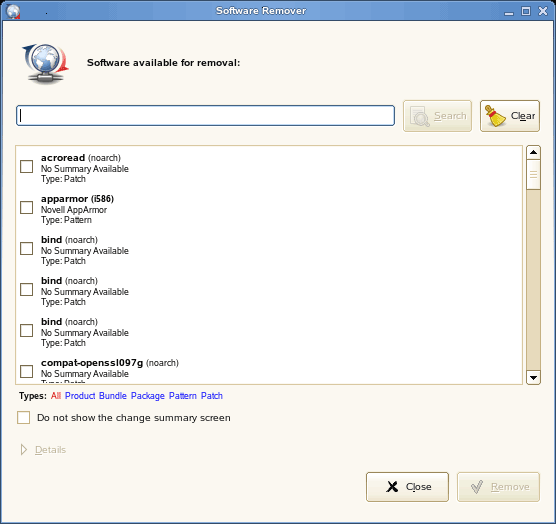
6.3.3 Removing Software
The Software Remover lets you remove software on a managed device. The utility is in the /opt/novell/zenworks/bin directory.
-
Launch Software Remover by navigating to /opt/novell/zenworks/bin and running zen-remover with root privileges.
-
Select the software you want to remove. To filter the list, click on the type of software: or . You can click for more information about the selected software.
-
(Optional) If you do not want to view the change summary information, select . By default, this option is not selected.
-
Click .
6.3.4 Viewing System Preferences
-
Right-click the icon, then click .
If the Software Updater icon is not in the system tray, you need to launch the program. See Launching the Software Updater.
-
Click the tab.
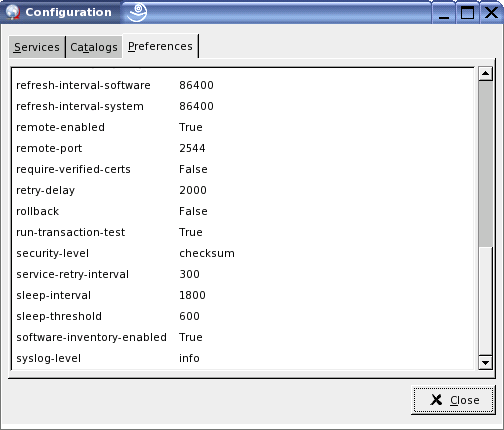
This window shows the system preferences.
NOTE:You can also display this list from the command line using rug get. For more information, see rug (1) Novell.
6.3.5 Editing System Preferences
-
Right-click the icon, then click .
If the Software Updater icon is not in the system tray, you need to launch the program. See Launching the Software Updater.
-
Click the tab.
-
(Optional) Select to automatically start the Software Updater.
-
(Optional) Select to list all available package updates.
By default, the package list will not show the version details nor will it show if multiple versions of the same package are available. Instead, it will show the “best” package available, or the package with the best architecture and version and with the least number of install/delete requests required.
-
In the preferences list, click the row whose value you want to change, then click the value.
-
Edit preferences as desired.
-
. If True, allows package bundle install for past schedules which is unable to execute or pending. If False, ignore the install action after due date is passed.
-
. For systems using more than one IP address, selects the address at which rcd will bind. Leave empty to bind to all addresses.
-
. Time interval for which the device is to be locked. Specify the start time and end time in the HH:MM format, with hours in 24-hour format.
-
. If True, automatically cleans up the cache. The default is True.
-
. The directory where cached data are stored. The default is /var/opt/novell/zenworks/cache/zmd/web.
-
. If True, never allow the cache to grow past the maximum size. The default is False.
-
Sets the cache size. The default is 300 mb.
-
. How long before sending delayed actions, in seconds. The default is 900 seconds.
-
. If True, locks the device and ZMD blocks install, removal, refresh, and register operations for packages and bundles.
-
. Sets the delay for a device shutdown. The default is 2 seconds.
-
. If True, hardware inventory information will be collected and sent to the server. The default is True.
-
. Number of seconds until HTTP requests timeout. The default is 180 seconds.
-
. Options to pass to the hwinfo command. By default, it is set to null on SLES 9 and NLD devices. For SLES 10 and SLED 10 devices, the default setting for the hwinfo preference is --nowpa. If the default setting is changed, the hwinfo command resets the wireless configuration settings on SLES 10 and SLED 10.
-
. Options to pass to the inventory scanner. The default is “- braille.”
-
. Log full traces when an exception is encountered. The default is False.
-
. Sets the log level. Options are off, fatal, error, warn, info, and debug. The default is Info.
-
. Maximum size (in MB) of all the zmd-messages.log files.
-
. Log soap messages (debug log level only). The default is False.
-
. The maximum number of days to cache a file. The default is 30 days.
-
. Maximum number of days to refresh the database.
-
. Maximum number of concurrent downloads. The default is 5.
-
. Maximum number of download retries. The default is 3.
-
Memory (in MB) at which ZMD should restart because of excessive memory usage.
-
.Specify the IP addresses of the servers (separated by a comma) for which you do not want to verify the SSL certificates. The servers are excluded only if is True.
-
. Password for the proxy, if any.
-
.The available options are URL, Bypass, or an empty string. By default, it is set to an empty string, and the device uses the system proxy. Set the value to URL to specify the URL of the proxy server, or set the value to Bypass for the device to bypass the system proxy.
NOTE:If you modify the system proxy, you must set proxy-url to use the system proxy URL if you want the device to use the system proxy. You can set the proxy URL either by using the rug command or through the ZMD settings in the ZENworks Control Center. For more information on how to use the rug command, see rug (1) Novell. For more information on how to configure the ZMD settings, see Section 7.10, Configuring the ZENworks Management Daemon (ZMD) Settings.
-
. Username for the proxy, if any.
-
. Specify the IP address or the DNS name of the server that you want to exclude from using the proxy settings. You can specify multiple IP addresses or DNS names by separating the same with a comma. You can use the * wildcard character only in the IP address. Ensure that there is no space in the specified IP address or the DNS name.
-
If True, the software inventory is sent immediately to the server when a package or bundle is changed on the managed device irrespective of the schedule set on the managed device. The default is True. If False, the software inventory is sent to the server based on the refresh interval specified in the schedule.
-
. How long between refreshes, in seconds. The default is 7200 seconds.
-
. How long between hardware refreshes. The default is 86400 seconds.
-
. How long between software refreshes. The default is 86400 seconds.
-
. How long before system refreshes. The default is 86400 seconds.
-
. Allow clients to connect to this daemon remotely. The default is True.
-
. Port used for connections of remote clients. The default value is 5505.
-
. Verify SSL certificates from server. This should remain False unless your ZENworks Linux Management server has a signed SSL certificate (generated or purchased). The default is False.
-
. The number of milliseconds to delay before retrying a download. The default is 2000 milliseconds.
-
. Store more detailed transaction history, enabling rollback feature. The default is False.
-
. Run a dryrun before attempting to install or remove packages. The default is True.
-
. Security requirements to enforce. Possible values are signature, checksum, and none. The default is Checksum.
-
. The default is 300 seconds.
-
The number of seconds before the next Service Refresh schedule wakes up. The default is 300 seconds.
-
. The default is 600 seconds.
-
. If True, software inventory information will be collected and sent to the server. The default is True.
-
. Sets the log level. Options are off, fatal, error, warn, info, and debug. The default is Info.
NOTE:You can also edit these system preferences from the command line using rug set. For more information, see rug (1) Novell.
If you change the value of the , , or , you must restart ZMD for the changes to take effect.
-