3.7 Setting Up, Executing, and Managing Jobs
Most discovery and portability operations are defined, executed, and monitored as PlateSpin Migrate jobs.
-
Section 3.7.1, Setting Up a Migration Job (Wizard vs. Advanced)
-
Section 3.7.4, Starting a Saved Migration Job in the Jobs View
-
Section 3.7.5, Changing the Start Time of a Saved Migration Job
-
Section 3.7.6, Viewing the Parameters of a Completed or In-Progress Migration Job
-
Section 3.7.8, Controlling the State of Source Workloads in the Jobs View
3.7.1 Setting Up a Migration Job (Wizard vs. Advanced)
You can set up a migration job and specify the job configuration parameters in one of the following two modes:
-
Advanced mode (Windows and Linux): Uses the Conversion Job window, which provides access to job configuration parameters.
-
Wizard mode (Windows only): Provides a convenient subset of the Advanced method and interactively captures only the essential parameters of a migration job.
The following sections provide more information:
Differences Between the Advanced and Wizard Job Configuration Modes
The Advanced (Windows and Linux) and Wizard (Windows only) job configuration modes differ in the extent of available configuration options.
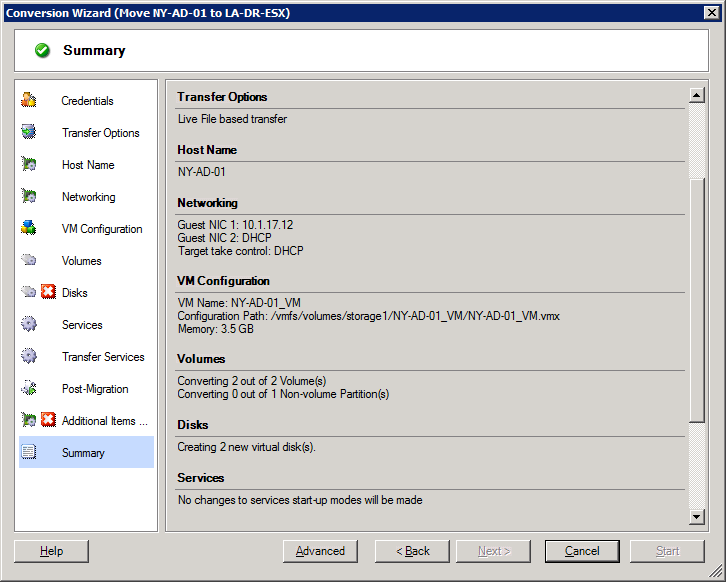
In Wizard mode, PlateSpin Migrate provides a convenient subset of the Advanced method, interactively captures the essential parameters of a migration job, itemizes settings specified in previous wizard pages, and provides a summary at the end.
Figure 3-6 Job Configuration Window in Wizard (Windows only) Mode
In Advanced mode, PlateSpin Migrate provides access to enhanced job configuration options and advanced settings for some aspects of a migration job. In Advanced mode, you access settings for an aspect of a migration job by clicking links that are grouped in categories. To hide or show category details, click the category bar.
Figure 3-7 Job Configuration Window in Advanced Mode
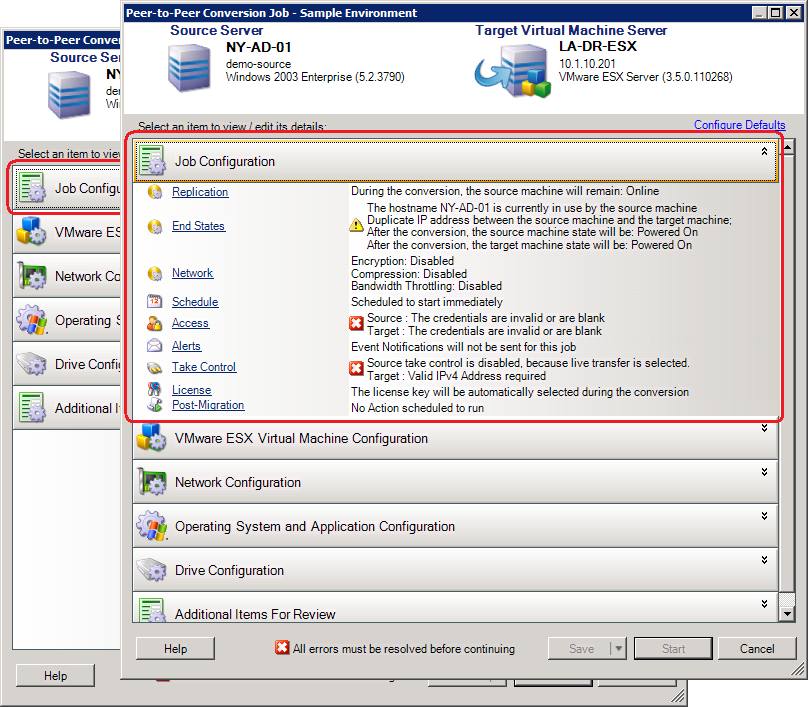
You can access the following enhanced job configuration options in Advanced mode, but cannot access them in Wizard mode:
-
Specifying a non-default license for a migration job.
-
Enabling automatic job progress and status notifications.
See Configuring Automatic E-Mail Alerts of Job Status and Progress.
-
Job scheduling options.
See Job Scheduling.
-
Advanced options for target virtual machine configuration.
See Virtualization Platform-Specific and Advanced VM Configuration Options.
-
Saving the job for on-demand execution at a later time.
Starting a Migration Job
To start setting up a migration job and select either the Advanced or the Wizard method:
-
Open the Action window by using one of the following methods:
-
Drag a discovered source and drop it on a discovered target.
-
Click a task in the Tasks pane.
-
Click the New Job toolbar.
-
In the Jobs view, right-click a source and select a command from the context menu. Available commands depend on the type of source.
The Action window opens:
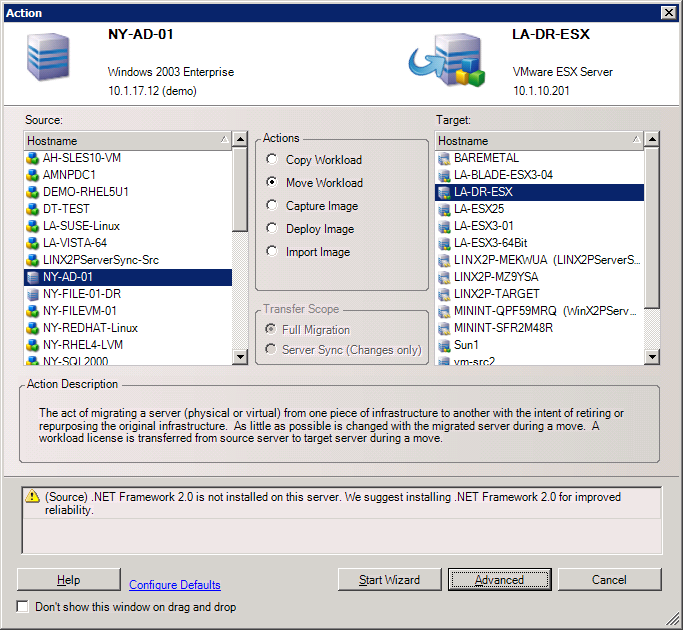
The Source and Target panes display workloads and targets applicable to the selected type of a migration job.
The and options are enabled under the following circumstances:
-
The system detects an existing operating system on the target
-
The operating system profile of the target matches that of the source workload
-
-
Check validation messages at the bottom of the window.
-
To start configuring your migration job in either Wizard (Windows only) or Advanced mode, click or click .
-
(Optional) For convenience, to avoid displaying the window on drag-and-drop, select before proceeding. Subsequent drag-and-drops bypass the Action window and directly open a Conversion Job window in Advanced mode.
To restore the job migration startup behavior, restore application defaults. See General Options.
3.7.2 Pre-migration Job Validation
When starting a migration job, PlateSpin Migrate validates the job type, the source, the target, and the selected parameters, and might generate errors and warnings.
|
|
Error markers show configurations that you need to change before the migration job can start. |
|
|
Warning markers alert you to settings that should be confirmed prior to starting the migration. |
In a default PlateSpin Migrate configuration, validation messages display at the bottom of the Action window. See Step 1.
If you have configured PlateSpin Migrate to bypass the Action window on drag-and-drop, errors and warnings are displayed in a separate window:
Figure 3-8 Migration Validation Window
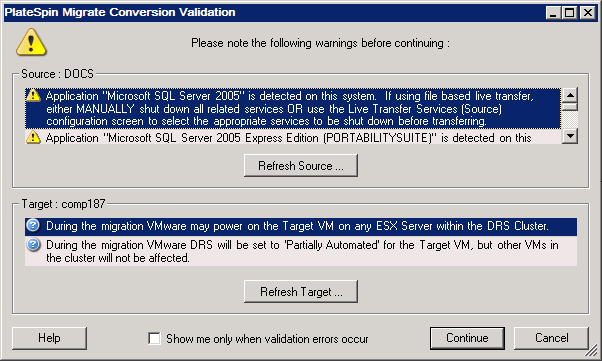
To force this window to open only on errors, select the option.
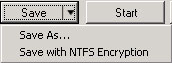
3.7.3 Saving Migration Jobs
When you start a migration job in Advanced mode, you have additional options for saving the job and executing it at a later time.
After all options have been configured for the job, click the arrow at the right side of the button, then select a command from the drop-down list:
3.7.4 Starting a Saved Migration Job in the Jobs View
-
In the PlateSpin Migrate Client’s Jobs view, click the Saved Jobs tab and locate the required saved job.
-
Right-click the job and select .
PlateSpin Migrate starts the migration job.
3.7.5 Changing the Start Time of a Saved Migration Job
-
In the PlateSpin Migrate Client’s Jobs view, locate the required saved job.
-
Right-click the job and select .
The Change Job Start Time dialog box opens.
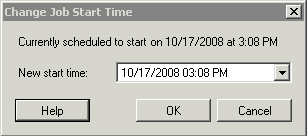
-
Specify the required new start date and time, then click .
PlateSpin Migrate reschedules the job and executes it at the specified time.
3.7.6 Viewing the Parameters of a Completed or In-Progress Migration Job
-
In the PlateSpin Migrate Client’s Jobs view, locate the required job.
-
Right-click the job and select .
PlateSpin Migrate opens the job configuration window in Advanced mode and displays the job’s configuration parameters in read-only mode.
3.7.7 Canceling an In-Progress Job
-
In the PlateSpin Migrate Client’s Jobs view, locate the required job.
-
Right-click the job and select .
3.7.8 Controlling the State of Source Workloads in the Jobs View
You can restart or shut down your source workload in the Jobs view, unless it in an active migration job.
-
In the PlateSpin Migrate Client’s Jobs view, locate the required job.
-
Right-click the job and select or as applicable.
To automate the startup state of source and target workloads, specify the required post-migration state in your migration job. See Specifying Replication Options.
3.7.9 Generating Job Reports
You can generate detailed reports of running and completed jobs. A report records the tasks performed during the job.
To generate a job report:
-
In the PlateSpin Migrate Client’s view, locate the required job.
-
Right-click the job and select .
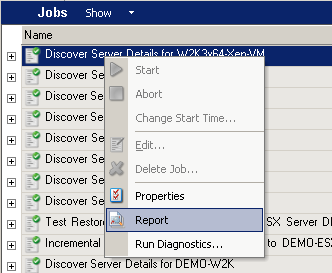
A Web browser window displays the requested report.
3.7.10 Job Diagnostics
PlateSpin Migrate provides a tool that can produce a diagnostics report for any running or completed job.
To view a diagnostics report:
-
In the PlateSpin Migrate Client Jobs view, right-click the required job and select .
The diagnostics report is displayed in a browser window. This process might take a few moments.
The diagnostics report lists several statistics:
-
All the operations involved in the job. Click any operation to view its XML representation.
-
The status of each operation.
-
The controller that ran the operation. Click the controller to view its XML representation, or click to view its event log.
In addition, the report contains links to:
-
The XML representations of the source machine, original target machine, and the target VM host.
-
The root operation for the job, as well as a variety of logs and reports.
Diagnostics reports can be sent directly to technical support by following the instructions provided on the report.