3.2 Installing the PeopleSoft Driver During Identity Manager Installation
During the installation of Identity Manager, you can select multiple components to install. This installation walks you through installing the Metadirectory engine with the PeopleSoft driver and its driver utilities. We’ll also look at the Remote Loader installation procedure.
NOTE:The PeopleSoft driver is not supported to run local on a NetWare® server. Check PeopleSoft documentation for supported PeopleTools platforms.
Identity Manager and the PeopleSoft driver can be installed on the following platforms:
- Section 3.2.1, Installing the PeopleSoft Driver on Windows with the Identity Manager Metadirectory Server
- Section 3.2.2, Installing the PeopleSoft Driver on Windows with the Identity Manager Connected System
- Section 3.2.3, Installing the Identity Manager Service on UNIX or Linux
- Section 3.2.4, Installing the PeopleSoft Driver On UNIX or Linux
3.2.1 Installing the PeopleSoft Driver on Windows with the Identity Manager Metadirectory Server
-
Run the installation program from the Identity Manager 3 CD. It is found at IDM3.0_Lin_NW_Wi:nt\install.exe.
-
Click on the welcome page.

-
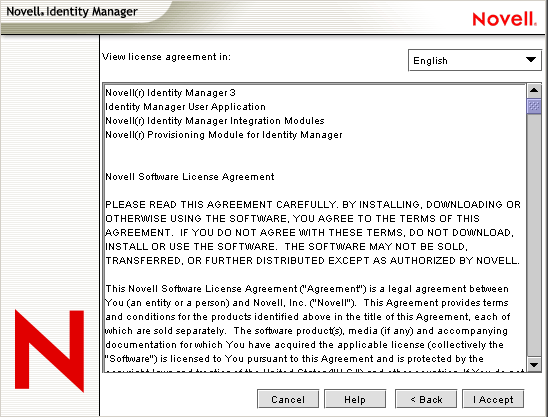
Read the license agreement, then click .
-
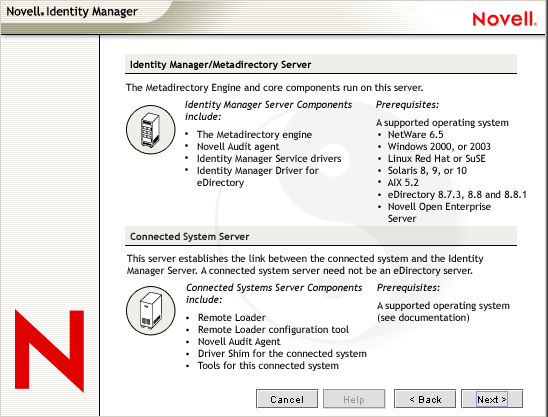
Read the Novell Identity Manager Overview page that describes installing the Metadirectory engine and the Connected System Server, then click .
-
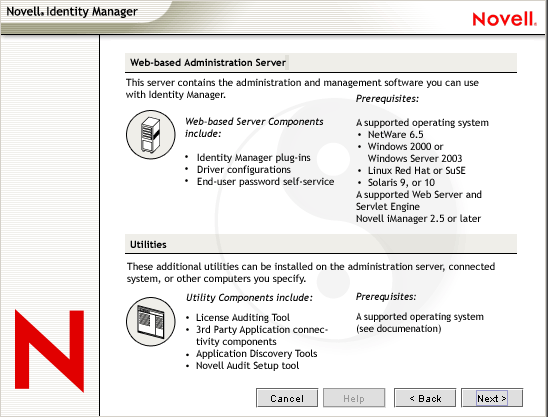
Read the Novell Identity Manager Overview page that describes installing the Web Components and the Utilities that are available for the driver, then click .
At this point you must choose how you want to install Identity Manager components. If you want to install the Novell Identity Manager Metadirectory Server, continue with Step 6. However, if you want to install the PeopleSoft driver and the Remote Loader service on your Application Server, see the Connected System information below.
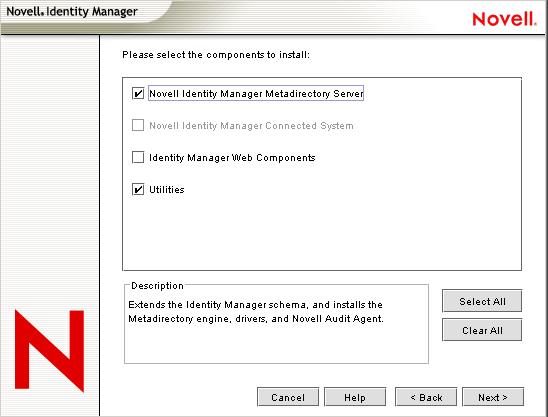
The following options are available:
-
Metadirectory Server: Installs the Metadirectory engine and service drivers. These include Identity Manager Drivers for eDirectory™, LDAP, JDBC, GroupWise®, Delimited Text, Composer, Remedy, Avaya, SOAP, SIF, and the Novell® Audit agent. Selecting this option also extends the eDirectory schema.
Novell eDirectory must be installed before you can install this option. Install the Metadirectory Server component where you want to run the Metadirectory engine for Identity Manager.
-
Connected System: Installs the Remote Loader that allows you to establish a link between the connected system and a server running the IDM Metadirectory engine. For Windows, this option installs the following drivers: Active Directory, Delimited Text, Exchange, GroupWise, JDBC, LDAP, Lotus Notes, NT Domain, PeopleSoft, Composer, Remedy, Avaya, SOAP, SAP, and SIF.
To install the Connected System to allow application connection from an application server to an eDirectory-based server running the IDM Metadirectory engine, see Section 3.2.2, Installing the PeopleSoft Driver on Windows with the Identity Manager Connected System.
-
Web Components: This option installs driver configurations, iManager plug-ins, and application scripts and utilities.
Novell iManager must be installed before you can install this option.
-
Utilities: Installs additional scripts for the JDBC driver and utilities for other drivers. Most drivers don't have a utility connected to them.
-
-
Select and , then click .
-
Select the and the driver you want to install. By default, all supported drivers are selected. When you have selected the PeopleSoft driver, click .

You can install all selected drivers or you can install just the PeopleSoft driver. Additional drivers are not viable until they are configured. To configure the PeopleSoft driver, see Section 3.3, Importing the Driver Configuration in iManager or Section 3.4, Installing the PeopleSoft Driver through Designer.
-
Read the warning about activating the driver, then click .

-
(Optional) The next option comes up only if you are installing an AD or NT driver. If you see the password synchronization warning, click .

-
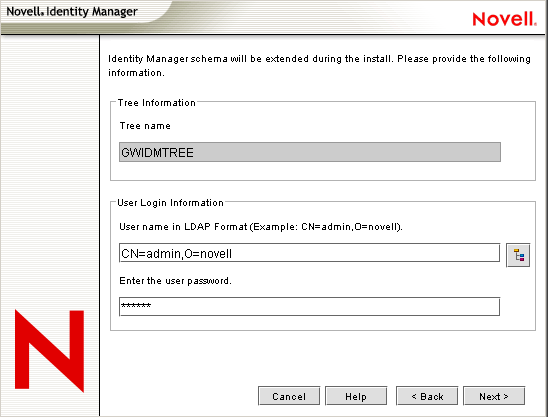
On the Schema Extension page, specify the following:
-
User Name: Specify the username (in LDAP format, such as CN=admin,O=novell) of a user (such as Admin) who has rights to extend the eDirectory schema.
-
User Password: Specify the user's password.
-
-
Click .
-
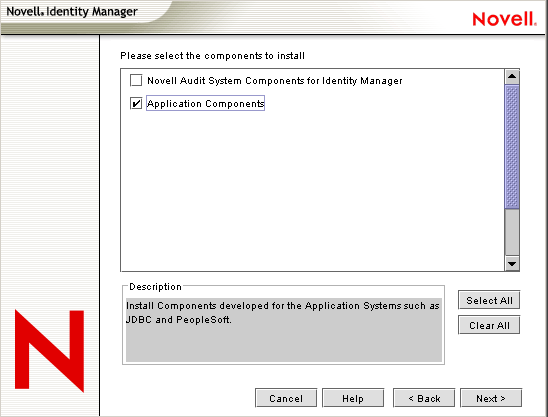
Be sure the is selected, then click .
-
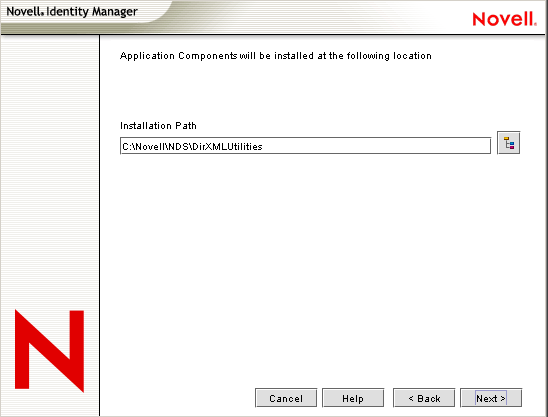
Accept the default location for the application components to be installed, or browse to and select the location where the application components are to be installed, then click .
-
Click to allow the installation to create a new directory if it does not exist.
-
Review the components to install. If you are only installing the PeopleSoft driver, be sure to select the option, then click .

-
Read the summary page of the products to install, then click .
-
Click in the installation complete message. Restart the server to complete the installation of the Metadirectory engine and restart Tomcat.
3.2.2 Installing the PeopleSoft Driver on Windows with the Identity Manager Connected System
-
Run the installation program from the Identity Manager 3 CD. It is found at IDM3.0_Lin_NW_Wi:nt\install.exe.
-
Click on the welcome page.
-
Read the license agreement, then click .
-
Read the Novell Identity Manager Overview page that describes installing the Metadirectory engine and the Connected System Server, then click .
-
Read the Novell Identity Manager Overview page that describes installing the Web Components and the Utilities that are available for the driver, then click .
-
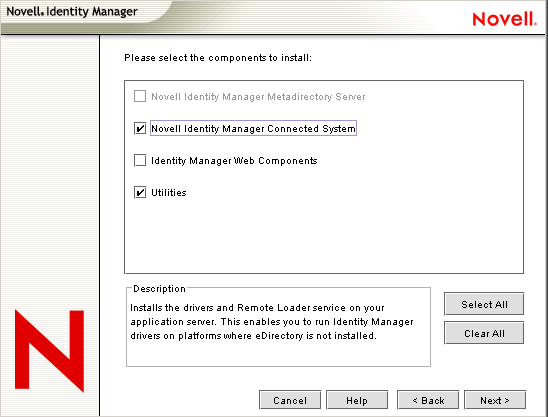
To select the Novell Identity Manager Connected System, first deselect the option. Then select and , then click .
-
Choose a directory to install the Novell Identity Manager Connected System, or keep the default and click .

-
Select the and the driver you want to install, then click .
-
Read the warning about activating the driver, then click .
-
If you see a password synchronization warning, read the message, then click .
-
Select , then click .
-
Accept the default location for the application components to be installed, or browse to and select the location where the application components are to be installed, then click .
-
Click to allow the installation to create a new directory if it does not exist.
-
Review the components to install. If you are only installing the PeopleSoft driver, be sure to select the option, then click .
-
Read the summary page of the products to install, then click .
-
Click on the installation complete message. Restart the server to complete the installation of the Identity Manager Remote Connection services and restart Tomcat.
3.2.3 Installing the Identity Manager Service on UNIX or Linux
The install procedure for PeopleSoft on UNIX or Linux is a two-part process. First, install the Identity Manager Metadirectory service or the Identity Manager Connected System service and the Identity Manager policies. After the service and policies are installed, you need to install the PeopleSoft driver. See Section 3.2.4, Installing the PeopleSoft Driver On UNIX or Linux.
After the PeopleSoft driver is installed, you need to configure the driver through either the iManager or the Designer utility. See Section 3.3, Importing the Driver Configuration in iManager or Section 3.4, Installing the PeopleSoft Driver through Designer.
-
Run the installation program from the Identity Manager 3 CD. It is found at IDM3.0_Lin_NW_Wi:linux\setup\dirxml.bin.
-
Read the welcome message, then press Enter.

-
Read the license agreement, then press Enter.

-
Press Enter until a message prompts you accept the license agreement.
-
Enter Y to accept the license agreement.

-
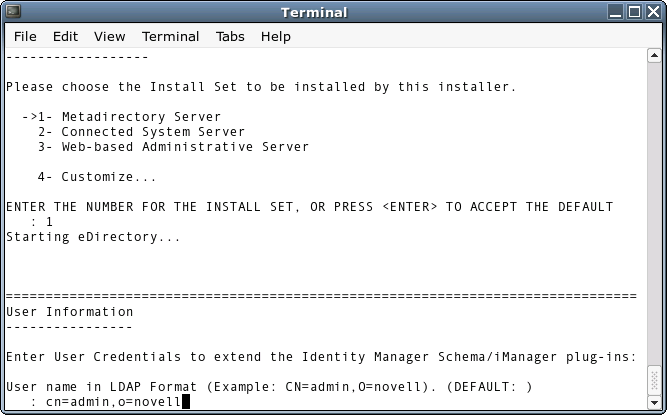
Specify the appropriate number (1-4) for the install set you want to install. For example, enter 1 to install the Metadirectory engine or 2 for the Identity Manager Connected System Service. However, to install the Identity Manager policies, enter (Customize).
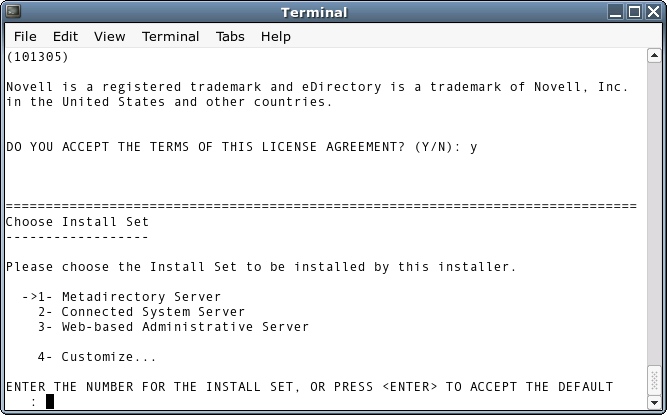
The install sets contain the following components:
-
Metadirectory Server: Installs the Metadirectory engine and service drivers, Identity Manager drivers, Novell Audit agent, and extends the eDirectory schema.
Novell eDirectory must be installed before you can install this option.
-
Connected System Server: Installs the Remote Loader and the following drivers: LDAP, JDBC, eDirectory, SAP, Delimited Text, GroupWise, Composer, Remedy, Avaya, Soap, and Lotus Notes. You can choose the Connected System Server option when you don't want to put the overhead of eDirectory services and the Metadirectory engine on your application server.
-
Web-based Administrative Server: Installs the Identity Manager plug-ins and Identity Manager driver policies in the iManager utility.
Novell iManager must be installed before you can install this option.
-
Customize: Installs the specific components you select from a list of all components. Select this option to install the Identity Manager Plugins and the Identity Manager Policies.
-
-
Specify the User name of a user that has rights to extend the schema in LDAP format.
-
(Optional) Depending on the option you chose (such as the Metadirectory Server), you are prompted to set the LD_LIBRARY_PATH environment variable. To do this, execute the /opt/novell/eDirectory/bin/ndspath script by typing . /opt/novell/eDirectory/bin/ndspath and then re-run the installation.
IMPORTANT:(Solaris* installations only) If you are installing your Web-based Administration Server on the same server where eDirectory resides, and you are prompted for the Web Server Secure port, change the default value to some free port, such as 8443.
-
Verify that the information contained in the Choose Product Features page is correct before you start installing the packages. You need to select either or , and .

If you want to change any information, use a comma to separate your selected numbers. Typing a number that is followed by an deselects that feature, while typing a number that is not followed by an selects the feature. To install the Metadirectory Engine and the Identity Manager Policies, type:
14
If you want to install the Remote Loader service instead of the Metadirectory Engine, type:
1,2,14
This deselects the Metadirectory Engine, selects the Remote Loader service, and selects to install the Identity Manager Policies. The option delivers all preconfiguration files for Linux and Solaris, including the PeopleSoft preconfiguration files (policies). (There is no iManager for AIX* so there is no DXMLcnfg package for AIX.)
You must have iManager installed on the same server; otherwise you see the following error message:
Novell iManager 2.5 or later has to be installed on this system to install the Policies. Please install iManager 2.5 or later to install Policies.
The PeopleSoft driver does not appear in the list of drivers on the Choose Product Features page, but this will be fixed in a future release of Identity Manager. To install the PeopleSoft driver, follow the directions under Section 3.2.4, Installing the PeopleSoft Driver On UNIX or Linux. If you do not want to install the other drivers, deselect them through the method described above.
-
Press to start installing the packages. eDirectory temporarily shuts down when installing the Metadirectory Engine and schema files.
-
When you see the Installation Complete screen, press to close the installation program.
3.2.4 Installing the PeopleSoft Driver On UNIX or Linux
After the Metadirectory engine or Connected System is in place, perform the following steps to install the PeopleSoft driver.
-
If necessary, uninstall any previous version of the PeopleSoft driver.
-
As a user with root privileges, install the PeopleSoft driver package for the appropriate platform. For eDirectory 8.7.3, use the default install location (/usr). For eDirectory 8.8, you need to relocate the package to /opt/novell/eDirectory.
For Linux or AIX:
rpm -e --allmatches --nodeps novell-DXMLpsoft
For eDirectory 8.7.3: rpm -i --replacefiles --nodeps <image-path>/linux/setup/packages/novell-DXMLpsoft*
For eDirectory 8.8: rpm -i --replacefiles --nodeps --relocate=/usr=/opt/novell/eDirectory <image-path>/linux/setup/packages/novell-DXMLpsoft*
For Solaris:
pkgrm -n -a /var/sadm/install/admin/admin.nds4s DXMLpsoft
pkgadd -n -r /var/sadm/install/admin/admin.nds4s -a /var/sadm/install/admin/admin.nds4s -d <image-path>/solaris/setup/packages/DXMLpsoft.pkg* DXMLpsoft