The SilverStream JAR Designer lets you perform all of the tasks associated with creating and maintaining JAR files. It also enables you to perform all of the application assembly associated with Enterprise JavaBeans.
This page describes how to use the SilverStream JAR Designer. It includes these sections:
 For background information about JAR files, see the chapter on utility classes, JAR files, and JavaBeans in the Programmer's Guide.

SilverStream's JAR Designer allows you to
When to use JAR files
In SilverStream, the following components must reside in a JAR:
In addition, if you want to access a class that resides in a different database, you must place that class in a JAR file.
The JAR Designer interface differs depending on how you invoke it.
Using Upload Media Item
If you invoke the JAR Designer by choosing Upload Media Item, SilverStream displays a dialog which prompts you to specify the file to upload. It looks like this:
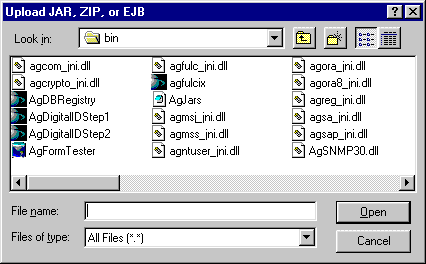
Using Upload JAR, ZIP, or EJB
If you invoke the JAR Designer by choosing Upload JAR, ZIP, or EJB, SilverStream displays a dialog which prompts you to specify the item to upload. It looks like this:
Using Create JAR
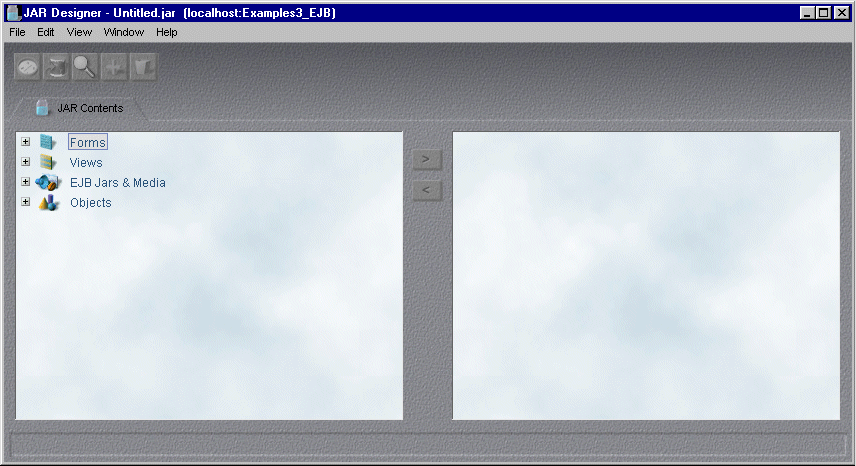
If you invoke the JAR Designer by choosing Create JAR, the JAR Designer consists of a single tabbed pane where you can add and remove the contents of the JAR file as shown below.
Using Create EJB JAR
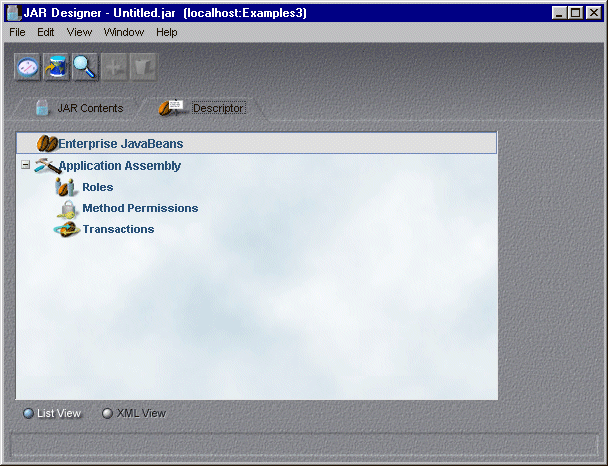
If you invoke the JAR Designer by choosing Create EJB JAR, then the JAR Designer consists of two panes: one to manipulate the contents of the JAR file and the other to create the EJB Deployment Descriptor as shown here:
 To create a JAR file in the SilverStream Designer:
Once you have saved and named the JAR file, SilverStream creates the JAR file in the current database.
You might need to edit a JAR file when you want to add or remove items.
NOTE You cannot edit imported JAR files; only JAR files created using the SilverStream JAR Designer can be edited.
You need to rebuild a JAR file when you have made changes to any of the components in the JAR.
How JARs are rebuilt
When you rebuild a JAR file, SilverStream performs the following process:
For individual items, such as "Forms/form1" or "Views/view1", the newer versions of these items, if any, replace the existing ones.
For directories, such as "Forms", "Views", and so on, only the items that were in those directories at the time of the JAR's creation, will be reinserted.
Packages, however, are dynamically regenerated each time you rebuild. For example, if the user adds any new classes or subpackages to a package, they will get inserted into the JAR, newer versions of existing classes will be substituted for older ones, and any deletions will be reflected in warning messages.
If you have created new packages that are not subpackages of packages already included in your JAR file (for example you created some new utility classes), you must manually add these to your JAR file. See Editing JAR files.
To rebuild JAR files in the Designer:
NOTE You cannot rebuild imported JAR files; only JAR files created using the SilverStream JAR Designer can be rebuilt.
You can also rebuild a JAR using the SilverCmd command line tool.
For more information see the chapter on SilverCmd in the online Tools Guide.
When you create or rebuild a JAR file, it is available only on the server in which it is created or rebuilt. To make the contents of a JAR file available on another server you need to publish the JAR file. This copies the JAR file from the source database to the destination database on the server.
To make your JAR file available to someone outside of your SilverStream environment, you need to export the file (save the file to disk) and then use some means such as email, ftp or network copying, to move the file to where it is to be used.
NOTE If you put forms or views into JARs, they will not work outside of the SilverStream environment. They rely on the metadata description stored external to the class files.
You can also export a JAR using the SilverCmd command line tool.
For more information see the chapter on SilverCmd in the online Tools Guide.
You can use JAR files created outside of your SilverStream environment by uploading them into the JAR Files directory in your SilverStream database.
To import a JAR file that does not include references to files in other JARs:
SilverStream copies the file into the JARs directory of the current database.
You cannot modify imported JARs using the SilverStream Jar Designer. You must make any modifications to the JAR file before importing it into SilverStream.
For more information on importing JAR files using SilverCmd, see the chapter on SilverCmd in the online Tools Guide.
To import a JAR file that includes references to files in other JARs:
See the following section for information on setting the Class-path attribute.
When the primary JAR already has a manifest
If the primary JAR file already contains a manifest file, you only have to:
A manifest file can contain an entry, called a section in the Manifest file specification, for each of the files contained in the JAR. You might think of the Manifest file as a table of contents (with attributes) for the JAR. You are not required to include all of the files that do reside in the JAR in the manifest file. A JAR file that contains JavaBeans requires a manifest file, and all of the JavaBeans must be listed.
Both standard and EJB JAR files requires a manifest file when they includes references to classes that reside in other JAR files.
SilverStream adds a Manifest file tab which has two modes List View (the default) and Text View. You can go back and forth between modes. SilverStream will attempt to convert the entries made in Text mode to the appropriate values in List Mode.
To add entries in List View mode:
SilverStream displays the Manifest Entry dialog.
This name is a relative path to the object that you are adding to the Manifest file. It must use forward slashes. For example, com/myco/MyClass.class.
The Property Inspector displays a new tab called Manifest.
SilverStream adds the Java-Bean: True entry to the manifest file.
Some examples of additional attribute names for JavaBeans include: depends-on, or design-time-only.
Upon Save, SilverStream analyzes the Manifest file. If there are errors, they are displayed in the a dialog box.
To add/remove entries in Text View mode:
Sometimes the classes in JAR files include references to classes that reside in one (or more) other JAR files. In these situations, you must provide the Class-path to the referenced JAR files. Here's what you have to do:
The Class-path entry in the manifest file is required regardless of the tool used to create the JAR file.
To create a Class-path entry in a manifest file:

The JAR Designer adds a Manifest tab.
Class-path:
This is a key word which must be spelled exactly as shown (as specified in Sun's Manifest specification).

Usage tips
db:jarName.jar
To make the referenced file available to deployment plans, forms, pages, and business objects:
You must specify the name of the referenced JAR file whether the JAR is used by a deployment plan, a business object, a page, or a form. The steps are the same:

Each EJB JAR must contain a deployment descriptor. The deployment descriptor contains important information for both application assemblers and the EJB container. The EJB specification defines the structure of the deployment descriptor as an XML file with its own DTD.
The deployment descriptor contents consist of two parts: the first part describes the individual beans in the JAR (defined by the bean developer), the second part describes the runtime attributes of the beans in the JAR (defined by the application assembler).
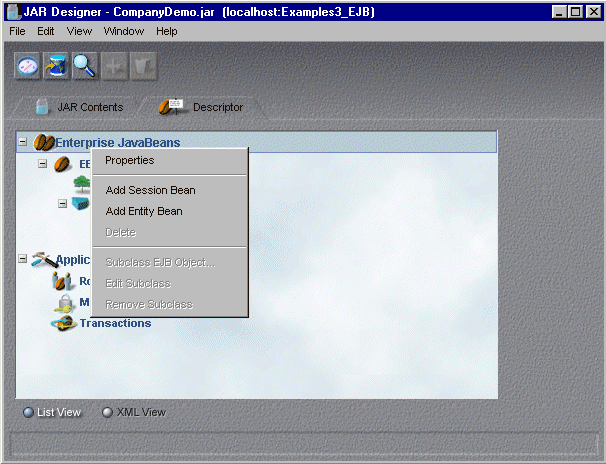
SilverStream implements this structure within the JAR Designer by including an Enterprise JavaBeans section and an Application Assembly section in the descriptor tab as shown here:
You can populate the deployment descriptor in one of these modes:
The tasks described in this section relate to the components in the Enterprise JavaBeans section of the deployment descriptor using List View mode. (The Enterprise JavaBeans section is represented as the <enterprise-beans> node in XML.)
You must have already created an EJB JAR and added the packages or objects to the JAR.
SilverStream creates an entry called UntitledSessionBean or UntitledEntityBean.
The Property Inspector includes required and optional entries. The properties vary depending on the entry.
For definitions of the properties, their corresponding XML entry and a definition, see the chapter on deployment descriptors in the Programmer's Guide.
To add an environment property:
SilverStream creates an entry called UntitledEnvironmentProperty.
SilverStream launches the Property Inspector.
For definitions of the properties, see "Environment properties" in the chapter on deployment descriptors in the Programmer's Guide.
SilverStream creates an entry called UntitledBeanReference.
SilverStream launches the Property Inspector.
You can choose the ellipsis (...) button next to the Referenced bean text field. Choose the appropriate bean from the list in the dialog and choose OK. SilverStream can then insert the remaining information about the bean such as its home and remote interface classes.
For definitions of the properties, see "Bean references" in the chapter on deployment descriptors in the Programmer's Guide.
NOTE SilverStream requires that referenced beans reside in the same EJB JAR file. To reference a bean located in a different EJB JAR, you can create a composite EJB JAR. For more information, see the section Creating composite EJB JARs
SilverStream creates an entry called UntitledRoleReference.
SilverStream launches the Property Inspector.
For definitions of the properties, see "Role references" in the chapter on deployment descriptors in the Programmer's Guide.
SilverStream creates an entry called UntitledResourceReference.
SilverStream launches the Property Inspector.
For definitions of the properties, see "Resource references" in the chapter on deployment descriptors in the Programmer's Guide.
NOTE You can select a type from the dropdown, or enter the type in the text box. The type javax.sql.DataSource is the only type supported by SilverStream. Select a different type only if the EJB is intended for use outside the SilverStream environment.
To add persistent field definitions (entity beans only):
SilverStream displays the Edit Persistent Fields dialog
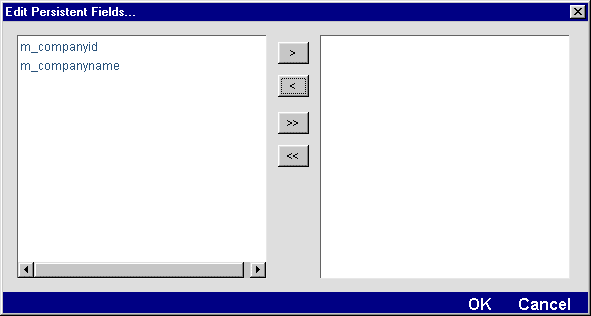
SilverStream adds the field names to the deployment descriptor.
NOTE If the field is a complex data type, for example, an AddressData object that has instance variables of its own, you should only add the AddressData object as the persistent field. At deployment, you can map the constituent parts of the complex data type (like the city field) to appropriate database columns.
For more information, see the chapter on the Deployment Plan Designer in the online Tools Guide.
The tasks described in this section relate to the components in the Application Assembly section of the deployment descriptor (the <assembly-descriptor> node in XML). Entries are not required for these components. If no values are specified SilverStream substitutes the default values described in each area.
For definitions of the properties, see "Specifying roles" in the chapter on deployment descriptors in the Programmer's Guide.
To specify method permissions:
SilverStream creates an entry called Untitled Permission.
For definitions of the properties, see "Specifying method permissions" in the chapter on deployment descriptors in the Programmer's Guide.
Usage tips
When you choose Edit Roles, SilverStream launches a dialog box from which you can choose the appropriate roles from the list of existing role.
When you choose Edit Methods, SilverStream launches a dialog box that lists all of the beans and their methods that reside in the EJB JAR. You can choose one or more methods from one or more bean. Specify * to include all of the methods in a bean.
The first line of Description is used for the Name field.
Rules for specifying method permissions
To specify transaction attributes:
SilverStream creates an entry called UntitledTransaction.
For definitions of the properties, see "Transaction attributes" in the chapter on deployment descriptors in the Programmer's Guide.
Usage tips
You can choose an Attribute from the drop-down list box. For more information on when it is appropriate to use each attribute, see the section on Transaction Attributes in the chapter on deploying EJBs in the Programmer's Guide.
If you do not specify a transaction attribute, the SilverStream container defaults to Supports.
When you choose Edit Methods, SilverStream launches a dialog box that lists all of the beans and their methods that reside in the EJB JAR. You can choose one or more methods from one or more bean. Specify * to include all of the methods in a bean.
The first line of the description is used for the Name field.
During application assembly, you might want to combine EJBs from one or more EJB JARs into one application. Because SilverStream requires that any bean references resolve to beans in the same EJB JAR, you might need to create a new composite EJB JAR that includes the contents of two or more different EJB JARs.
To create a composite EJB JAR:
The JAR Designer appears.
SilverStream recommends that you create composite JARs from the EJB JAR not from the remote JAR.
Once you have added the components to the composite JAR, you can map the references to any EJB in that JAR.
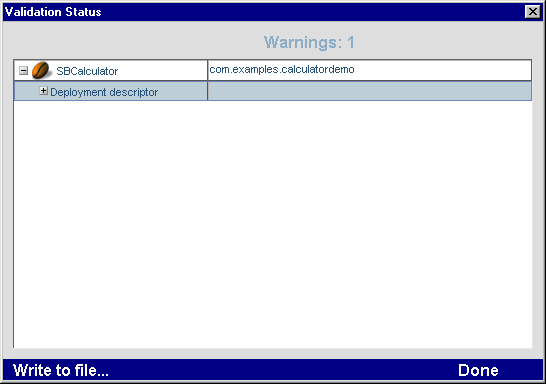
You can test to see if the deployment descriptor is correct and complete before deploying your EJB JAR. An EJB JAR with an invalid deployment descriptor can be saved but not activated on the SilverStream Server.
The Validate EJB Jar option validates the deployment descriptor within the specified EJB JAR file. It reports any deployment descriptor problems, missing application assembly components, and class-related problems. The problems are written to a message dialog.
To validate the EJB JAR's deployment descriptor:
To deploy an EJB JAR, you must first create an EJB Deployment Plan using the Deployment Plan Designer.
To access the Deployment Plan Designer:
SilverStream launches the Deployment Designer. For more information on the Deployment Designer, see the Deployment Plan Designer chapter in the online Tools Guide.
You can modify an EJB class, home or remote interface at any point in the development or deployment cycle. To ensure that the latest classes are included in the EJB JAR, you simply rebuild the EJB JAR. See the Rebuilding JAR files for more information about how this command works.