6.7 Creating Entitlement Policies
To create an Entitlement Policy, you can use the wizard provided.
-
Make sure you have set up the Entitlements Service Driver and created the driver configurations that are necessary.
-
In iManager, click .
-
Select a driver set.
Entitlement policies are per driver set.
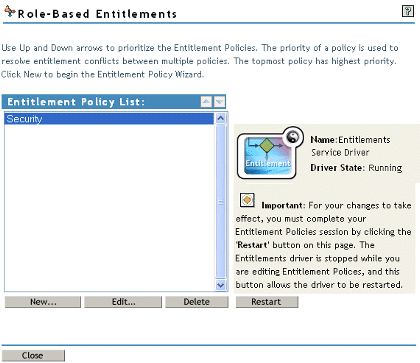
The list of existing Entitlement policies opens, similar to the page in the following figure. If you are using Role-Based Entitlements for the first time, no policies are listed.
-
Click .
The Wizard opens.
NOTE:Creating a new entitlement policy stops the Entitlements Service driver. You need to click when you are finished creating policies.
-
Follow Step 1 through Step 6 in the wizard to create a new policy. Refer to the online help for information about each step in the wizard.
-
In Step 1, give the policy a name and description.
-
In Step 2, define the membership filter the search parameters.
-
In Step 3, define static members by including and excluding members in the search criteria.
-
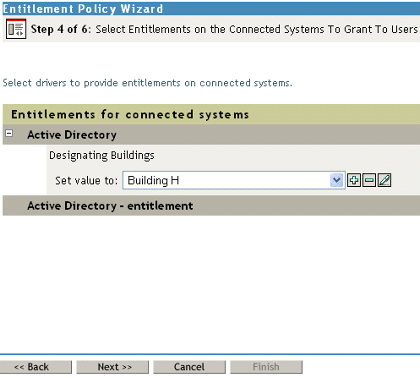
In Step 4, select an Identity Manager driver and provide entitlements for inclusion. You created entitlements in Section 6.4, Writing Entitlements in XML through iManager. Click , then select an entitlement to add.
-
In Step 5, browse for objects for which you want this entitlement policy to be a trustee.
-
In Step 6, read the summary to ensure that the entitlement policy does what you want it to. If it does, click ; if not, click .
-
-
Entitlement policy creation turns off the Entitlements Service driver. Click to complete the session.
6.7.1 Defining Membership for an Entitlement Policy
Like an Identity Manager driver, each Entitlement policy can manage only objects that are in a master or read/write replica on the server to which is it assigned. Each Entitlement policy is associated with a single Driver Set object, which is assigned to a particular server.
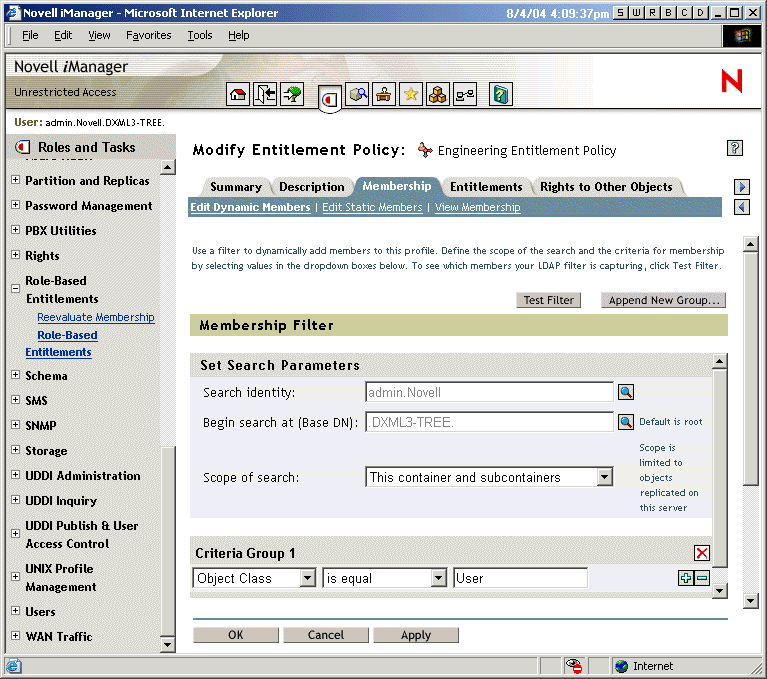
Only User objects (and other object types derived from the class of User) can be members of an Entitlement policy. To get to the Membership page in an Entitlement policy, select , then highlight the Entitlement policy you want to edit from the Entitlement Policy List and select . In the Internet Explorer browser, select the tab; in the Firefox browser, select Edit Dynamic Members from the pull-down menu.
An Entitlement policy is a dynamic group object. You can define membership for an Entitlement policy by using two methods, dynamic and static. You can use both methods in the same Entitlement policy.
-
Dynamic: You can define criteria for membership based on values of attributes of the object, such as whether the job title includes the word “Manager.” The criteria you specify are converted into an LDAP filter.
Users who meet the criteria are automatically part of the Entitlement policy, without requiring you to specifically add each user to the policy. The dynamic membership is the same as a Dynamic Group object.
If an object changes so that it no longer meets the criteria for dynamic membership, the entitlements are automatically revoked.
Figure 6-2 Editing Dynamic and Static Members
-
Static: In addition to creating criteria for dynamic membership (an LDAP filter), you can include or exclude specific users.
You can add statically members who don’t meet the criteria of the filter. You can exclude members who meet the filter’s criteria but should not be included in the Entitlement Policy.
NOTE:If you run the option and the Entitlement Services driver is stopped, you must first restart the driver before the reevaluation process can begin.
6.7.2 Choosing Entitlements for an Entitlement Policy
Entitlements enable you to grant or revoke access to services on connected systems and rights in Identity Vault.
Drivers that you install with entitlements enabled come with a list of entitlements that can be assigned using an Entitlement policy. You can create your own entitlements that can be used in an Entitlement policy. The entitlements that the driver can provide are child objects of the driver, which is created by the driver developer to represent the capability of the driver and connected system.
Trustee rights to objects in the Identity Vault are immediately granted to members of the Entitlement policy. By default, entitlements in connected systems are granted to each member of the Entitlement policy the next time an attribute used for Entitlement policy membership is modified for that user, or when a user is moved to a different container or renamed.
Entitlements on connected systems can be any of the following:
-
Accounts
-
Membership in e-mail distribution lists
-
Group membership in NOS lists
-
Attributes for the corresponding objects in connected systems, populated with values you specify
-
Other entitlements that you customize
Accounts on Connected Systems
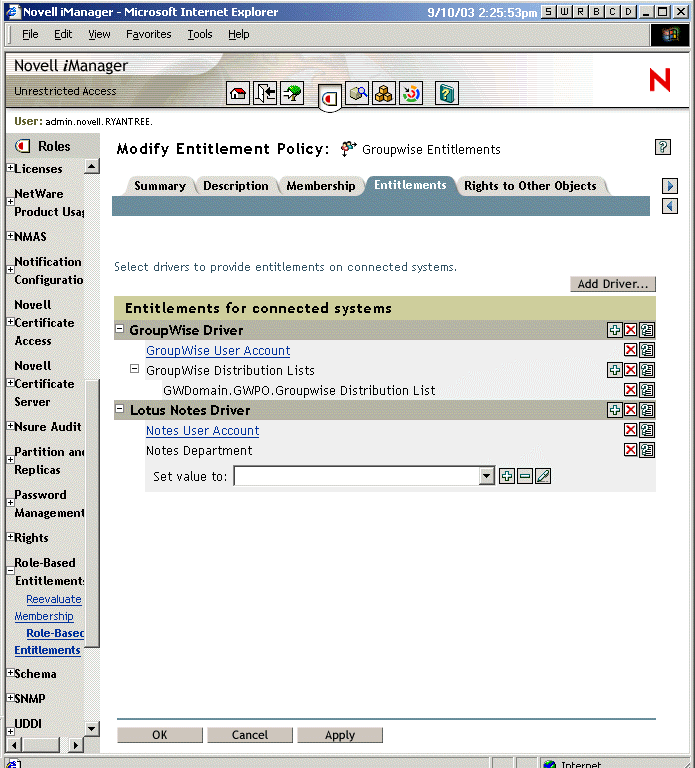
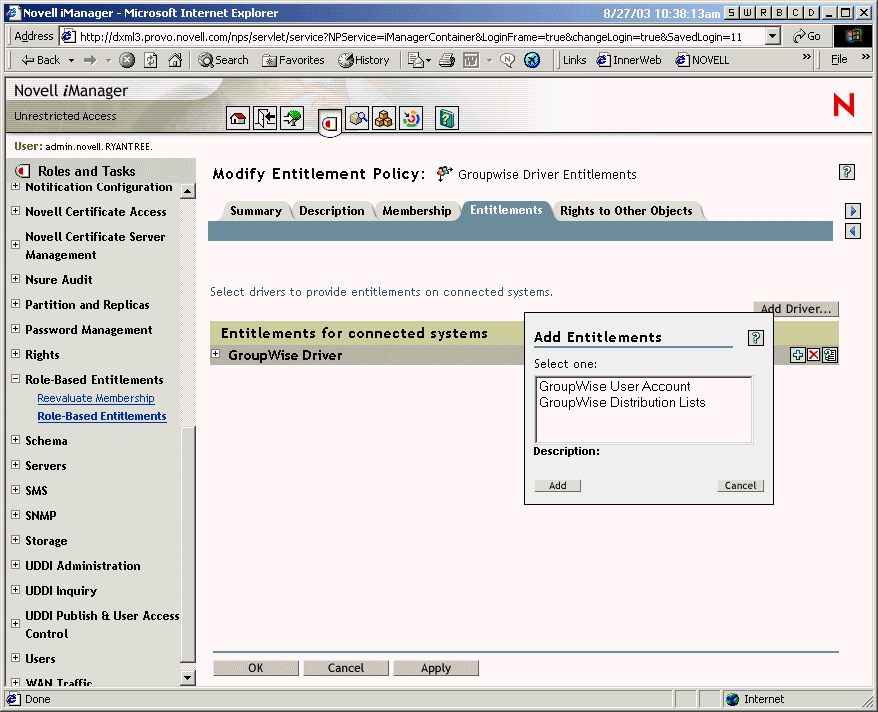
To add entitlements to an Entitlement Policy, go to the Entitlements page and select a driver. A pop-up window displays the entitlements that the driver offers.
For example, in the following figure, you can see two kinds of entitlements being offered by a GroupWise driver, and the first one in the list is a GroupWise User Account.
Figure 6-3 Interface for Defining Entitlements
Membership in E-Mail Distribution Lists and NOS Lists
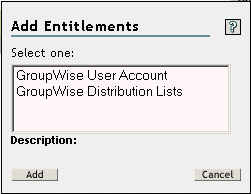
To assign membership in groups on connected systems, you choose the membership entitlement from the list of entitlements offered by a driver.
The following figure shows an example, with GroupWise Distribution Lists shown second in the list.
Figure 6-4 Selecting GroupWise Distribution Lists
If you choose in this example, a query pop-up is displayed, like the example in the following figure.
Figure 6-5 Query for Entitlements
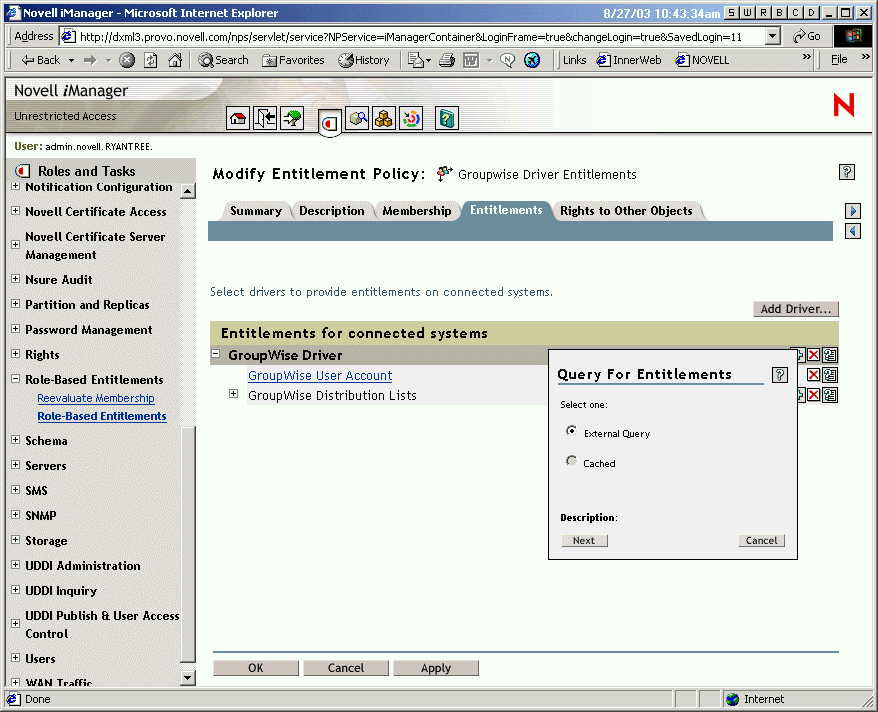
The Entitlement Policy interface lets you query for the list of e-mail distribution lists or NOS lists. After a query has been performed, you can choose to view the cached list.
The drivers are configured to return the complete list, so you can choose from the lists that exist on the connected system.
NOTE:A driver could be customized to limit the list to group names you specify, rather than a query that returns the complete list.
Attribute Values on Connected Systems
You can assign attribute values for user accounts on connected systems. The interface lets you type in the value you want the user accounts to have.
The following figure shows an example of adding an attribute value for a Notes attribute, Department.
Figure 6-6 Adding an Attribute Value