8.5 Configuring Nagios
Nagios is an open source monitoring tool. You can configure it to monitor the health of the server systems and services. It also provides an alert and notification system.
The information in this section provides basic information to get you started using Nagios. For detailed information about configuring and using Nagios to monitor your server and services, see other sections in this guide. See also the open source Nagios Documentation at Nagios.org.
8.5.1 Configuring Nagios Authenticated Users and Contacts
Nagios user accounts are specific to the Nagios software. The accounts have nothing to do with the local server user names or eDirectory user names.
There are two levels of access for Nagios users:
-
Authenticated user: a Nagios user who is granted access to the web-based Nagios monitoring dashboard.
-
Authenticated contact: An authenticated Nagios user whose user name is also defined in the Nagios Object Contact configuration file (/etc/nagios/objects/contacts.cfg) and has permissions to access CGI information as defined in the Nagios CGI configuration file (/etc/nagios/cgi.cfg) and other object configuration for services that are monitored.
By default, the Nagios user nagiosadmin is already configured in Nagios as a user, a contact, and a member of the contact group admins. This user is also authorized to access server and services information and to issue host or service commands via the command CGI configuration file (/etc/nagios/cgi.cfg). However, you must configure a password for the nagiosadmin user in order to log in to the website. You must configure a valid email address for the nagiosadmin contact in order to receive alerts via the Nagios alert notification system.
Setting or Modifying the Password for the nagiosadmin User
By default, Nagios defines one default user nagiosadmin with no password in the /etc/nagios/htpasswd.users file. Novell Remote Manager requires passwords to be set for any Nagios user. Thus, before you can access the web-based Nagios Service Details report for the first time, you must specify a password to use for the user nagiosadmin.
IMPORTANT:Do not delete the nagiosadmin user.
To configure a password for user nagiosadmin:
-
Log in to Novell Remote Manager as the Linux root user.
-
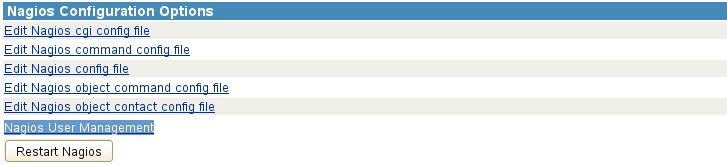
Click the icon in the toolbar to go the Novell Remote Manager Configuration Options page.
-
Under , click .
-
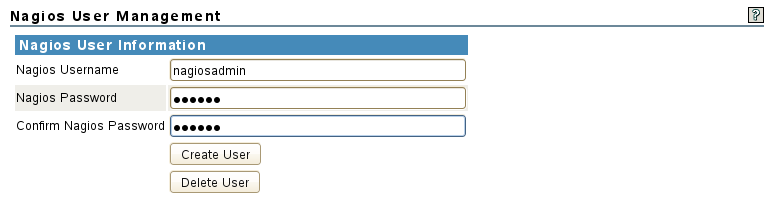
On the Nagios User Management page, specify nagiosadmin as the Nagios user name.
-
Type a password, then type it again to confirm.
-
Click .
The user name and password are saved in the /etc/nagios/htpasswd.users file. The password is stored in encrypted format. The password is enforced on the next login to Nagios.
-
When a message confirms that the user nagiosadmin was created in Nagios with the password you provided, click to dismiss the message.

For information about configuring additional Nagios users and the tasks they can perform, see Section 8.8, Managing Nagios Users.
Setting or Modifying an Email Address for the nagiosadmin Contact
By default, Nagios defines the nagiosadmin user as a contact in the /etc/nagios/objects/contacts.cfg file. It sets the email for the contact to nagios@localhost. In order to receive notification alerts from the Nagios alert notification system, you must replace this email setting with a valid email address. You must restart Nagios to apply the changes.
IMPORTANT:Do not delete the nagiosadmin contact or its email definition line in the /etc/nagios/objects/contacts.cfg file.
To configure an email address for the contact nagiosadmin:
-
Log in to Novell Remote Manager as the Linux root user.
-
Click the icon in the toolbar to go the Novell Remote Manager Configuration Options page.
-
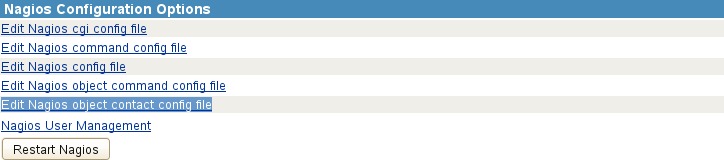
Under , click .
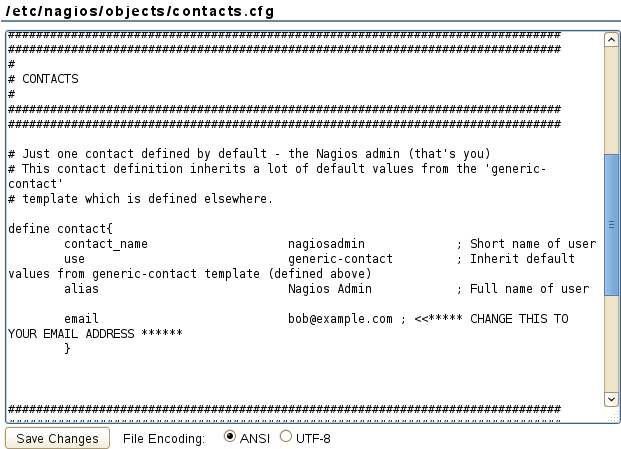
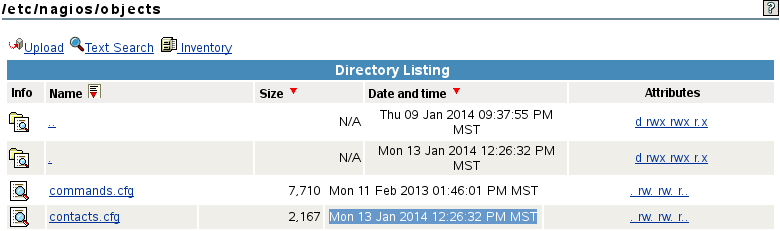
This opens the /etc/nagios/objects/contacts.cfg file in the Novell Remote Manager text editor.
-
Scroll down to the contact definition section for nagiosadmin, and then replace nagios@localhost with the email address (such as bob@example.com) where you want to receive alert notifications that are sent to nagiosadmin.
-
Click .
The changes are saved in the /etc/nagios/objects/contacts.cfg file. You can verify the new saved date for the file.
-
Click the icon in the toolbar to return to the Novell Remote Manager Configuration Options page, then restart Nagios.
-
Under , click .
-
When you are prompted to confirm the restart, click to proceed.

-
Wait while Nagios is restarted with the rcnagios restart utility.

When the restart is completed, Novell Remote Manager returns to the Configuration Options page.
-
Using the Nagios admins Contact Group
Nagios defines a default contact group admins and adds the contact nagiosadmin as a member of the group in the contactgroup section of the /etc/nagios/objects/contacts.cfg file.
If you create additional Nagios users and contacts, you can add them to the admins group. It is not necessary to create additional contact groups. However, Nagios also allows you to create other contact groups to make it easier to set up authorizations for Nagios users who have different roles.
IMPORTANT:Do not remove the default contact group admins from the /etc/nagios/objects/contacts.cfg file. Do not remove the Nagios contact nagiosadmin from the group admins.
You can set up contacts, contact groups, and members of contact groups in the configuration file on the Novell Remote Manager Configuration Options page (or in the /etc/nagios/objects/contacts.cfg file). You must restart Nagios to apply the changes.