3.11 Auditing Option (Overview)
This option provides reports on user activities.
Path: Retain Server ManagerAuditing
All pertinent actions performed by users in Retain are logged and can be discovered and printed. If Reporting and Monitoring is installed, four buttons are added to the following page, as shown below.
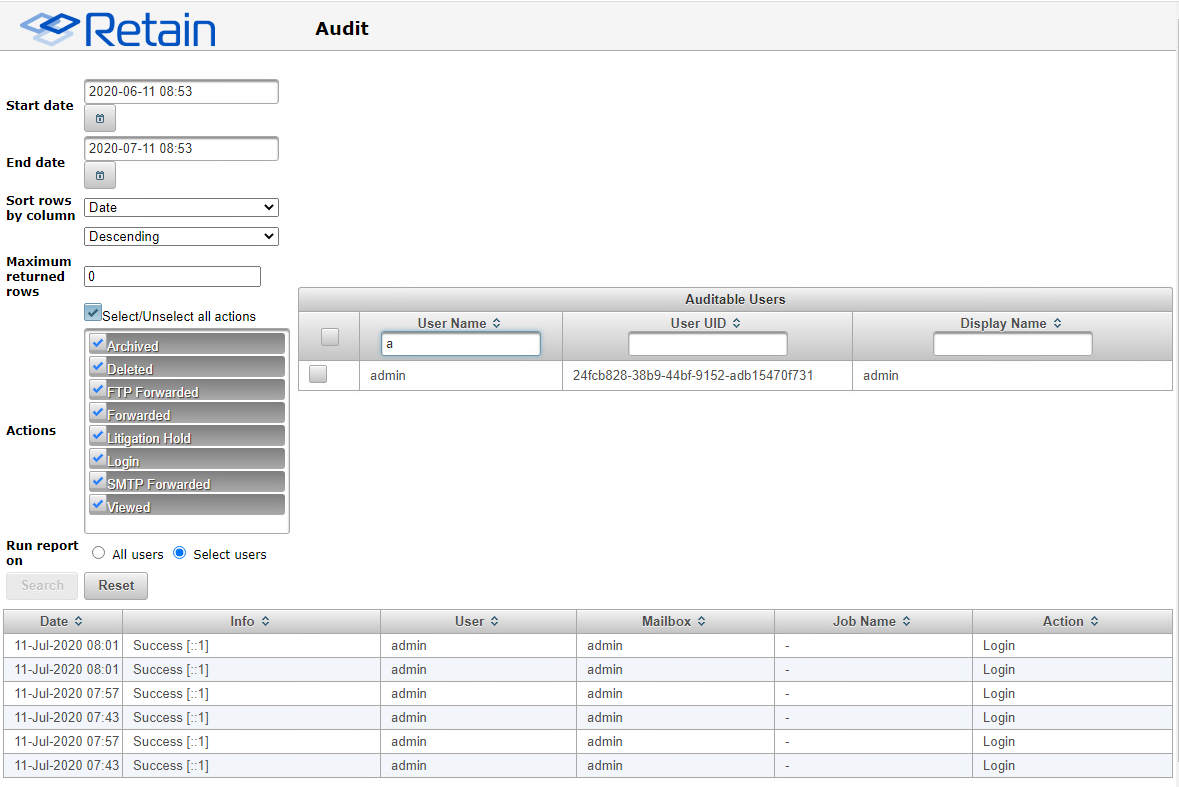
Figure 3-2 Audit Page without a Reporting and Monitoring Server Installed
The Audit dialog is also available through the Reporting and Monitoring Server admin console as shown in Figure 3-3 .
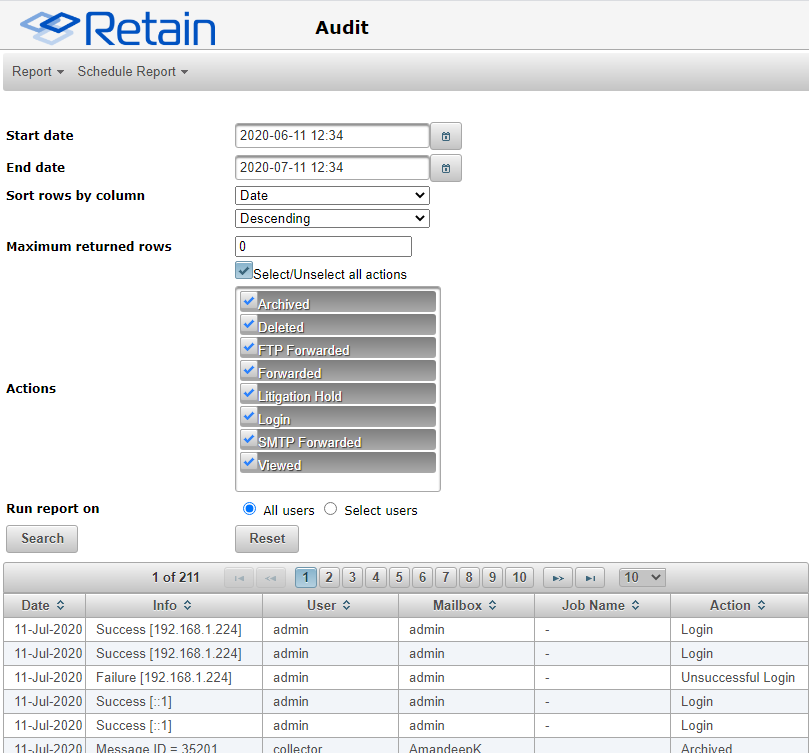
Figure 3-3 Audit Page with a Reporting and Monitoring Server Installed
-
Accessing the audit log requires the “Access all audit logs” administrative right.
-
Ordinary users cannot access their audit logs unless you grant the “View Personal Audit Log” right, in which case they can find the audit log on a per-message basis under the Properties tab.
To view actions, select the desired actions, one or all, a date range, and a user, one or all, and then click Search. The results are displayed in a table with sortable columns.
You can print the report by selecting and printing the result.
Auditors do not automatically have rights to READ messages in mailboxes that are not assigned to them.
The Export Audit Table sorts the entire Audit log with the settings desired and creates a report for specific users or all users, with specific events or all events. This report can be limited by size and date range.

Output formats for this report include: HTML, PDF, XLS, and CSV.
You can limit the report by size or by items. Enabling the option generates a complete report broken down into multiple files, each conforming to the limits set above the option.
If restricting the report to a specific user or users, a menu displaying ‘auditable users’ is displayed. The different fields are searchable. The option to select all, or none, is also present. Users may be searched for via User Name or email address, User UID, or the user Display Name.
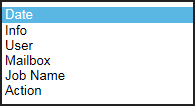
The rows and columns are not sortable in the generated report, but they can be sorted or organized from the report generation interface. The rows may be organized by the columns listed.
This has the exact same effect as organizing columns for the jobs on the reporting and monitoring home page. Configure as desired and then select ‘Generate’ to create the report.
To Schedule the report, select the ‘Schedule’ button from the top of the report to keep the settings.