Creating a NMAS Challenge Response Servlet
By Gordon Mathis and Susan Perrin
Introduction
This article shows how to create a simple Novell Modular Authentication Services (NMAS) Challenge Response servlet. The Challenge Response method is typically used when users forget their password, prompting the user with a series of pre-defined questions. If the correct response is given to each of the questions, the user is allowed to reset the password. The questions can be admin-defined or user-defined, and can be required or random, all at the control of the network administer.
Typically, the questions are defined using iManager, and users enter their responses to the questions the first time they authenticate to eDirectory using either a Novell Portal Services (NPS) Gadget or Virtual Office (VO). However, for the purpose of this how-to article, I will have you use a Java application that invokes the NMAS method management API's to set the challenges and responses. This will introduce you to a few of the method management API's and save you the trouble of having to install Virtual Office just to set the responses. Several developers have expressed an interest in using the Challenge Response method outside the framework NPS and VO. The Challenge Response method is included with the latest release of eDirectory 8.8 and it can be tested using the NPS, VO, Novell Client, or a custom application or servlet once the challenges and responses are set.
In addition to learning about the NMAS Challenge Response method I am going to have you use the latest release of eclipse (3.1.1SDK) and the WebTools Platform (WTP 0.7) plug-ins which makes developing and debugging a servlet very easy. I will have you download and import a working servlet from a WAR file, but you could also create a new Dynamic Web Project and create a new servlet within that project.
eDirectory
If you have not already installed Novell eDirectory 8.8 on your Linux system, you can download the latest version of eDirectory from Novell's download site and then follow the instructions below to complete the installation. Also note that the Challenge Response method is included with Linux Services (OES) just in case you already have OES installed.
- 1. Download eDir_88_Linux_full.tar.gz
- 2. Uncompress eDirectory
tar -zxvf eDir_88_Linux_full.tar.gz
- 3. Change directories to the install directory and install
       cd eDirectory/setup
       ./nds-install -c server
       /opt/novell/eDirectory/bin/ndsconfig new -t corp-tree -n o=novell -a cn=admin.o=novell
- 4. Install the NMAS Challenge Response method
    rpm -ivh eDirectory/nmas/NmasMethods/novell-nmas-methods.i386.rpm
    export LD_LIBRARY_PATH=/opt/novell/eDirectory/lib:/opt/novell/eDirectory/lib/nds-modules:/opt/novell/lib:$LD_LIBRARY_PATH
    cd /opt/novell/nmas/nmasmthd/ChallengeResponse
    /opt/novell/eDirectory/bin/nmasint -addmethod admin.novell corp-tree ./config.txt -h <ip address>
iManager
You need a way to administer eDirectory. iManager is the recommended utility for administering the directory. If you do not already have iManager installed, download the latest release of mobile iManager from http://download.novell.com
- 1.Download iMan_25_Mobile_iManager_linux.tar.bz2 or later.
- 2.Uncompress iManager in the users home directory
tar -xvf iMan_25_Mobile_iManager_linux.tar.bz2
- 3.Execute iManager
       cd ~/imanager/bin
       ./imanager.sh
- 4.Enter user credential
       Username: admin
       Password: <admin password>
       Tree: <IP Address>
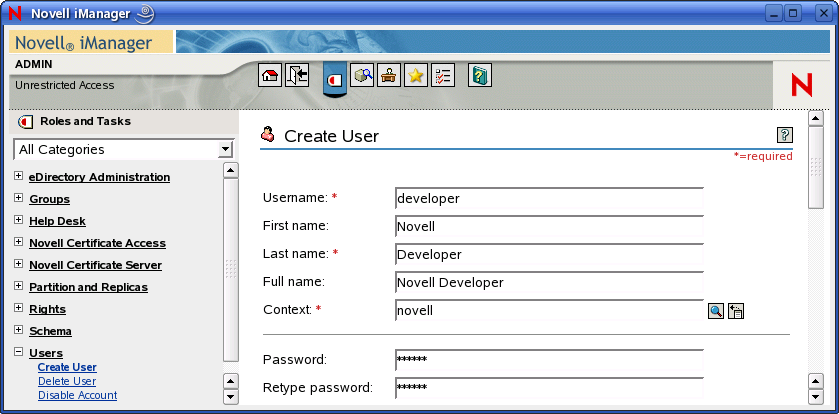
From the Users role, select Create User and create a new user in the novell container.
All NMAS management APIs require you to establish an SSL connection with the server. To do this, it is necessary to export the servers Trusted Root certificate.
- 1.Select the Configure icon from the top menu of iManager
- 2.Expand the Module Installation role and select Available Novell Plug-in Modules
- 3.Check the pki.npm checkbox and click the install link (takes several seconds to install)
- 4.Restart iManager from the command line.
- 5.Select the Modify Object task under eDirectory Administration.
- 6.Browse and select the SSL CertificateDNS - linux.novell object.
- 7.Select Trusted Root certificate from the combo box and click the Export button.
- 8.Select No to export the private key and click the Next button.
- 9.Click the Next button to accept the default of a binary DER format file.
- 10.Click the Save the exported certificate to a file link to save the file to disk (shorten the name to just linux.der).
- 11.Create a certs directory in your user's home directory.
mkdir ~/certs
- 12.Add the Trusted Root Certificate to a Sun Keystore.
java sun.security.tools.KeyTool -import -alias TrustedCert -file linux.der -keystore ~/certs/sslkey.keystore
NMAS NDK
Download and install the latest NMAS NDK from NDK Website To install the NDK
rpm -ivh novell-nmas3.1-devel-2005.10.05-1cross_platform.rpm
Set the Challenge and Response questions
Download the SetChallengeResponse.jar file from Challenge Response Servlet. The source code is included in the jar file and currently all the questions are stored as admin defined, and required.
Create a text file (i.e. questions.txt) with the following format:
         What is your mother's maiden name? Smith
         What is your employee id? 12345
         What is your user name? developer
Make sure you include the ? character because it is used as the delimiter. Execute the SetChallengeResponse.jar with following command
     java -Djavax.net.ssl.trustStore=/home/developer/certs/sslkey.keystore
     -classpath.:/opt/novell/ndk/nmas_2005.10.05/nmas_mgmt_sdk/ldap/java_mgmt_sdk/NMASToolkit.jar:SetChallengeResponse.jar
     com/novell/SetChallengeResponse <ip address> 636 cn=admin,o=novell
     novell cn=developer,o=novell questions.txt
Apache Tomcat
Because Apache Tomcat 5.x was packaged to run on J2SE 5.0 or later use the YaST utility to install JDK 1.5 (java_1_5_0-sun-devel).
Download and install the latest release of Apache Tomcat from Apache Org. Do not use the version distributed with YaST since it currently does not work with the eclipse 3.1.1 SDK. Simply extract Tomcat to your user's home directory.
tar -zxvf apache-tomcat-5.5.12.tar.gz
Eclipse
Download and install the latest release of Eclipse Web Tools Platform (WTP) from Eclipse website. There is all-in-one package that includes the eclipse 3.1.1 SDK and the WTP 0.7 plug-ins. Extract eclipse to your user's home directory.
tar -zxvf wtp-all-in-one-0.7-linux-gtk.tar.gz
Download the ChallengeResponse.war file from Challenge Response Servlet. Once again this source code is included in the war file.
Configuration
Execute eclipse and select the Window->Preferences from the main menu. Expand the General section and select Web Browser and select the Use external Web browser radio button. Next expand Java->Editor section and select the Installed JREs and make sure you have a JDK selected and not just a JRE (Its OK to have both). Next expand the Server section and select the Installed Runtimes and click the Add button to add the Tomcat 5.5 server.

Scroll down and select the Apache Tomcat v5.5 runtime server and click the Finish button.

Enter the Tomcat installation directory and specify the JRE. Ensure that there are no errors in the message box at the top of the window. Click the Finish button to save the settings.

Select Window->Open Perspective->Other and select J2EE to open the J2EE perspective.
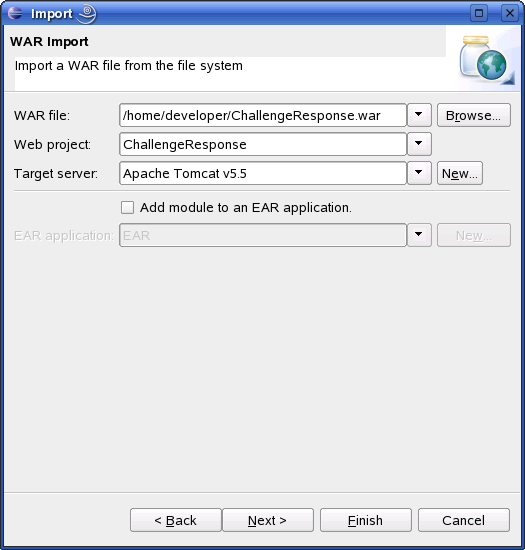
From the Project Explorer with the J2EE perspective selected right click on the Dynamic Web Projects folder, and select Import. From the Import window select the WAR File option and click the Next button. Browse and select the ChallengeResponse.war file and click the Finish button.
The imported project should include the following. It may be necessary to select Project->clean from the main menu.

Execution
To execute this sample make sure the Tomcat is not running and then right click on the CRTest.html and select either Run As->Run on Server or Debug As->Debug on Server if you want to set break points and debug the code. Both of these options will start an instance of the Tomcat server and then launch a browser.
At the Debug on Server screen you will select the server type and you may want to check the Set server as project default checkbox so that it doesn't keep prompting for the server type and then click the Finish button.

Enter the user's credentials. Optionally you can do a server side ssl bind by checking the sll checkbox and changing the port to 636 and setting the location of the Java KeyStore.
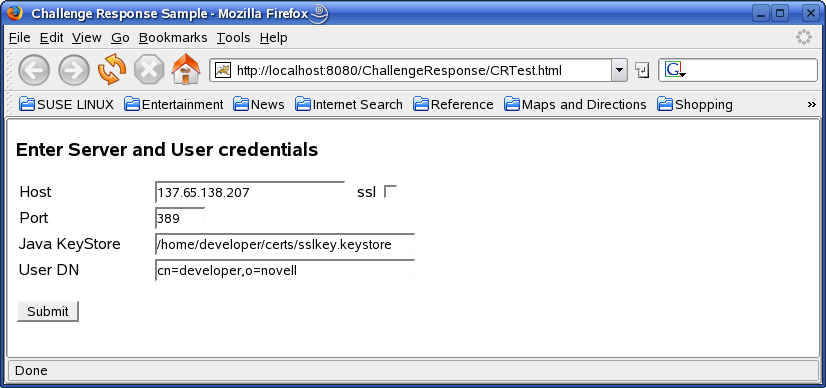
Enter the responses to the challenge questions and click the Submit button.

If you gave the correct response to each of the challenge questions you will see the following output. Click the OK button to repeat the process.
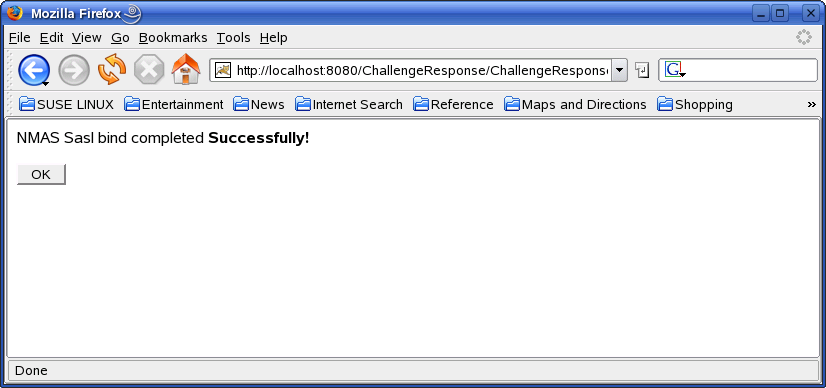
This is a simple example of how to call the servlet from a HTML or JSP file. However, because the doGet method produces the same HTML as the CRTest.html it is possible to just start the Server running and access the servlet directly by browsing to http://<ip address>:8080/ChallengeResponse/ChallengeResponseServlet which gives the same results.
As you review the source code you will notice that the bulk of this NMAS method like many other methods is in the callback function. We start an LDAP bind, but rely on the callback handler to prompt for user input and complete the connection. In the doPost we get the challenge questions form the Login Server Module (LSM) and prompt the user for the responses. The servlet makes those responses available to the LSM in the form of an HttpServletRequest, at which point the LSM decides rather or not the user is authenticated.
Review the source code and make any desired changes, and then right click on the ChallengeReponse project and export it to a WAR file. Put the .war file in the apache-tomcat-5.5.12/webapps directory. Start Tomcat (apache-tomcat-5.5.12/bin/startup.sh) and it will automatically install your application from the war file at which point you can access it from a browser.
Conclusion
This is a very simple, but useful example of Dynamic Web application. Because we launched Tomcat from within eclipse you are able to set break points in the servlet and debug the server side code. At this point you could either integrate this sample with your own project or enhance this project to meet your specific needs.