23.5 Configuring GroupWise to Support Your Teaming Installation
Novell Teaming requires an integrated e-mail system in order for the Teaming site and the GroupWise system to exchange messages.
23.5.1 Configuring Outgoing E-Mail from Teaming to GroupWise
During installation, you set up outgoing E-Mail in the Outbound E-Mail Configuration window of the Teaming installer. If you need to change the outbound e-mail configuration after installation, you need to use the Liferay Enterprise Admin portlet and the Teaming Administration portlet on the Teaming site. Also after installation, you need to create the GroupWise user that you configured to send outgoing mail from the Teaming site.
Adding Portlets for Outgoing E-Mail Setup
You configure LDAP using the Liferay Enterprise Admin portlet and the Teaming Administration portlet. If you have not already added these portlets to your Teaming home page, do so now.
-
Click .
-
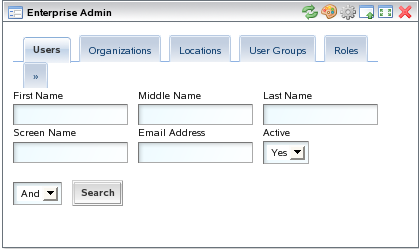
Click , then click beside Enterprise Admin to add the Liferay Enterprise Admin portlet to your Teaming home page.
-
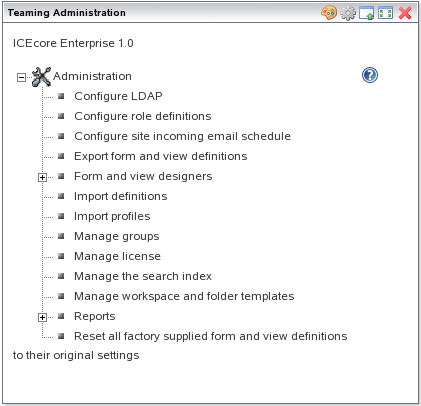
Click , then click beside Teaming Administration to add the Novell Teaming Administration portlet to your Teaming home page.
-
If necessary, close the Add Content window.
When you add the Novell Teaming Administration portlet, the window closes automatically. When you add the Liferay Enterprise Admin portlet, the window remains open so you can add more Liferay portlets.
Configuring Outgoing E-Mail from Novell Teaming to GroupWise Users
Outgoing e-mail from your Teaming site consists of automated notifications of changes in your Teaming site’s content and messages from Teaming site users sent to GroupWise mailboxes.
Your Novell Teaming system needs an administrator e-mail account that is responsible for sending notifications from Teaming folders and e-mail messages from Teaming site users to GroupWise mailboxes. During installation, you specified this account in the Outbound E-Mail Configuration window in the Teaming installer. You use ConsoleOne to create the Teaming administrator account in GroupWise.
-
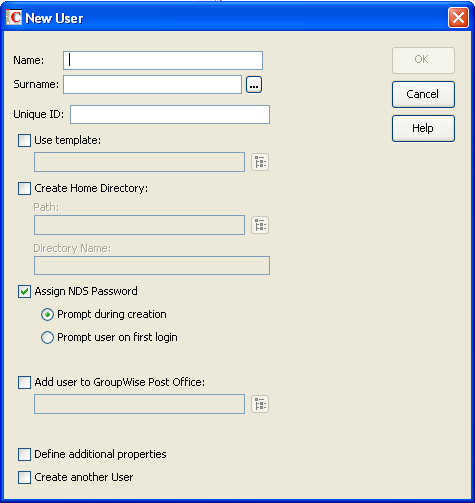
In ConsoleOne, browse to and right-click the container where you want to create the Teaming administrator User object, then click .
-
In the field, specify the GroupWise username for the Teaming administrator user (for example, TeamingAdmin).
-
Provide a surname for the new user.
The field is filled in to match the field by default.
-
Assign a password to the eDirectory account.
-
Add the Teaming administrator user to a GroupWise post office.
-
Select , if desired, then click to create the Teaming administrator user.
23.5.2 Configuring Incoming E-Mail from GroupWise Users to the Novell Teaming Site
Incoming e-mail to your Teaming site consists of postings that GroupWise users make to the Teaming site by sending e-mail messages rather than by logging into the Teaming site. Postings can consist of contributions to discussion groups, wikis, or blogs, files for sharing with the team, calendar items, and so on. You should already have created at least one workspace by following the instructions in Create Your Initial Workspaces
in Configuring Novell Teaming
in the Novell Teaming 1.0 Administration Guide.
Enabling Incoming E-Mail
Incoming e-mail is enabled in the Inbound E-Mail Configuration windows in the Teaming installer. This window is available when you perform an Advanced installation.
To enable incoming e-mail after installation:
-
As the Teaming Site Manager user (username admin), display the Teaming site Home page.
-
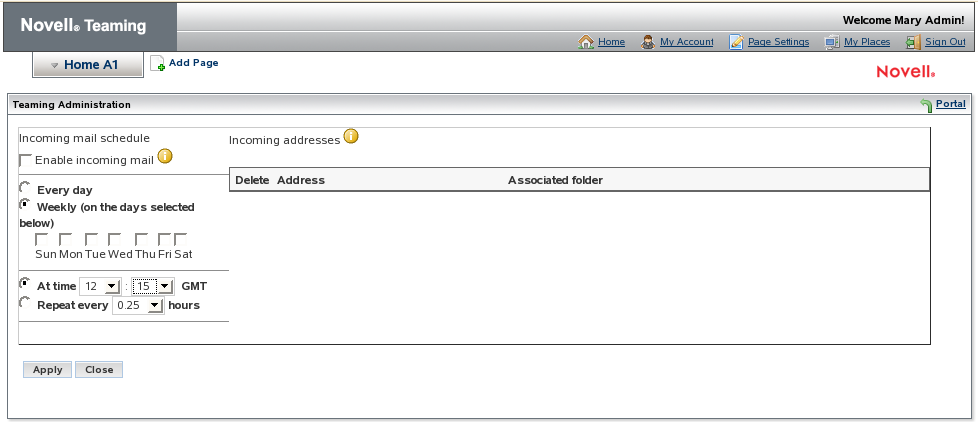
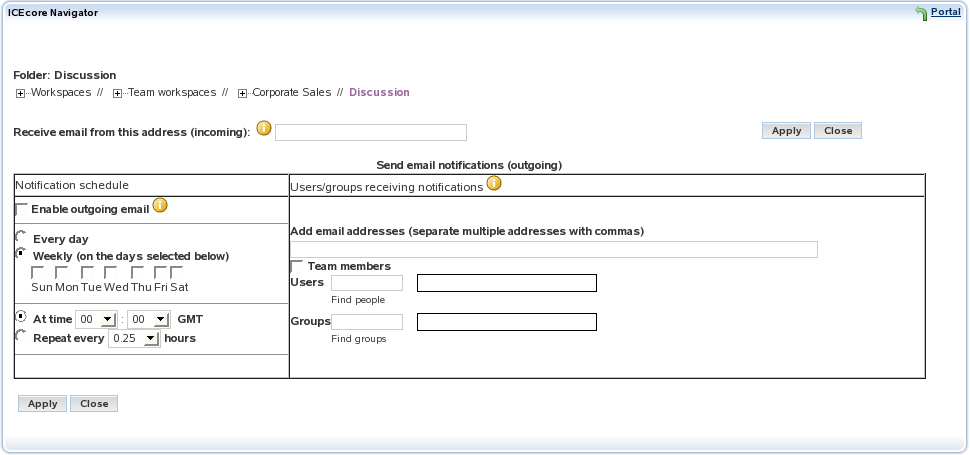
In the Novell Teaming Administration portlet, click .
-
Select .
-
Select .
or
Select , then select the days of the week when you want the Teaming SMTP server to check for incoming mail.
-
Select .
-
Leave the default of 0.25 hours.
This configures the Teaming SMTP server to check the GroupWise Teaming mailbox for incoming messages every 15 minutes. You can adjust this schedule as necessary to meet the needs of your Teaming site.
-
to save you incoming e-mail settings.
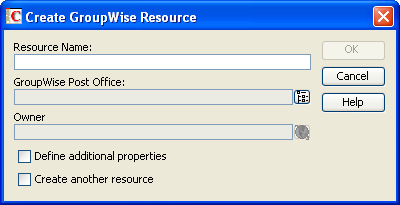
Creating GroupWise Resources for Teaming Folders
In order for GroupWise users to post items to Teaming folders, each folder needs a unique e-mail address. This is accomplished by creating a GroupWise resource that corresponds to each folder where e-mail posting is needed. For example, if a sales team has a Discussion folder, you could create a resource named salesdisc. Then, when sales people want to post items to the Discussion folder, they can mail a posting to an e-mail address similar to salesdisc@corporate.net. The message is delivered to the resource mailbox, where it is picked up by the Teaming SMTP server for posting in the designated folder on the Teaming site.
-
In ConsoleOne, browse to and right-click the container object where the Teaming administrator User object is located, then click .
-
Specify the name for the resource.
-
Select the post office that the Teaming administrator user belongs to.
-
Select the Teaming administrator user as the resource owner.
-
Click .
-
Repeat Step 1 through Step 5 as needed to create resources for all Teaming folders where postings from GroupWise are needed.
Creating a Distribution List for GroupWise Resources
For convenience in creating an Internet Agent class of service specifically for Teaming resources, you need to create a distribution list that includes all the resources that correspond to Teaming folders.
-
In ConsoleOne, browse to and right-click the container object where the Teaming administrator User object is located, then click .

-
Specify the name for the distribution list (for example, TeamingResources).
-
Select the post office that the Teaming administrator user belongs to.
-
Select , then click OK.
-
On the Distribution List object Identification page, click , then click .
-
Select to filter the list by resources,

-
Select the resources you have created for use with Teaming, then click .
-
Click again to add the listed resources to the distribution list.
Setting Passwords for GroupWise Resources
Because the Teaming administrator user owns all the resources that correspond to Teaming folders, the Teaming administrator can proxy into the resource mailboxes to set passwords.
-
Start the GroupWise Windows client as the Teaming administrator user.
-
Double-click the GroupWise icon on your desktop.
-
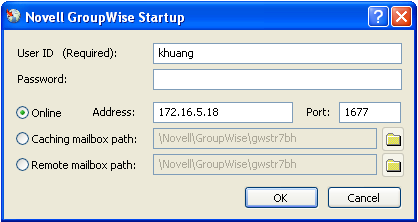
When prompted for your personal GroupWise password, click to display the Novell GroupWise Startup dialog box.
-
Replace your username with the username of the Teaming administrator user.
-
Specify the administrator user’s password.
-
Select , then specify the IP address and TCP port of the administrator user’s POA.
-
Click to log in to the administrator user’s mailbox.
-
-
In the upper left corner of the GroupWise client window, click .
-
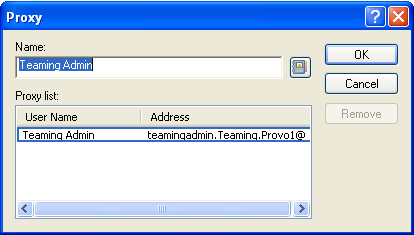
Click the icon, then select the Novell GroupWise Address Book.
-
In the field, start typing the name of the resource until it is highlighted in the Address List, then click to proxy into the resource mailbox.
This also adds the resource to your proxy list, so that the next time you need to proxy into this resource, you can simply click .
-
In the resource mailbox, click .
Use the same password for the resource mailbox that you used for the Teaming administrator user’s mailbox.
-
Type the password twice for verification, then click .
-
In the upper left corner of the GroupWise client window, click , then select your username to return to your own mailbox.
-
Repeat Step 2 through Step 7 for each resource you have created.
Associating a Resource with a Novell Teaming Folder
Each Teaming folder that can receive postings by way of e-mail must be configured with its resource e-mail address.
-
Log in to your Teaming site as the Teaming Site Manager user (by default, username admin, password admin).
-
Browse to and open the folder that you want to associate with a resource.
-
Click , then click .
-
In the field:
-
Specify the e-mail address of the resource (for example, salesdisc@corporate.net).
-
In the field, specify the resource password.
-
Click.
-
-
Select if you want users to be able to subscribe to notifications for this folder, then click .
If desired, you can set up a unique outgoing notification schedule for this folder as well.
-
Repeat Step 2 through Step 5 for each Teaming folder that you want GroupWise users to be able to post to by way of e-mail.
-
When you are finished adding resource e-mail addresses to folders, return to the Teaming home page.
-
In the Teaming Administration portlet, click .
The e-mail addresses for the resources that you have provided on folders have been added to the Incoming Addresses list.

-
For each e-mail address, click , specify the password for the e-mail account, then click .
-
When all the e-mail addresses have passwords associated with them, return to the Teaming home page.
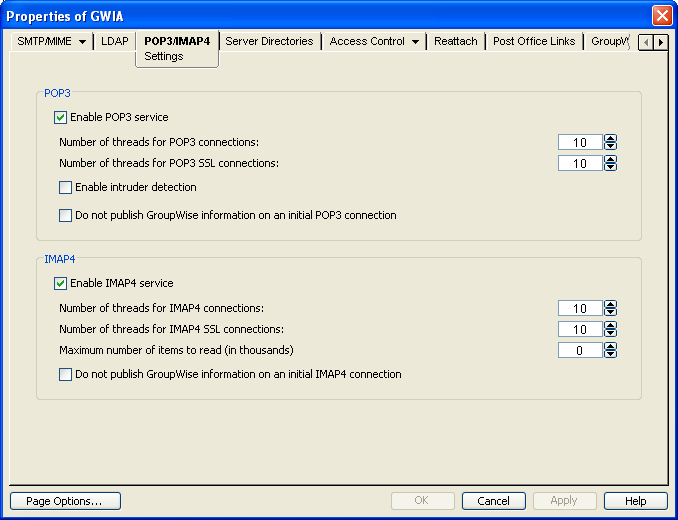
Configuring the GroupWise Internet Agent for POP or IMAP
By default, the GroupWise Internet Agent is configured for both POP and IMAP. Whether your Teaming site uses POP or IMAP is determined by your selection in the Inbound E-Mail Configuration window when you ran the Teaming installer.
To verify that the Internet Agent is properly configured:
-
In ConsoleOne, browse to and select the Domain object where the Internet Agent object is located, right-click the Internet Agent object, then click .
-
Click .
-
Make sure that either POP or IMAP is enabled, to match the configuration you provided in the Inbound E-Mail Configuration window when you ran the Teaming installer.
-
If necessary, adjust the POP or IMAP settings as needed for your Internet Agent.
For more information, see
Configuring POP3/IMAP4 Services
inInternet Agent
in the GroupWise 7 Administration Guide. -
If you are using POP, create a new class of service specifically for interacting with the Teaming site:
-
Click , then click .

-
Specify a name for the new class of service, such as Teaming Site, then click .

-
On the tab, select .
-
On the tab, select .
-
On the tab, select , select , then click .

-
Select the distribution list of Teaming resources, then click to add the new class of service.
-
-
Click to save the settings.
23.5.3 Testing GroupWise Integration with Novell Teaming
After you have configured outgoing and incoming e-mail, you are ready to test your e-mail integration.
Testing Outgoing E-Mail from Your Teaming Site
To verify that e-mail is successfully delivered from the Teaming site to the GroupWise system:
-
Log in as yourself to the Teaming site.
-
Browse to and open a Teaming folder where you are a member of the team.
-
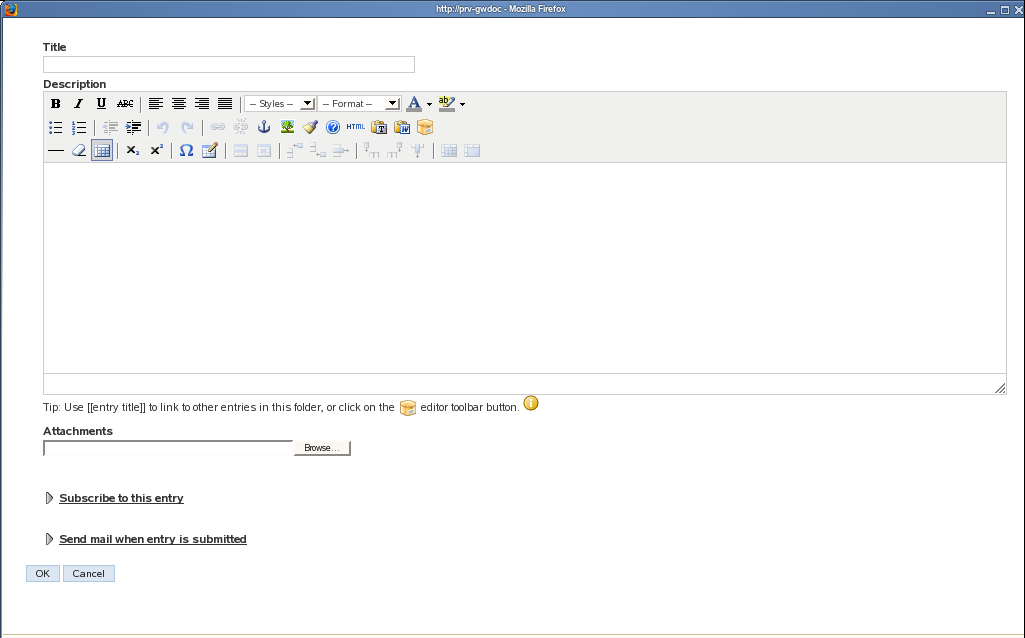
Click , then add a new entry to the folder.
-
Fill in the and fields to create a test posting, then click .
-
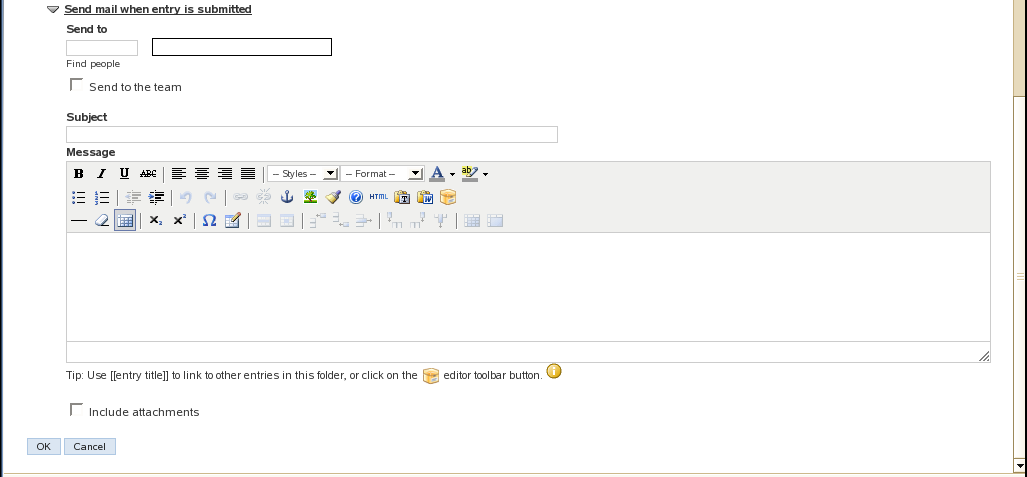
Select .
-
Fill in the and fields to create a test notification message, then click .
-
Check your GroupWise mailbox to see if you received the notification of the new posting.
-
Check with other members of the team, especially remote team members, to verify that they also received the notification.
-
Open the message, then click the link to verify that it opens the page of the Teaming site from which the notification was sent.
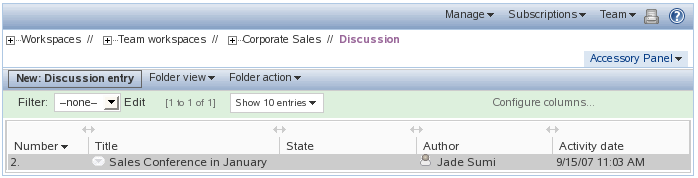
Testing an Incoming Posting to Your Teaming Site
To verify that e-mail is successfully delivered from the GroupWise system to the Teaming site:
-
In the GroupWise client, send a message to one of the nickname addresses you created in Associating a Resource with a Novell Teaming Folder.
-
Open that folder on the Teaming site and see if your message has been posted.