2.1 Running the Installer
IMPORTANT:If you are installing Novell Teaming for use with eDirectory and GroupWise, see Installing Novell Teaming with GroupWise
in Novell Teaming and Conferencing
in the GroupWise 7 Interoperability Guide for more information.
If you are doing an upgrade, use your existing license-key.xml and installer.xml files by placing them in the same directory as the installer program (the unzipped Novell Teaming kit). If you are doing a new installation, use your license-key.xml by placing it in the same directory as the installer program. The license-key.xml file required to install the product is provided with the software kit (but is not included in the kit).
NOTE:You can edit the installer.xml file directly and run the installer’s Reconfigure option to reconfigure Novell Teaming. See Section A.0, A Sample installer.xml File.
-
Run the installer (on Linux, do a chmod +x installer-liferay.linux to make the installer executable).
The installer is one of the following files, depending on your operating system:
-
installer-liferay.exe
-
installer-liferay.linux
NOTE:On Linux, you can run a console-based version of the installer (with all of the same options as the GUI-based installer) by using the following command:
installer-liferay.linux -console
-
-
In the window, select the procedure you want to perform, then click :
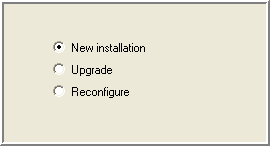
New installation: Use this option to perform an initial installation of Novell Teaming. The rest of this procedure walks you through an advanced initial installation to show you all the available options.
Upgrade: Use this option to perform an upgrade of an existing Novell Teaming application.
Reconfigure: Use this option to reconfigure an existing Novell Teaming application.
-
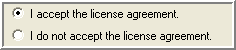
Read the license agreement, selectto indicate your acceptance of the agreement, then click .
-
In the window, select the type of installation you want to perform, then click .
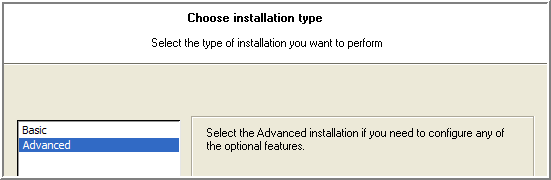
Basic: Use this option to configure only required Teaming features.
-
Installation location
-
User ID and/or groupID (Linux only)
-
Database selection
-
Java JDK information
-
Outbound e-mail configuration
Advanced: Use this option if you want to configure any of the following optional features:
-
Liferay data location
-
Network information
-
Lucene configuration
-
RSS configuration
-
Inbound e-mail configuration
-
Presence configuration
-
iChain configuration
-
Mirrored folder configuration
-
-
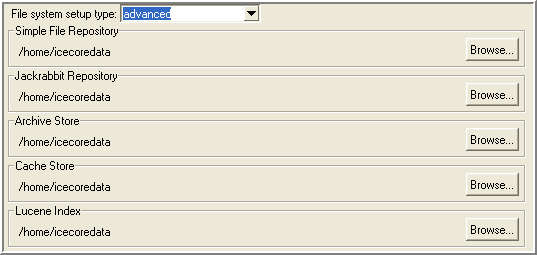
In the window:

-
Use the associated buttons to change the default location for the installation or file system:
-
If you need to change the locations of any of the file system components, select from the drop-down list to activate the buttons for these components, make the necessary changes.
-
Click .
-
-
In the window, if you need to change the default for this data, click and select a new location, then click .

-
(Linux only) In the window, specify the Linux user ID and/or group ID that you want Novell Teaming to run as, then click .
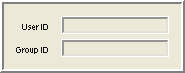
The Linux user ID and group ID must already exist. Preferably specify a user other than root.
-
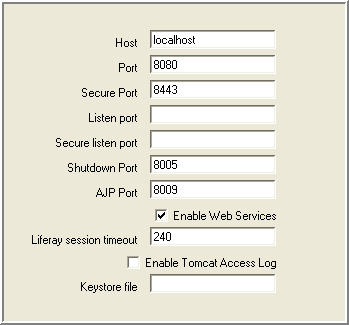
(Advanced installation only) In the window, specify the network values for how you want Novell Teaming to appear on the network. See Network Planning.
-
In the window:
-
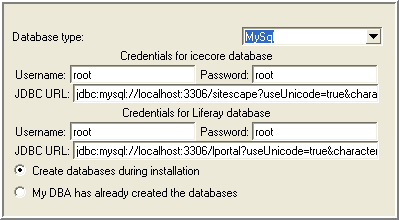
Select the database from the drop-down list.
The database server you select must already be installed.
-
Enter your , , and for the ICEcore™ and Liferay databases.
-
Select whether or not to create the databases during install.
-
If your DBA created the databases by hand (required for Oracle), select . For more information, see Database Planning.
-
Click .
-
-
In the window:

-
If the directory location is not detected automatically, click , then select the location
-
If you require more than the default 1 G (use a small “g” with no spaces), specify the value.
-
Click .
-
-
In the window:
-
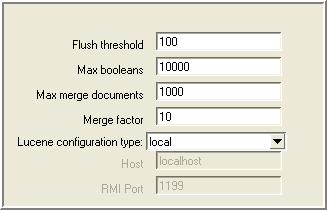
Edit the fields to configure the Lucene index.
-
To run the Lucene index as a server, select from the drop-down list, specify the , and edit value if the default port cannot be used.
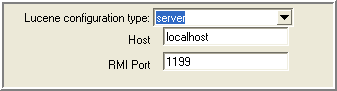
You can run Lucene as a server from the same system as Novell Teaming or from a remote system. You need to install the Standalone Lucene Index Server before running Novell Teaming. See Installing a Standalone Lucene Index Server.
-
Click .
-
-
(Advanced installation only) In the window, edit the fields to configure the Novell Teaming RSS feeds, or deselect the option to disable RSS feeds, then click .
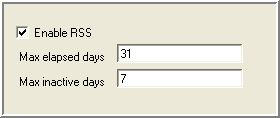
Because RSS readers are outside of the authentication system, the URL provided by Novell Teaming for an RSS feed embeds some authentication information about the user. This means that the RSS URL must be protected and not shared between users.
For this reason, RSS is not recommended for use on highly sensitive data.
-
In the window, edit the fields to configure your outbound e-mail settings, then click .
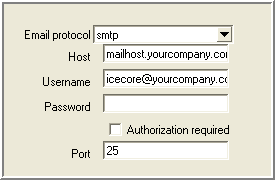
Outbound configuration requires the basic information for generating SMTP mail messages: server, port, and optional authentication information.
The field is the address used for any e-mail notifications generated by the system. This name is also used for authenticated access to the SMTP server. To support e-mail sent by users, either the Novell Teaming server or the authenticated user must be authorized to use different addresses.
For more information, see
Mail Setup
inConfiguring Novell Teaming
in the Novell Teaming 1.0 Administration Guide. -
(Advanced installation only) In the window, edit the following fields to configure your inbound e-mail settings, then click .
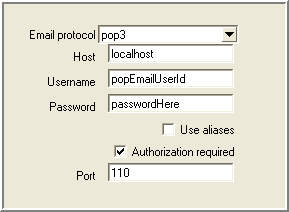
For inbound mail (postings) you need to specify either or ( or for SSL connections to mail servers) from the drop-down list. These settings are not used until you enable incoming e-mail in Novell Teaming.
Novell Teaming posting uses real or alias e-mail addresses in your folders, according to whether you select the option:
-
When you use aliases for posting, the system accesses a single e-mail account (posting account). Novell Teaming routes e-mail from this account to individual folders based on unique e-mail addresses (aliases) that are assigned to individual folders and mapped to the posting account.
-
When you use real e-mail addresses for each folder, you need to create multiple posting accounts by using your normal e-mail system management tools. Each posting e-mail address is used for a single folder.
Create the posting accounts by using your normal e-mail system management tools. Novell Teaming needs a host, port, e-mail account ID, and password for the posting feature to work.
For more information, see
Configuring Incoming E-Mail from GroupWise Users to the Novell Teaming Site
inNovell Teaming and Conferencing
in the GroupWise 7 Interoperability Guide. -
-
(Advanced installation only) In the window, select the option to link your Novell Teaming and Conferencing servers together, then click .
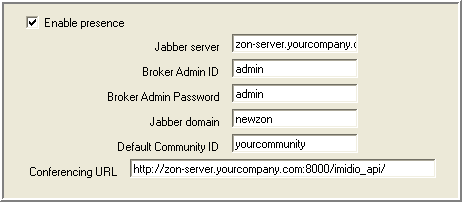
You need to obtain the values for the following fields from an installed and configured Conferencing server. If you do not know these values now, you can run the installer’s option to add this information later.
-
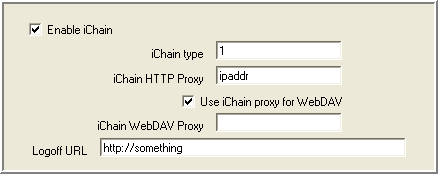
(Advanced installation only) In the window:
-
Select to use the iChain® Single Sign-on Support (SSO).
-
Set the to the address used to trigger an iChain logoff, set the IP address of the iChain Proxy server.
Only transactions from that address and the localhost are allowed. For more information, see Integrating with iChain.
-
Set the WebDAV support options:
-
To use a two-accelerator configuration for WebDAV support, select theoption and specify the iChain WebDAV accelerator in the field during installation.
-
If you do not use a a two-accelerator configuration for WebDAV support, you must use basic authorization headers to support WebDAV. With basic authorization headers, the WebDAV URLs are made public with iChain and the authentication work is delegated to Novell Teaming, which stores the passwords locally so that the Teaming WebDAV server can use them for WebDAV client authentication. In this case, the value of field in the installer is ignored and Novell Teaming does not perform hostname re-writes for the WebDAV URLs.
For more information, see Running the Installer.
-
-
Click .
-
-
(Advanced installation only) In the window, configure as many as three mirrored folders, then click .
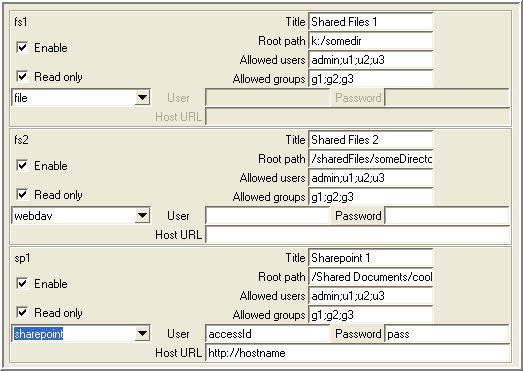
Mirrored folders are local/shared directories that are exposed within Novell Teaming. You must configure the directories here before they are available in Novell Teaming. For security reasons, the set of people who can map Novell Teaming folders to these shared directories should be limited.
There are three mirrored folder types:
-
file: For normal file systems
-
webdav: For WebDAV servers that support basic authentication
-
sharepoint: For Microsoft SharePoint WebDAV access
A mirrored folder uses a server file system directory as its file storage area instead of the normal Novell Teaming repository. Typically, the directory is a file share, accessed via normal file sharing mechanisms. Novell Teaming attempts to keep its knowledge about the folder contents in sync with whatever is in the directory.
Because of the way mirrored folders are configured, they are intended to bring common (relatively static) file shares into the Novell Teaming environment. They are not appropriate for individual file shares. You can use Novell Teaming to add additional metadata around these files, including Novell Teaming-specific access controls.
The fields in the window specify the mirrored folder resource drivers. These drivers then make the files in the specified directory available to the Novell Teaming folders. It is important to note that the Novell Teaming process accesses the directories and that the user ID for Novell Teaming acts as a proxy for all Novell Teaming users.
If you need more than three mirrored folders, you need to edit the installer.xml file directly and run the installer’s option. For more information, see
Configuring Mirrored Folders
inConfiguring Novell Teaming
in the Novell Teaming 1.0 Administration Guide. -
-
In the window, click to begin the installation or use to review the current configuration of the installer.