3.5 Managing Received Items
GroupWise stores all the mail messages, appointments, and other items you receive in your Mailbox.
From your Mailbox, you can read items, reply to items, and forward items you’ve received. You can organize items by creating a checklist. You can delegate tasks and appointments to other users. You can handle unwanted Internet e-mail with Junk Mail Handling. You can even change an item, such as a mail message, to another type of item, such as an appointment.
This section contains the following topics:
3.5.1 Reading Items You Receive
You can read items you receive in your Mailbox or Calendar. Your Mailbox displays a list of all of the items you have received from other users. Posted appointments, tasks, and reminder notes appear in your Calendar, not in your Mailbox.
You can open and read all types of new items in your Mailbox. However, you might want to read tasks and reminder notes in your Calendar so you can view new messages while looking at your schedule.
Phone and mail messages stay in your Mailbox until you delete them. Appointments, reminder notes, and tasks stay in your Mailbox until you accept, decline, or delete them. When you accept an appointment, reminder note, or task, it is moved to your Calendar.
All Mailbox items are marked with an icon.The icons change depending on whether or not the item has been opened. See Icons Appearing Next to Items in Your Mailbox and Calendar for more information.
In addition, all unopened items in your Mailbox are bolded to help you easily identify which items and documents you have not yet read.
This section contains the following topics:
Reading Items in Your Mailbox
To read an item:
-
Double-click the item you want to read.
To change the font on an item you are reading:
-
click > , then select the font, font style, and font size.
-
Click to apply the changes.
Reading HTML Items
For information about reading items that were composed in HTML, see Viewing and Composing Items in HTML.
Reading Items in the QuickViewer
Use QuickViewer to scan the contents of your items. QuickViewer saves time because you don’t need to open each item; you simply click an item or press the Down-arrow to read your items. If you click a document reference, the document displays in QuickViewer. You can display an item’s attachment by clicking the attachment in the drop-down list on the QuickViewer toolbar. OLE attachments, however, do not display in QuickViewer.
When you read an item in QuickViewer, the icon changes to the opened status. For example, the closed envelope representing a mail message changes to an opened envelope.
You can specify that some folders show QuickViewer every time you open them, while others never show QuickViewer.
-
Click
 on the toolbar.
-
Select whether to turn QuickViewer on in all folders or just the selected folder, then click .
-
Size QuickViewer by dragging a corner of the window or by dragging the horizontal dividing line up or down.
If you size and close QuickViewer, it is the same size when you open it again. Size it by dragging a corner of the window, not by clicking the maximize button.
-
In the Mailbox, click each item that you want to read.
To view an attachment, click the drop-down list on the QuickViewer header, then click the attachment. You cannot open OLE attachments in QuickViewer.
Right-click the QuickViewer window to choose other options.
-
To change how information displays in the header, right-click the header and choose options.
-
To close QuickViewer, click
on the toolbar.
Marking an Item Unread
If you open an item to read it, and then decide you want to read the item later, you can mark the item unread. Marking the item unread changes the item to bold and changes the item’s icon to unopened so you know you still need to read the item.
-
In the Main Window, click the item in the Item List.
-
Click > .
Marking an item you have opened unread does not change the status of the item in Properties. For example, if you have opened an item, then marked the item unread, the sender of the item still sees the item status as Opened in the Properties window.
3.5.2 Replying to Items You Receive
Use Reply to respond to an item. You can reply to everyone who received the original item or to the sender only, without needing to create and address a new message. You can also include a copy of the original message in your reply. Your reply will include Re: preceding the original subject text. You can modify the subject text if you want.
Replying to an Item
-
Open the item you want to reply to.
-
Click on the toolbar.
-
Click r.
or
Click .
To include the message text in your reply, make sure is selected.
-
Click .
-
Type your message, then click on the toolbar.
If the original item included BC or CC recipients and you selected to reply to all, your reply is sent to the CC recipients but not to the BC recipients.
Replying to an Item in a Shared Folder
-
Open or select an item in the shared folder.
-
Click on the toolbar.
-
Click a reply option.
You can reply to the original discussion topic, rather than to the item you are reading. Or, you can reply to any item you are reading, whether it’s an original discussion topic or someone else’s reply. In both cases, these replies are posted in the shared folder and not sent to individuals.
If you reply privately to the individual who wrote the item, your reply is not posted to the shared folder.
-
Click .
-
Type your reply, then click on the toolbar.
3.5.3 Forwarding Items to Other Users
Use Forward to send items you receive and document references to other users. When you forward an item, it is sent as an attachment to a mail message. The mail message includes your name and any additional comments you have made.
-
Open the item you want to forward.
-
Click on the toolbar.
or
Click > .
-
Add the names of the users to whom you want to forward the item.
-
(Optional) Type a message.
-
Click on the toolbar.
If you can’t accept an appointment, task, or reminder note, you can delegate the item instead of forwarding it. Delegating places a Delegated status in the item’s Properties window, letting the sender know you have transferred responsibility for the item to another person.
3.5.4 Creating a Checklist
Use the Checklist folder to create a task list. You can move any items (mail messages, phone messages, reminder notes, tasks, or appointments) to this folder and arrange them in the order you want. Each item is marked with a check box so that you can check off items as you complete them.
You can also make other folders work the way the Checklist folder does.
The Checklist folder is a system folder. It replaces the Task List folder. For a comparison of the Checklist folder and the Task List folder, see Checklist Folder under Folder List.
IMPORTANT:If you or your system administrator has set up auto-archiving of items in your Mailbox, checklist items are archived based on the original date you received the item, not based on the due date you assigned.
This section contains the following topics:
Creating a Master Checklist in the Checklist Folder
-
Drag items to the Checklist folder
 .
.
In the Checklist folder, items display next to a check box. When you complete an item in the checklist, you can mark it complete by selecting the check box.
You can move items to the Checklist folder from a shared folder only if you are the owner of the shared folder.
-
To arrange the items in the order you want, drag them to the position you want, or click them, then click the toolbar buttons
 ,
,
 ,
,
 , and
, and
 .
.
You can also create a checklist area in another folder and drag items to the area. After items are in a checklist area of any folder, they will also display in the master Checklist folder, even though they are still located in the original folder.
Creating a New Item in the Checklist Folder
-
Click the Checklist folder.
-
If no items exist in the Checklist folder, click the down-arrow on the
 icon, then click
.
icon, then click
.
Type a subject and message, then click on the toolbar.
Moving an Item to the Checklist Folder
-
Drag the item to the Checklist folder.
The item or items are moved from this folder to the Checklist folder, where you can arrange them in the order you want, assign due dates, mark them Completed, and so forth.
You can only move items to the Checklist folder from a shared folder if you are the owner of the shared folder.
To return an item to its original folder, drag the item from the Checklist folder to the original folder.
Marking or Unmarking a Checklist Item Completed
-
Click the box next to the checklist item.
3.5.5 Delegating Items
Use Delegate to reassign a scheduled item to someone else. The sender can determine who you delegated the item to by looking at the item’s Properties.
This section contains the following topics:
Delegating an Appointment, Task, or Reminder Note from the Main Window
-
In the Main Window, click a task, reminder note, or appointment.
-
Click > .
-
In the field, type a username, then press Enter.
or
To select a username from a list, click on the toolbar, double-click the user, then click .
-
Type any additional comments to the recipient.
-
Click on the toolbar.
-
Click if you want this item to remain in your Calendar.
or
Click if you want this item deleted from your Calendar.
Delegating an Appointment, Task, or Reminder Note from the Calendar View
-
In a Calendar view, right-click a task, reminder note, or appointment, then click .
-
In the field, type a username, then press Enter.
or
To select a username from a list, click on the toolbar, double-click the user, then click .
-
Type any additional comments to the recipient.
-
Click on the toolbar.
-
Click if you want the item to remain in your Calendar.
or
Click if you want the item deleted from your Calendar.
3.5.6 Handling Unwanted Mail
Use Junk Mail Handling to decide what to do with unwanted Internet e-mail that is sent to your GroupWise e-mail address. Internet e-mail includes all e-mail where the sender’s address is in the form of name@domain.com, name@domain.org, and so forth.
This is an example of an e-mail message from the Internet:
Figure 3-1 E-mail From the Internet
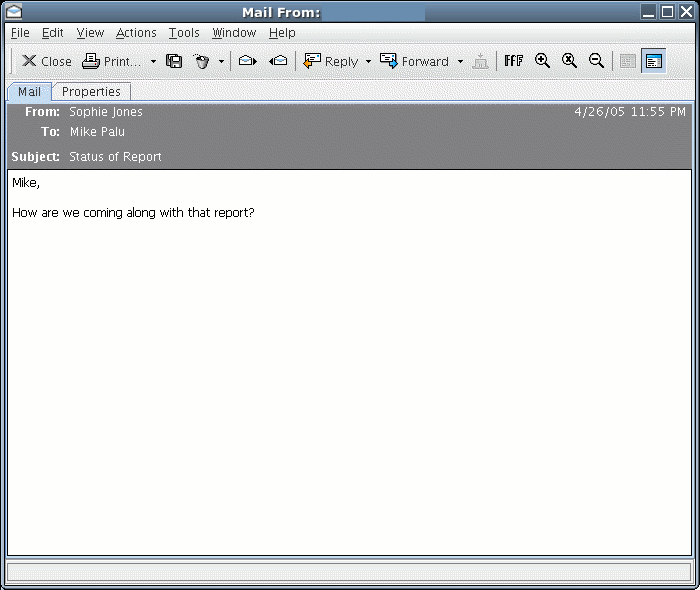
Junk Mail Handling does not apply to internal e-mail. Internal e-mail is e-mail where the sender is part of your GroupWise system and the From field shows only the name of the sender, not an Internet address as explained above. If you want to block or junk internal e-mail, you can use Rules. (For more information, see Section 6.6, Creating Rules.)
This is an example of an internal e-mail message:
Figure 3-2 E-mail From a GroupWise User
You have three options for blocking or junking Internet e-mail:
-
You can add individual e-mail addresses or entire Internet domains to a Block List. Items from these addresses or Internet domains are blocked and never arrive in your Mailbox.
An Internet domain is the part of the e-mail address that comes after the @. For example, in the address Henry@mymail.com, the Internet domain is mymail.com.
However, e-mail from contacts in your Frequent Contact address book and your corporate address book is not blocked.
-
You can add individual e-mail addresses or entire Internet domains to a Junk List. Items from these addresses or Internet domains are delivered to the Junk Mail folder in your Mailbox. You can specify that the items in this folder are automatically deleted after <n> days.
-
You can specify that any e-mail items from users whose addresses are not in your personal address books (including your Frequent Contacts address book and any personal address books you have created) are sent to the Junk Mail folder. This is sometimes called “white listing.”
For information about the Junk Mail folder, see Junk Mail Folder under Folder List.
In addition to the Block List and Junk List, there is a Trust List. Use this list to add e-mail addresses or Internet domains that you do not want blocked or junked, no matter what is specified in the other two lists. For example, you may have zcompany.com in your Block List, but you have one friend whose address is myfriend@zcompany.com. Add this friend’s e-mail address to the Trust List.
If you specify Junk Mail Handling options in Caching mode, make sure to synchronize with your Online Mailbox in order to see the same options when you log in to GroupWise on another computer.
Your system administrator can turn off Junk Mail Handling so that it is not available.
This section contains the following topics:
Blocking or Junking E-Mail From a User
-
Right-click an item with an Internet address, then click .
-
Click .
or
Click .
-
Select or .
If you select Junk, the address is added to the Junk List. All future e-mail items from this e-mail address are delivered to the Junk Mail folder
 .
.
You can specify that the items in this folder are automatically deleted after <n> days. This folder is not created in the folder list unless a Junk Mail option is enabled or an address or Internet domain is added to the Junk List (which enables the Junk List option).
If you select Block, the address is added to the Block List. All future e-mail items from this e-mail address will not be delivered to your Mailbox.
Your Junk List and Block List can each include up to 1000 entries. If more than 1000 entries are added, the least-used entries are discarded.
-
If the Junk List or Block List is not enabled, select or .
At any time, you can click > > or , then click to add an e-mail address to the Junk List or Block List.
Figure 3-3 Junk Mail Handling Dialog Box Showing the Junk List Tab
Blocking or Junking E-Mail From an Internet Domain
An Internet domain is the part of the e-mail address that comes after the @. For example, in the address Henry@mymail.com, the Internet domain is mymail.com.
-
Right-click an item, then click .
-
Click .
or
Click .
-
Select or .
If you select Junk, the Internet domain is added to the Junk List. All future e-mail items from this Internet domain are delivered to the Junk Mail folder
.
You can specify that the items in this folder are automatically deleted after a specified number of days. This folder is not created in the folder list unless a Junk Mail option is enabled or an address or Internet domain is added to the Junk List (which enables the Junk List option).
If you select Block, the Internet domain is added to the Block List. All future e-mail items from this Internet domain are not delivered to your Mailbox.
Your Junk List and Block List can each include up to 1000 entries. If more than 1000 entries are added, the least-used entries are discarded.
-
If the Junk List or Block List is not enabled, select or .
At any time, you can click > > or , then click to add an Internet domain to the Junk List or Block List.
Junking E-Mail From Users Not In a Personal Address Book
-
Click > .
-
Select .
-
Click .
All future e-mails from addresses not in your Frequent Contacts address book and other personal address books is delivered to the Junk Mail folder. You can specify that the items in this folder are deleted after a specified number of days.
Deleting Items From the Junk Mail Handling Folder
-
Click > .
-
Click .
Specify how long you want items retained in the Junk Mail folder.
-
Click .
To manually delete items from the Junk Mail folder, right-click the Junk Mail folder, click , then click .
Preventing E-Mail From a User or Internet Domain From Being Junked or Blocked
-
Click > .
-
Click the tab.
-
Click , type an e-mail address or Internet domain, then click .
An address or Internet domain can be in upper, lower, or mixed case. For example, amy@idomain.com and AMY@IDOMAIN.COM are both the same.
You cannot use wildcard characters such as * or ? in an Internet domain name. However, an Internet domain, for example idomain.com, affects all e-mail from idomain.com and any subdomains that prefix this Internet domain, such as offers.idomain.com or members.idomain.com. A domain of abcidomain.com is not affected.
-
Click .
All future items from this e-mail address or Internet domain are not blocked or delivered to the Junk Mail folder, no matter what is specified in the Block List and Junk List.
Modifying Junk Mail Handling Lists and Settings
-
Click > .
-
On the tab, modify any settings.
-
Click the tab of the list you want to modify.
-
To add an e-mail address or Internet domain to a list, click , type the e-mail address or Internet domain, then click .
An address or Internet domain can be in upper, lower, or mixed case. For example, amy@idomain.com and AMY@IDOMAIN.COM are both the same.
You cannot use wildcard characters such as * or ? in an Internet domain name. However, an Internet domain, for example idomain.com, affects all e-mail from idomain.com and any subdomains that prefix this Internet domain, such as offers.idomain.com or members.idomain.com. A domain of abcidomain.com is not affected.
-
To change an e-mail address or Internet domain, click the address or Internet domain, click , make changes, then click .
-
To remove an e-mail address or Internet domain from a list, click the address or Internet domain, then click .
-
Click .
3.5.7 Viewing and Composing Items in HTML
You can view items in GroupWise that have been composed in HTML from other users or from Web-based information services. You can click any links that are included in the item and jump to the linked Web sites.
If you have Mozilla* or Konqueror installed on the same computer as GroupWise, you can compose messages in HTML. An HTML toolbar above the Message box gives you HTML options such as text formatting, text color, and inserting lines.
For more information, see Changing the Font of Items You Send.
This section contains the following topics:
Setting the Default View
If you do not like your default read or compose view (whether it is HTML or Plain Text), you can change it.
Changing the Default Read View
-
Click > .
or
On a Macintosh, click > .
-
Click , then select or under .
-
(Optional for Plain Text Only) Select the default font and font size to use.
-
(Optional) Select if you want to force all messages to be displayed in text only.
-
Click .
Changing the Default Compose View
-
Click > .
or
On a Macintosh, click > .
-
Click , then select or under .
-
(Optional) Select the default font and font size to use.
-
Click .
Setting the View for One Item
You can change the view for one item only if that item is composed in HTML.
-
Open an item.
-
Click > or text.
Changing the Default Font in the HTML View
You can choose a different font for your outgoing messages.
-
From an HTML view, select the font style and size you want to use as the default for your messages.