2.8 Localizing and Customizing User Application Strings
Identity Manager provides several tools for localizing or customizing the User Application’s text. This section includes the following topics:
2.8.1 Localizing User Application Strings
See Table 2-5 for links to the documentation that describes how to localize User Application components.
Table 2-5 Localization and Customization Topics
|
Topic |
Where to find it: |
|---|---|
|
To set the User Application’s preferred locale |
See the sections “Preferred Locale” and “Choosing a Preferred Language” in the Identity Manager User Application: User Guide. |
|
To localize e-mail templates |
|
|
To localize challenge questions |
See “Security: Best Practices” in the Novell Identity Manager Administration Guide. |
|
To localize the password sync status application name |
|
|
To localize the names of container or shared pages |
See the property in Section 6.2.1, Creating Container Pages. |
|
To localize portlet preferences |
See Section 7.3.5, Modifying Preferences for Portlet Registrations. |
|
To localize or customize the text in the provisioning request definitions you create by using iManager |
See Section 17.3.2, Creating or Editing a Provisioning Request. |
|
For general information about localizing provisioning objects or customizing their display text, such as:
|
See the section “Localizing Provisioning Objects” in the Identity Manager User Application: Design Guide. |
|
Digital signature declaration strings |
See the section “Creating a Signature Declaration” in the Identity Manager User Application: Design Guide. |
2.8.2 Customizing Text
The text displayed in the User Application is stored in either the User Application driver or in a set of language-based JAR files (UserAppStrings_xx.JAR) located in the User Application WAR. You use different tools to customize the text depending on where the text is stored. For text stored in the:
-
User Application driver: Use the provisioning tools in Designer for Identity Manager.
For more information, see the section “Localizing Provisioning Objects” in the User Application: Design Guide.
-
User Application WAR: Follow the procedure described in this section.
The text strings stored in the User Application WAR file are stored in a language-based JAR file. There is one JAR for each supported language, and the JAR file names indicate the associated language by appending the Java locale code for the associated language. The base name of the JAR file is UserAppStrings_locale-code.JAR. For example, the English language strings are stored in the UserAppStrings_en.JAR. The JAR files are copied to the l10n-resources subfolder of the User Application’s installation directory.
NOTE:To customize graphics or theming, see Section 5.1.6, Theme Administration
To customize the text stored in the User Application WAR, decide:
Once you know what to change, follow these steps:
You can follow the example outlined in Text Change Example
The User Application strings typically change between versions. This means that you have to apply your string changes or customizations to each new release.
What strings do I want to change?
-
Review the User Application tabs.
-
Make a list that includes each string you want to change and where the string is located in the User Application user interface. You can use this list when testing your changes to ensure that you made the text changes in the appropriate places.
-
Determine whether the strings are stored in the User Application driver or in the language-based JAR. The following guidelines help you determine where the strings are stored:
-
Navigation, headers, tab names, and instructions: This content is stored in language-based JARs.
-
Identity Self-Service tab: This content is stored in language-based JARs, unless it is related to directory abstraction layer entities (such as display name, lists, and categories). Content related to directory abstraction layer entities is stored in the User Application driver.
-
Requests & Approvals tab: This content is stored in language-based JARs, unless it is in the Form Details section. The content in the Form Details section is stored in the User Application driver.
-
Administration tab: This content is stored in language-based JARs.
-
Role tab: This content is stored in language-based JARs unless it is related to role or SoD names or descriptions. Role or SoD names and descriptions are stored in the User Application driver.
-
Compliance tab: This content is stored in the language-based JARs unless it is related to the provisioning request definition. Content related to the provisioning request definition is stored in the User Application driver.
-
For information on changing the strings stored in the User Application driver, see the section “Localizing Provisioning Objects” in the User Application: Design Guide.
What languages do I want to support?
-
Locate the JAR files corresponding to the language(s) you want to support. For example, English strings are located in UserAppStrings_en.JAR.
-
Unzip the JARs into a working directory using a zip tool or the Java JDK JAR program.
Modify or customize the strings
-
Search the files in the working directory to locate the strings you want to change.
Use a tool that allows you to search for a specified string across all of the files in a folder (the string(s) you want to change might be located in more than one file).
HINT:The strings in the files are in the properties file format of key=value. Modify only the value, and not the key. Modifying the key can cause run-time errors. Follow the additional editing tips identified below.
-
When editing the properties files:
-
Use an editor that formats properties files for improved readability, when possible.
-
Use an editor that displays characters rather than unicode encoding for improved readability. Some of the properties files contain unicode-encoding.
-
In the editor, turn off wrapping to improve readability. It helps identity each property on a separate line.
-
In some files, the key value might be difficult to identify, especially if your editor does not provide automatic property file formatting. In these cases, search for the equals sign, and find the first occurrence of the equals sign that does not have a backslash preceding it (\=). The key precedes the equals sign (=), and the value follows it.
-
Make sure to maintain the proper properties file format.
To learn more, see Java Properties Object
-
Repackage the updated files and deploy
-
Add the properties files back to the JAR using the Java JDK jar program. You must maintain the folder location within the JAR.
-
Add the modified JAR into the User Application WAR maintaining the folder location within the WAR. You can use the Java JDK Jar program.
This example uses the Java JDK Jar program and maintains the folder location:
jar -uvf IDMPRov.WAR WEB-INF/lib/UserAppStrings_en.jar
-
Redeploy the WAR file to your application server.
Test your changes
-
Access the User Application.
-
Using your list of changes, review each occurrence of the string you changed to determine if you made the change appropriately.
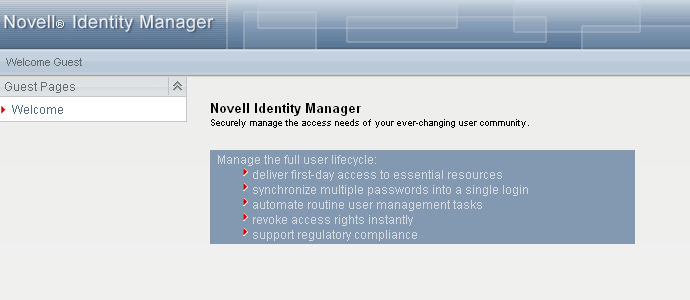
Text Change Example
This section provides a simple text change example.
Open the User Application Welcome page and notice the text that says
Securely manage the access needs of your ever-changing user community
Figure 2-7 Sample Text Change
To change this string in the English language JAR.
-
Expand the UserAppStrings_en.JAR file to a temporary directory.
-
Use a find tool to locate the string.
Notice that it is located in this properties file ./com/novell/afw/portal/portlet/message/IDMWelcomeMessageRsrc_en.properties
-
Open the properties file and change the text from:
Securely manage the access needs of your ever-changing user community
to
Test text change
-
Save and close the file.
-
Follow the steps described in Repackage the updated files and deploy.
-
Open the User Application’s Welcome page and verify your changes.
