2.1 Upgrading the ZENworks Orchestrator Server Components
The following information lists the upgrade steps in the order that they should be performed.
-
Section 2.1.1, Checking Out the VMs that Are to be Used in PlateSpin Orchestrate
-
Section 2.1.2, Backing Up the Orchestrator Server Prior to Upgrading
-
Section 2.1.3, Checking the Current Version of ZENworks Orchestrator
-
Section 2.1.4, Snapshotting the Existing Server Installation
-
Section 2.1.5, Upgrading the ZENworks Orchestrator Server Packages
If you use the command line tools to upgrade, we recommend that you also clean up any obsolete packages after the upgrade. Follow the steps in Removing Obsolete and Unneeded ZENworks Orchestrator Patterns.
-
Section 2.1.6, Removing Obsolete and Unneeded ZENworks Orchestrator Patterns.
-
Section 2.1.9, Checking the Upgraded Version of the Orchestrate Server
NOTE:To perform a mass upgrade of ZENworks Orchestrator Server 1.3 components, we recommend that you use a reputable application software distribution method to upgrade to the newer versions that ship with PlateSpin Orchestrate 2.0. For example, you can use ZENworks Linux Management to distribute new agents and clients to Linux servers.
If you choose to use ZENworks Linux Management, you should enable the rollback command. This will let you easily roll back to the prior version of ZENworks Orchestrator prior if the upgrade to PlateSpin Orchestrate is unsuccessful.
For more information, see Section 2.7, Running the Upgrade Configuration on an Enterprise Scale.
2.1.1 Checking Out the VMs that Are to be Used in PlateSpin Orchestrate
Any VMs that are checked in to the ZENworks Orchestrator 1.3 Warehouse cannot be discovered in PlateSpin Orchestrate VM Client. Therefore, to continue to use VMs that were created in ZENworks Orchestrator, you must check them out of the Warehouse before upgrading to PlateSpin Orchestrate.
For information on checking out VMs from the 1.3 Warehouse, see Checking Out a Virtual Machine in the Novell ZENworks Orchestrator 1.3 Virtual Machine Management Guide.
2.1.2 Backing Up the Orchestrator Server Prior to Upgrading
As with the installation of any software, it is always a wise precaution to back up a working copy of the older version of ZENworks Orchestrator before you install the newer version of PlateSpin Orchestrate. To back up the old version, copy the /var/opt/novell/zenworks/zos/server directory. Of course, because ZENworks Orchestrator jobs are nearly always running, the only guaranteed “safe” way to make this copy is to stop the server before you make the backup. Even so, if the server is not too busy, making a backup when it is running is usually acceptable.
If you want to restore the older version of ZENworks Orchestrator, stop the Orchestrator Server, copy the backup of the /var/opt/novell/zenworks/zos/server directory into its original location, and restart the Orchestrator Server.
2.1.3 Checking the Current Version of ZENworks Orchestrator
Before you upgrade the ZENworks Orchestrator packages from version 1.3 to the PlateSpin Orchestrate 2.0.2 packages, you should check which packages of the older Orchestrator version need to be upgraded and which non-Novell packages are included in the product packages.
To do this, run the following command:
rpm -qa | grep 'novell-zen'
We recommend that you record the results of this command so that you can compare it with the results of a similar task following the upgrade (see Section 2.1.9, Checking the Upgraded Version of the Orchestrate Server).roo
2.1.4 Snapshotting the Existing Server Installation
Before you begin the upgrade process of the ZENworks Orchestrator Server, make sure that all running jobs are complete. If the jobs have not completed on their own, the upgrade processes forcibly cancels them, which is the normal behavior when the server is shut down. The effect on the jobs is that they are terminated abruptly before they finish running. The specific consequence of this termination depends on the job that is terminated.
When you are sure that the jobs are complete, you need to run a specific shutdown command to prepare a “snapshot” of the current configuration of the server so that a new version of a server can be started with the configuration of the old server.
When an upgrade of server components occurs, all of the current server settings (configuration) and state (model) for the current instance is written to a platform-independent XML encoded snapshot. This snapshot is read in by a newly upgraded server instance to initialize its settings and state to that of the previous server instance.
The snapshot data is read when a newly upgraded server instance is first started, initializing its settings and its state to that of the previous server instance. The snapshot files must exist in /var/opt/novell/zenworks/zos/server/snapshot.
Use the following steps to perform the snapshot:
-
Check the running status of the server:
/etc/init.d/novell-zosserver status
If the Orchestrator Server is already stopped, you must start it before a snapshot can be created:
/etc/init.d/novell-zosserver start
-
Create a snapshot of the server’s current configuration with the following command:
/etc/init.d/novell-zosserver stop --snapshot
You can also create the snapshot by using the Development Client to shut down the server. To do so, select > to display the Server Shutdown Confirmation dialog box.
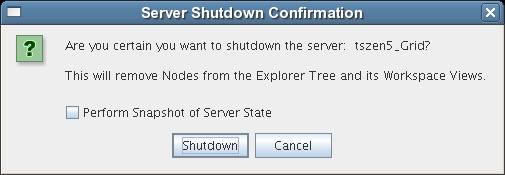
Select , then click .
2.1.5 Upgrading the ZENworks Orchestrator Server Packages
There are two methods for upgrading ZENworks Orchestrator Server Packages.
-
If you want to use a graphical user interface (GUI) see Upgrading ZENworks Orchestrator Server Packages Using YaST.
-
If you want to use the command line to upgrade the packages, see Upgrading ZENworks Orchestrator Server Packages at the Command Line.
-
If you use ZENworks Linux Management tools to upgrade the packages, we recommend that you use the same tools to clean up the environment, see
Upgrading ZENworks Orchestrator Server Packages Using YaST
Use the following procedure if you want to use YaST, a graphical user interface, to upgrade the ZENworks Orchestrator packages. If you want to use the command line to upgrade, see Upgrading ZENworks Orchestrator Server Packages at the Command Line.
-
Download the appropriate PlateSpin Orchestrate 2.0.2 ISO (32-bit or 64-bit), then prepare it for installation:
-
(Optional) Burn a DVD of the ISO image and load it into the DVD drive of the target machine.
-
(Optional) Copy the ISO image to the local file system. For more information, see Adding a Local Mount Point As An Installation Source in YaST.
-
(Optional) Mount the ISO image file on the machine where PlateSpin Orchestrate is to be installed (the “target” machine). For details, see Adding a Local Directory As An Installation Source in YaST.
-
(Optional) If you are installing the ISO image to a large network, extract the product files from the ISO image to a web server / ftp server that can be accessed by the target machine without the need for authentication or anonymous login. For details, see Adding an ISO or Web URL As An Installation Source in YaST.
-
-
Upgrade ZENworks Orchestrator Server software packages:
-
Log in to the target SLES server as root, then open YaST2.
-
In YaST2, select > , select the method to open the product ISO on your machine, click , then follow the procedures to mount the ISO.
-
From the License Agreement page, select the option to agree to the license terms, then click .
-
In YaST2, open the drop-down list, select to display the Patterns and Packages view, then click to close the information pane and open the Package frame.
-
In the frame (left-hand side of the view), select a PlateSpin Orchestrate pattern already installed on this server. The frame lists the packages either installed or not yet installed for this pattern.
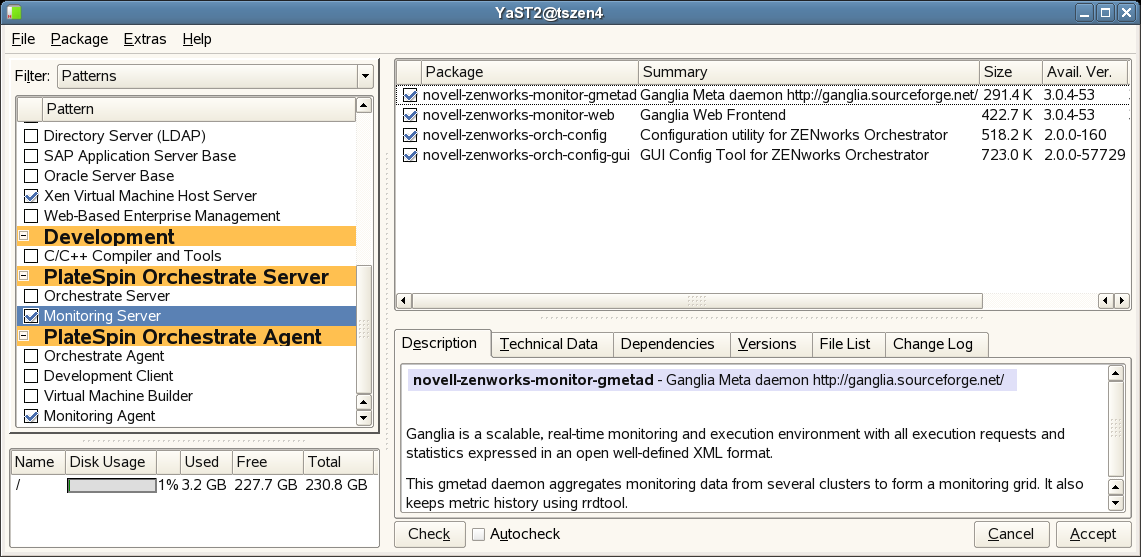
Component packages already installed to the server are checked.
NOTE:Package names for this release of PlateSpin Orchestrate continue to use “novell-zenworks” in the prefix or “ZENworks Orchestrator” in the summary description.
-
Right-click on any of the installed package names, click > , then click to install the upgraded packages.
-
Repeat Step 2.f and Step 2.f for each installed pattern you are upgrading.
After the RPMs are upgraded, scripts are run that do the following:
-
Back up the existing server instance directory
-
Upgrade the RPMs for the selected PlateSpin Orchestrate patterns
-
-
-
Configure the PlateSpin Orchestrate Server. You can use one of two information gathering methods to perform the configuration:
-
Run the Orchestrator product configuration script. If you use this method, continue with the steps in Running the PlateSpin Orchestrate Product Configuration Script to Configure the Upgraded Packages.
-
Run the GUI Configuration Wizard. If you use this method, skip to the steps in Running the GUI Configuration Wizard to Configure the Upgraded Packages.
-
Adding a Local Mount Point As An Installation Source in YaST
If you want to mount the ISO image file on a particular machine,
-
Log in to the target SLES 10 server as root.
-
From the command line of the target machine, enter the following commands
mkdir /mnt/iso
mount -o loop PlateSpin_Orchestrate-2.0.2.x86_64.iso /mnt/iso
(where you substitute the name of the ISO (32-bit or 64-bit) that you are using).
-
Open YaST2.
-
In the YaST Control Center, click , then click to display the Configured Software Catalogs view.
-
In the Configured Software Catalogs view, click to open the Media Type view.
-
In the Media Type view, select , then click to open the Local Directory or ISO view.
-
In the field of the Local Directory or ISO view, enter the mount point:
/mnt/iso
Adding a Local Directory As An Installation Source in YaST
If you want to mount the ISO image file on a particular machine,
-
Log in to the target SLES 10 server as root.
-
Open YaST2.
-
In the YaST Control Center, click , then click to display the Configured Software Catalogs view.
-
In the Configured Software Catalogs view, click to open the Media Type view.
-
In the Media Type view, select , then click to open the Local Directory or ISO view.
-
In the field of the Local Directory or ISO view, select , browse to the path where you copied the ISO image file, then click .
Adding an ISO or Web URL As An Installation Source in YaST
To add an .iso file or Web URL as an installation source in YaST,
-
Log in to the target SLES 10 server as root, then open YaST2.
-
In the YaST Control Center, click , then click to display the Configured Software Catalogs view.
-
In the Configured Software Catalogs view, then click to open the Media Type view.
-
In the Media Type view, select an installation media type.
-
(Example) If you extracted the ISO image to a Web Server or FTP Server, select (or ), then click to open the Server and Directory view.
-
In the field of the Server and Directory view, enter the Server Name (IP Address or DNS Name), in the , enter the directory name where you extracted the ISO, then click .
-
Upgrading ZENworks Orchestrator Server Packages at the Command Line
To prepare for the upgrade, download the appropriate PlateSpin Orchestrate 2.0.2 ISO (32-bit or 64-bit), then prepare it for installation:
-
(Optional) Burn a DVD of the ISO image, mount the DVD, then extract the contents of the .iso folder to the local file system of the server.
-
(Optional) Extract the contents of the .iso folder to the local file system of the server.
Use the following procedure if you want to use the rug command on the SLES server to upgrade the ZENworks Orchestrator packages to PlateSpin Orchestrate packages.
IMPORTANT:A known problem in the pattern and package versioning of SLES generates a list of patterns that are upgraded (in this case, to version 2.0.2) but the subordinate packages might still appear to be ZENworks Orchestrator 1.3 patterns. Some upgrade packages might also be missing from the list. The following steps are mandatory to ensure that the correct packages are upgraded.
-
At the command line, change to the directory where the Orchestrator .iso folder was extracted, then run the following command:
rug sa -t zypp "http://<ip_address_of_local_server>/<directory_location_of_iso_files>"
NOTE:If you have chosen not to extract the files and you want to use the .iso image to upgrade, use the following command in this step:
rug sa -t zypp "iso:///?iso=$ISO_FILE_NAME&url=dir:///$PATH_TO_ISO/"
For example, for the ISO located at /root/Desktop/PlateSpin_Orchestrate-2.0.2.x86_64.iso, you could use this command:
rug sa -t zypp "iso:///?iso=PlateSpin_Orchestrate-2.0.2.x86_64.iso&url=dir:///root/Desktop/"
NOTE:If you are using an ftp server, extract the contents of the .iso to a folder, use the following command:
"ftp://<ip_address_of_local _server>/<directory_location_of_iso_files>"
-
Run the following command to subscribe to the PlateSpin catalog:
rug sub platespin
-
Run command to list the upgrade packages so you can visually confirm them:
rug lu
-
Run the following command to upgrade the ZENworks Orchestrator Server to a PlateSpin Orchestrate Server:
rug up
Remember to type y (yes) when you are asked if you want to proceed with the upgrade transaction.
-
Repeat Step 1 through Step 4 for every server that needs to be upgraded.
-
From the command line of machine where you ran the rug up command, use the following command to bypass the 1.3 patterns that are not part of the upgrade:
patterns_to_upgrade=$(rug --terse pt -i | grep zw | grep -v warehouse | grep -v orch_config | cut -d'|' -f2)
The vmwarehouse and orch_config patterns are avoided in the upgrade.
-
Run the following command to install the patterns that are to be upgraded:
rug in -t pattern $patterns_to_upgrade -y
2.1.6 Removing Obsolete and Unneeded ZENworks Orchestrator Patterns
After you upgrade ZENworks Orchestrator 1.3 packages to PlateSpin Orchestrate 2.0.2 packages, you need to manually remove the obsolete patterns and packages that remain after the upgrade.
-
On the machine where the ZENworks Orchestrator 1.3 VM Warehouse is installed, run the following command:
rug rm -t pattern zw_vm_warehouse -y
A system message is displayed:
The following packages will be removed:
  zw_vm_warehouse 1.3-0 (system)
-
Run the following command to remove the remainder of the VM Warehouse component:
rug rm novell-zenworks-vmwarehouse-base novell-zenworks-vmwarehouse-cimproviders -y
A system message is displayed:
The following packages will be removed:
  novell-zenworks-vmwarehouse-base 1.3.0-46 (system)
  novell-zenworks-vmwarehouse-cimproviders 1.3.0-27 (system)
-
Because the Monitoring Server in PlateSpin Orchestrate must now be installed on the same machine with the Orchestrate Server, you need to remove it from its own server and install it on the Orchestrate Server machine. Run the following command from the command line of the Monitoring Server machine to stop the monitoring function:
/etc/init.d/novell-gmetad stop
-
Use the following command to remove the Monitoring Server pattern:
rug rm -t pattern zw_mon_server -y
A system message is displayed:
The following packages will be removed:
  zw_mon_server 1.3-0 (system)
-
Use the following command to remove the remainder of the Monitoring component on this machine:
rug rm novell-zenworks-monitor-gmetad novell-zenworks-monitor-web -y
A system message is displayed:
The following packages will be removed:
  novell-zenworks-monitor-gmetad 3.0.4-44 (system)
  novell-zenworks-monitor-web 3.0.4-44 (system)
Make sure you install the monitoring components on the Orchestrate Server after you have removed Monitoring from its own machine. For more information, see
Installation and Configuration Steps
in the PlateSpin Orchestrate 2.0 Installation and Configuration Guide.
2.1.7 Revising An Outdated, Required .conf File
After you upgrade from ZENworks Orchestrator 1.3 to PlateSpin Orchestrate 2.0.2, the ganglia-auth.conf file (located in the /etc/apache2/conf.d directory), created when the original installation configuration script ran, is not upgraded.
Because this version 1.3 file is necessary for the monitoring function, and because it is not updated with the other files in the rpm, you need to change it manually to be compatible with the 2.0.2 system.
The contents of the 1.3 are as follows:
Alias /monitor /var/opt/novell/zenworks/monitor/htdocs
<Directory /var/opt/novell/zenworks/monitor/htdocs>
  Order Allow,Deny
  Allow from all

  AuthType Basic
  AuthName Monitoring

  <IfDefine !DCA-NOLDAP>
    AuthBasicProvider ldap
AuthLDAPURL ldaps:///
    AuthzLDAPAuthoritative on

require ldap-group
  </IfDefine>

  <IfDefine DCA-NOLDAP>
    AuthBasicProvider file
    AuthUserFile /opt/novell/zenworks/monitor/web/user.dat
    AuthGroupFile /opt/novell/zenworks/monitor/web/grpfile.dat

    require group DCA-monitoring
  </IfDefine>
</Directory>
You need to replace this information with the following:
Alias /monitor /var/opt/novell/zenworks/monitor/htdocs
<Directory /var/opt/novell/zenworks/monitor/htdocs>
   Order Allow,Deny
   Allow from all
</Directory>
This content is compatible with the 2.0.2 Orchestrate system.
When you have made the change, you need to restart the Apache 2 server using the rcapache2 restart command.
2.1.8 Running Discover on VM Images
Because many new facts have been added to PlateSpin Orchestrate VMs for version 2.0.2, it is necessary to re-discover all of the VMs in the grid so that the new facts are added to the VMs.
To do this from the Orchestrate Development Client tools menu, click > , select the Provisioning Adapter you want to run for the discovery, then click OK.
2.1.9 Checking the Upgraded Version of the Orchestrate Server
After you upgrade the ZENworks Orchestrator packages to PlateSpin Orchestrate 2.0.2, you should check the upgraded software packages to confirm that all of the earlier versions of the product components are now updated and which of the non-Novell packages have been updated.
To do this, change to the directory where the current version of PlateSpin Orchestrate was extracted, then run the following command:
rpm -qa | grep 'novell-zen'
Compare the results of this command with the results you had with the check you performed before the upgrade (see Section 2.1.3, Checking the Current Version of ZENworks Orchestrator). If some of the components have not been upgraded from the earlier version, the incompatibility between the components could cause unexpected behavior.
2.1.10 Configuring the Upgraded Server Packages
You can use one of two information gathering methods to configure upgraded PlateSpin Orchestrate packages:
Running the PlateSpin Orchestrate Product Configuration Script to Configure the Upgraded Packages
If you decide to use the product configuration script to configure the upgraded PlateSpin Orchestrate packages, follow these steps:
-
Make sure you are logged in as root to run the configuration script.
-
Run the script, as follows:
/opt/novell/zenworks/orch/bin/config
When the script runs, the Install or Upgrade option is displayed as follows::
Welcome to PlateSpin Orchestrate.

This program will configure PlateSpin Orchestrate 2.0.2


Select whether this is a new install or an upgrade

i) install
u) upgrade
- - - - - -

Selection [install]:
-
Enter u to select the option to upgrade to PlateSpin Orchestrate.
Depending on which components were installed, the script displays the products to upgrade
Select products to upgrade # selected Item 1) yes PlateSpin Orchestrate Monitoring Service 2) yes PlateSpin Orchestrate Server 3) yes PlateSpin Orchestrate Agent 4) yes PlateSpin Orchestrate VM Builder Select from the following: 1 - 4) toggle selection status a) all n) none f) finished making selections q) quit -- exit the program Selection [finish]: -
Select the products you want to upgrade either by entering their individual product numbers (1-5) or by entering a to select all of the products for upgrade.
NOTE:We recommend that you upgrade all listed components at the same time. Although you can upgrade the packages one at a time, there is no need to do so. An upgrade of all the installed packages at the same time has been thoroughly tested.
If you upgrade any package separately, however, we recommend that you do not run the upgrade script again. Doing so might have unexpected results.
-
Enter f to finish the selection and begin the configuration.
The script displays the following:
Gathering information for upgrading PlateSpin Orchestrate Server . . .

Select whether this is a standard or high-availability server

s) standard
h) ha
- - - - - -

Selection [standard]:
-
Enter s for the standard server (for information about upgrading a high-availability configuration, see Section 2.8, Upgrading a ZENworks Orchestrator 1.3 High Availability Configuration).
The following section of the upgrade script is displayed:
Enter the name of the PlateSpin Orchestrate administrator user
previously defined when you configured that server.
-
Type the name of the administrator, then press Enter.
-
Type the adminstrator password, then press Enter.
-
Retype the administrator password, then press Enter.
The following section of the script is displayed:
If you've enabled auditing, you will need to upgrade the DB schema. If you use a PostgreSQL database, you can upgrade it at this time. If you use a different RDBMS, you will have to configure it separately. You must supply the same DB connection information provided when the audit DB was initially created. Upgrade Audit DB (y/n) [no]: -
Enter y to upgrade the audit database.
The following section of the script is displayed:
Specify the JDBC URL used previously to connect to the audit database. Do not include a database name after the trailing slash. JDBC URL [jdbc:postgresql://localhost:5432/]: -
Enter the appropriate database URL.
The following section of the script is displayed:
Specify the database name used previously to create to the audit database.
Audit Database Name [zos_db]:
-
Enter the previously specified database name.
-
Type the name of the PostgreSQL audit database user previously created, then press Enter.
-
Type the audit database user password, then press Enter.
-
Retype the audit database user password, then press Enter.
The remainder of the upgrade interview is nearly identical to the installation interview. For more information about the questions gathered during this interview that are added to the configuration script, see PlateSpin Orchestrate Configuration Information
in the PlateSpin Orchestrate 2.0 Installation and Configuration Guide.
The Orchestrator Server automatically starts at the end of a successful upgrade configuration process.
Running the GUI Configuration Wizard to Configure the Upgraded Packages
If you decide to use the GUI Configuration Wizard to configure the upgraded Orchestrator packages, follow these steps:
-
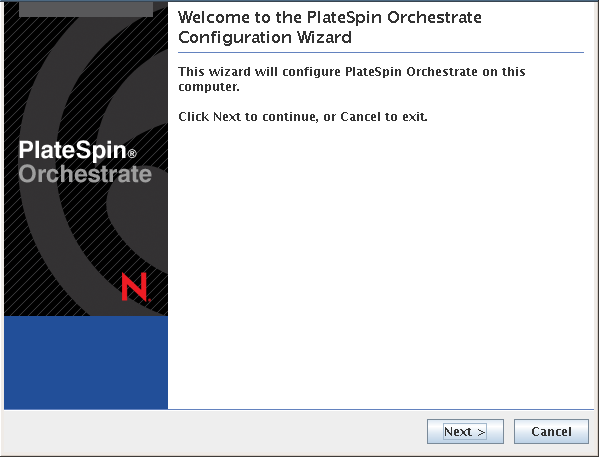
Run the script for the PlateSpin Orchestrate Configuration Wizard as follows:
/opt/novell/zenworks/orch/bin/guiconfig
The GUI Configuration Wizard launches.
IMPORTANT:If you only have a keyboard to navigate through the pages of the GUI Configuration Wizard, use the Tab key to shift the focus to a control you want to use (for example, a button), then press the spacebar to activate that control.
-
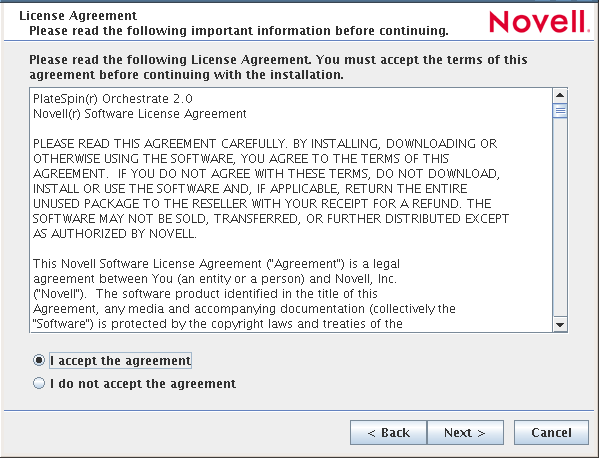
Click to display the license agreement.
-
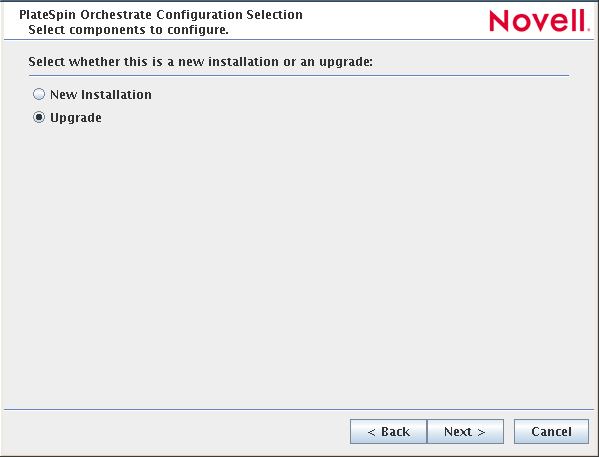
Accept the agreement, then click to display the PlateSpin Orchestrate Configuration Selection page.
-
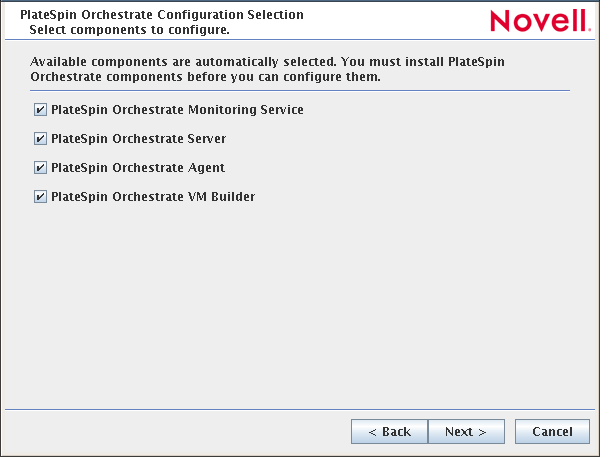
Select , then click to display the PlateSpin Orchestrate components page.
This page lists the components that are available for configuration. By default, all installed components are selected for configuration.
-
Deselect any PlateSpin Orchestrate components that you do not want to upgrade, then click to open the wizard page where you choose to configure the server for a High Availability clustered environment.
NOTE:You might not want to upgrade all components. For example, you might want to keep an older version of the Orchestrate Aagent installed on an Orchestrate Server machine when the agent is used to connect to a different (that is, a non-upgraded) Orchestrate server, such as in a “grid-of-grids” configuration.
-
Click on the High Availability page to open the wizard page where you can begin configuring required settings.
(This example does not demonstrate configuring the server for a High Availability environment)
-
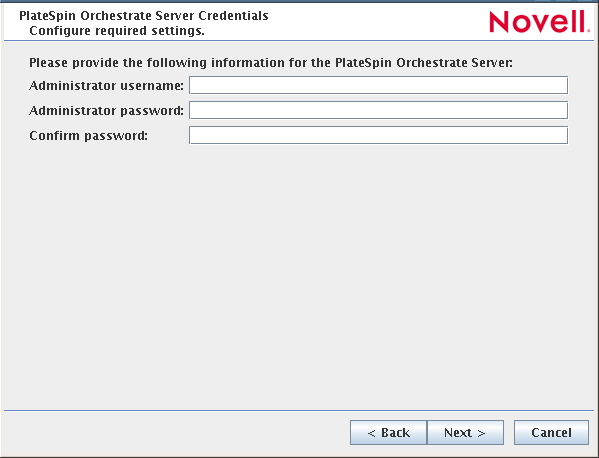
Fill in the fields as needed for each of the configuration pages.
Administrator username: Enter the name of the Platespin Orchestrate administrator used in the previous installation (for ZENworks Orchestrator 1.3).
Administrator password: Enter the administrator password.
Confirm password: Re-enter the administrator password.
-
Click to display the required settings page of the wizard.
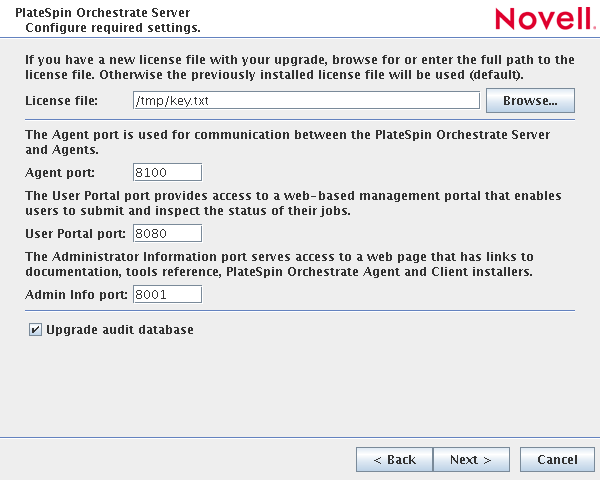
If you need clarification for the data to enter into the fields of the configuration pages, refer to the table in
PlateSpin Orchestrate Configuration Information
section of the PlateSpin Orchestrate 2.0 Installation and Configuration Guide.Make sure you provide the path to the new PlateSpin Orchestrate license file during the configuration.
Default values are built into the script; most of these defaults are set to configure all of the product patterns that were installed using the Add-on Product Media utility.
If an error is displayed during the configuration process, the script or wizard stops the configuration and does not proceed.
-
Click to display the next page of the wizard.
(Conditional) If you did not select the checkbox in the previous step, the following page of the wizard is displayed:
Proceed to Step 11.
If you selected selected the checkbox in the previous step, the following page of the wizard is displayed.
Proceed to Step 10.
-
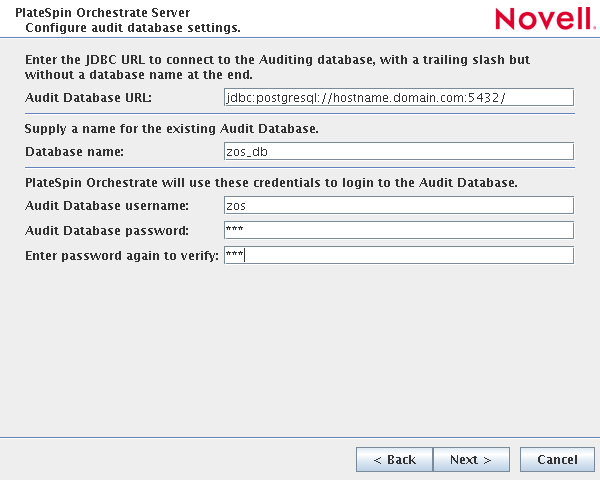
Specify the required information to configure the upgrade for the audit database:
Audit Database URL: Specify the URL for the existing PostgreSQL audit database so that its schema can be upgraded.
NOTE:If you have been using a different RDBMS (that is, not PostgreSQL) for your audit database, you will have to configure it separately.
Database name: Specify the name of your existing database.
Audit Database username: Specify the existing database username.
Audit Database password: Specify the existing database user password.
Enter password again to verify: Re-enter the existing database user password to verify its authenticity.
-
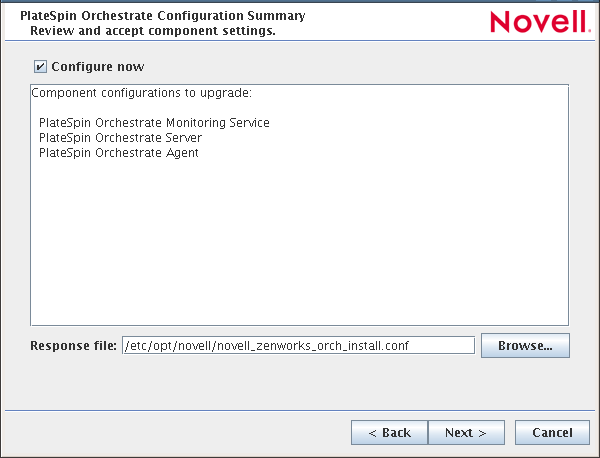
Click to display the Configuration Summary page of the configuration wizard.
IMPORTANT:Although this page of the wizard lets you navigate using the Tab key and Spacebar, you need to use the Shift+Tab combination to navigate past the summary list. Click if you accidentally go to the summary list, then re-enter the page to navigate to the control buttons.
By default, the check box on this page is selected. If you accept the default, the wizard starts PlateSpin Orchestrate and applies the configuration settings.
If you deselect the check box, the wizard writes the configuration file to /etc/opt/novell/novell_zenworks_orch_install.conf without starting PlateSpin Orchestrate or applying the configuration settings.
You can use this .conf file to start the Orchestrator server or client and apply the settings either manually or with an installation script. Use the following command to run the configuration:
/opt/novell/zenworks/orch/bin/config -rs
-
Click to display a message asking whether you want to overwrite the .conf response file.
-
To upgrade, you need to overwrite the existing file. When prompted, click to overwrite the file and display the configuration page.

-
Click to dismiss the configuration wizard.
-
Click to begin the upgrade configuration for the PlateSpin Orchestrate Service.
When the configuration is complete, the Finish page of the configuration wizard is displayed.
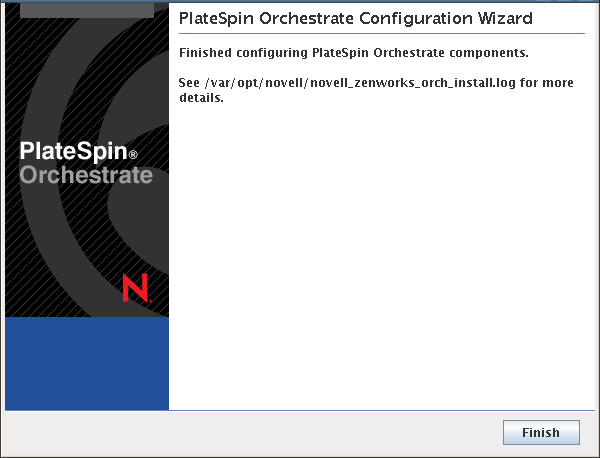
The Orchestrate Server automatically starts at the end of a successful configuration process.
Manually Configuring the Remote Audit Database after PlateSpin Orchestrate Is Upgraded
When you have upgraded PlateSpin Orchestrate, you can manually configure the existing audit database using the audit_db_upgrade.sql script. This script creates an actions table in the database. Use the following procedure to manually upgrade the audit database:
-
On the PlateSpin Orchestrate host machine, use your favorite editor to edit the script /opt/novell/zenworks/zos/server/conf/audit_db_upgrade.sql.
-
Replace the ${DB_NAME} variable with the PostgreSQL database name (for example, zos_db).
-
Replace the ${DB_USER} variable with the PostgreSQL schema owner name (for example, zos).
-
-
Use the following commands to run the modified script as the PostgreSQL database administrator for the remote database:
su - postgres
psql -h <psql-server-addr> -d postgres -U postgres -f audit_db_upgrade.sql
-
Use the following command to log into PostgreSQL, using the database name and schema owner substituted in Step 1 above:
su - postgres
psql -h <psql-server-addr> -d zos_db -U zos -f audit_db_upgrade.sql
-
Confirm that the database username and password match the values used when creating the schema owner database user in
Creating a PlateSpin Orchestrate User for the PostgreSQL Database
in the PlateSpin Orchestrate 2.0 Installation and Configuration Guide. In this example, the username is zos and the password is zos.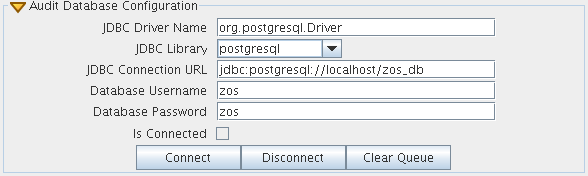
-
Confirm that the database username and password match the values you replaced in the variables of the .sql script. In this example, the username is zos and the password is zos.
-
Click .
The check box is selected: the Orchestrate Server is connected to the database so that any queued data and subsequent job, user, and resource events are written there.