6.3 Modifying a Virtual Machine after Checking In
After a VM has been checked in to the warehouse, you can check it out again to make changes to the properties and storage data. You can then check the VM back in to the warehouse to create the next version of the VM.
6.3.1 Checking Out a Virtual Machine
To check a VM out of the warehouse, go to the ZENworks VM Management Console, right-click the VM, and select . Checking out a VM moves a copy of the VM into the Workspace section of the ZENworks VM Management Console. When it is there, you can modify the VM. For information on the ZENworks VM Management Console, see Workspace View.
6.3.2 Modifying Virtual Machine Properties
When a VM is in a status, it can be modified and edited. There are two different types of edit you can perform on the VM in the ZENworks VM Management Console:
-
Edit: Allows you to change elements of the metadata on the VM.
-
Edit Image: Allows you to create a copy of the VM that is put elsewhere on the drive, so you can open the VM image and change its inherent metadata, processor architecture, initial hard disk properties, memory properties, and so forth.
To start the edit process:
-
In the ZENworks VM Management Console, select the VM you want to edit.
-
Do one of the following:
-
Select the or options in the menu.
-
Click the or icons in the toolbar.
-
Right-click the VM and select or
When you click , the VM Builder Wizard opens again, allowing you to change elements of the metadata of the VM. When you click , a version of the VM is saved to a selected directory, where you can open it and make changes to the image itself.
-
Using the Edit Tool to Edit Virtual Machine Metadata
When you right-click a VM in the Workspace panel, you can choose to open the VM Builder Wizard. If the VM has the status of , you can edit any of the initial VM Builder fields. The VM has not yet been built, so you can still add things to the overall metadata for the VM. However, if the VM has been installed or checked out, you can change only the following:
-
The VM description
-
Any additional arguments
-
VM crash instructions
-
Number and priority weight of processors
-
Startup and maximum memory allocations
-
Graphic mode (if you have fully virtualized the VM)
-
Additional hard disks and CD or DVD disk drives
-
Additional NICs
-
Virtual network interface details
-
Server name information
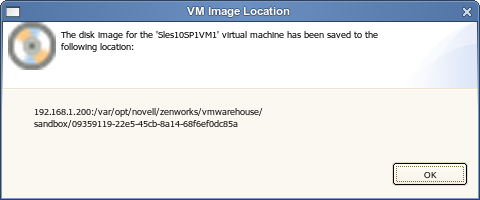
Editing the Virtual Machine Image
Click to actually edit elements beyond the VM metadata. A dialog box is displayed that tells you where the image is located so that you can open the VM image and modify it:
Figure 6-4 VM Image Location Dialog Box
6.3.3 Modifying and Adding Applications to a Checked-Out Virtual Machine
A VM behaves as if it is a single, physical machine. While it is running, you can add any application to the VM that you need. If these applications are made on the first hard disk, the applications are saved as part of the VM image and are called upon when the VM is started again.
One of the specific modifications you might want to make to a VM is to install the Orchestrator VM Agent Pattern in YaST, so the VM is available to ZENworks Orchestrator. For instructions on installing the Orchestrator Agent on a VM, see Installing the Orchestrator Agent on VMs
in the Novell ZENworks Orchestrator 1.3 Installation and Getting Started Guide.
6.3.4 Assuring Sufficient Loopback Devices to Allow for Virtual Machines
The Linux kernel allows for a set number of loopback devices. The default is 64 for the version of Linux supported by ZENworks Virtual Machine Management.
The available loopback devices are for all VMs in the grid. The default setting for the allowed number of loopback devices can be changed in the kernel.
When you run a VM, the Orchestrator Server requires one of those loopback devices for the VM Prep job. The VM Prep job is a shared part of the provisioning adapters. It is used to personalize a VM (that is change identity and network configuration—the so-called autoprep facts). It works by mounting the VM disk over loopback and then modifying configuration files in the VM disk image (via the mount). For more information on the provisioning adapters and their function, see Section 6.2.1, Provisioning Actions from the Right-Click Menu.
When you use the Orchestrator Server to launch a VM, you need to make sure that there are enough loopback devices remaining to support that VM. For example, if the VM has seven mounted loopback devices, a VM host machine must have at least eight available loopback devices to allow for the seven for the VM and one more for the VM Prep job.
If the VM host machine is using a loopback device, this device also counts against the total. You can create a VM without a loopback device, which does not count against the total.
To manage loopback devices:
Setting Up Loopback Devices in the Virtual Machine
You can designate loopback devices by running the VM and mounting the ISO or software you want to have as a mounted loopback device by using mount -o loop command, just as you would on a physical machine. The number of loopback devices in the VM do not count against the total allowable loopback devices of the host machine.
Changing the Number of Allowed Virtual Machines
In order to change the VM hosts in your data center grid, be sure that you have already discovered your VM hosts and your VMs. For information on discovering VM hosts and VMs, see Section 2.2.4, Discovering Virtual Machine Hosts.
To change the number of allowed VMs on a VM host machine:
-
In the ZENworks Orchestrator Console, open the grid containing the VM host you want to change.
-
Select in the tree menu.
-
Select .
-
Select the VM host machine.
-
On the Info page change the to a number equal to one less than your Linux kernel’s allowed number of loopback devices, or as many as the VM host machine’s hardware allows.
6.3.5 Testing a Virtual Machine Modification
One of the benefits of modifying a VM before checking it into the VM Warehouse is the opportunity to test the VM configuration.
You can continue to make changes throughout the test process until the VM meets your organization’s standards for VMs.
Test the VM by keeping it active until you have finished your testing. When you are finished, shut the VM down and check it into the warehouse.
6.3.6 Checking In an Edited Virtual Machine
When you have made a modification, and at any point during your testing cycle, you can check a VM back in to the VM Warehouse. Check it back in as you did the first time you checked the VM in to the warehouse. For more information, see Section 3.3.1, Checking In a Virtual Machine.
The newly checked-in VM receives the next version number for that VM.
Any version can be checked back out, modified, and checked back in to increment to the next version number.
6.3.7 Changing the Gold Master Designation
The first time you check a VM into the VM Warehouse, it is designated as Version 1, which is also the Gold Master version. After you have moved one or more modified versions of the VM back into the VM Warehouse, they are listed in the edit view in the order they were checked in, along with their parent versions.
When a version you have created has passed necessary testing, you can designate it as Gold Master by doing any of the following:
-
Right-click the version, then select .
-
Click > .
-
Click the icon on the toolbar.
The Gold Master is the version of the VM discovered by the Orchestrator Server. It is launched when the VM is used as a resource to receive joblets.