19.3 Updating a Single-Server Teaming Site
When you update a single-server Novell Teaming installation from version 1.0 to version 2.0, the Teaming Installation program can perform the entire update in a single process, unless the Teaming site uses an Oracle database.
-
Stop Teaming.
-
(Conditional) If your Teaming site uses an Oracle database, update the database as described in Section 19.3.1, Updating an Oracle Database before running the Teaming Installation program.
-
Copy the installer.xml file from the directory where the Teaming 1.0 Installation program is located to the directory where you have extracted the Teaming 2.0 software.
-
Remove old license files from your Teaming site and make sure that you have a license-key.xml file in the same directory with the Teaming 2.0 Installation program.
-
Start the Teaming 2.0 Installation program.
If you need assistance with this task, see the detailed installation instructions for the platform where you are updating Teaming:
-
Accept the License Agreement, then click .
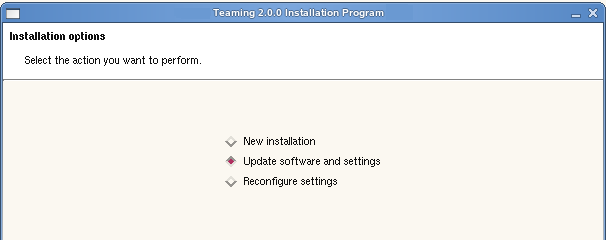
Because you provided your Teaming 1.0 installer.xml file in the directory with the Teaming Installation program, the installation option is selected by default.
-
Click to continue.
-
Click to let the Installation program know that you have stopped Teaming.
-
Select the check box to let the Installation program know that you have backed up all of your Teaming data, then click .
-
Select or , depending on the type of Teaming installation you are updating, then click .
-
Continue through the installation process using the configuration information gathered on the Installation Summary Sheet.
-
Click when you are ready to perform the update.
The Installation program might seem to pause at this point. It needs to update tables and indexes in the Teaming database. If you have a large database, this process can be time consuming.
-
Click when the update is completed.
-
Start Teaming 2.0.
Linux:
New command:
/etc/init.d/teaming start
For more information, see Section 4.1.5, Starting Teaming on Linux.
Windows:
Same command, different directory:
c:\icecore\apache-tomcat-version\bin\startup.bat
NOTE:The default locations for Teaming 2.0 are different, as listed in Section 3.2.4, Teaming Installation Locations, but the Teaming Installation program does not move it as part of the update process.
For more information, see Section 4.2.3, Running Teaming as a Windows Service and Section 4.2.4, Running Teaming as a Windows Application.
When you start Teaming for the first time after the update, it takes longer to start than usual because data in the Teaming database must be updated before the Teaming site is ready to use.
-
Skip to Section 19.5, Performing Post-Update Tasks.
IMPORTANT: The post-update tasks include:
-
Resetting custom forms, views, and workflows
-
Reindexing your Teaming site
-
Updating LDAP synchronization settings
You must perform the post-update tasks, or your updated Teaming site does not function correctly.
-
19.3.1 Updating an Oracle Database
The Novell Teaming Installation program can update MySQL and Microsoft SQL databases as part of the Teaming software update, but it cannot update an Oracle database. Therefore, you must manually run the Teaming 2.0 database update script after you have stopped Teaming.
-
Change to the directory where the Teaming Installation program is located.
-
Unzip the teaming-2.0.n-sql.zip file to create the update-1.0.0-2.0.n directory
The update-1.0.0-2.0.n directory contains an update script for each type of database (MySQL, Microsoft SQL, and Oracle).
-
Run the update-oracle.sql script.
sqlplus "/ as sysdba"
SQL>spool update-oracle.out;
SQL>@update-oracle;
SQL>quit;
-
Return to Section 19.3, Updating a Single-Server Teaming Site.