Rapid Desktop Development using REALbasic 2006
Introduction
This article will introduce you to REALbasic 2006 for Linux and illustrate just how easy it is to create Desktop applications, quickly and effectively with this tool. You may download REALbasic for Linux, Standard Edition free at http://www.realbasic.com/download/. This article assumes you have REALbasic 2006 for Linux installed. You will want to have completed the REALbasic quickstart and perhaps the excellent tutorial provided by REAL Software in order to get the most from this tutorial. These can be downloaded from the same page as the product itself and while you are on that page you might want to download many of the other files available including the User's Guide and the Language Reference.
We will take you through the steps needed to create a very simple yet useful web browser. You will see how to place components easily on your application window, how to configure those components and finally how to write small amounts of REALbasic code to add functionality to your web browser. Okay let's get started.
Configuring the Browser application settings
First launch REALbasic 2006 and you will see a screen similar to the image below (your screen should not have the black arrows used to point out important settings and instructions).
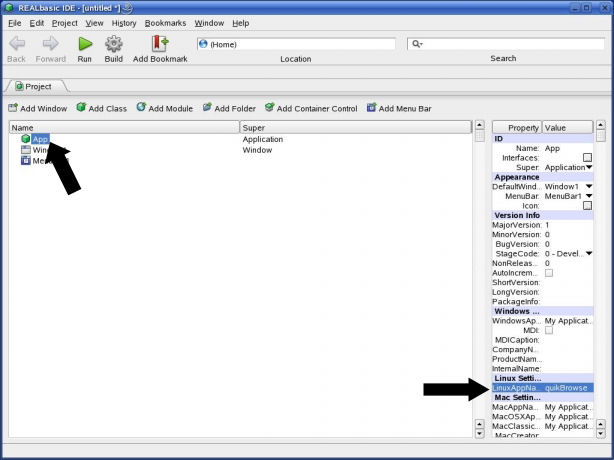
The initial REALbasic 2006 project screen
Select the App object in the main project window and under Linux settings in the property browser change the name of the Linux application that will be built, in this case "quikBrowse". Within the property browser you can select the file names of your compiled applications for each of the platforms REALbasic 2006 support. Please note that with the Standard Edition of REALbasic you may only compile fully functional applications for the host platform. If you need to compile applications for platforms other than Linux contact REAL Software regarding an upgrade to the professional Version of REALbasic.
Now for the Browser application window setup
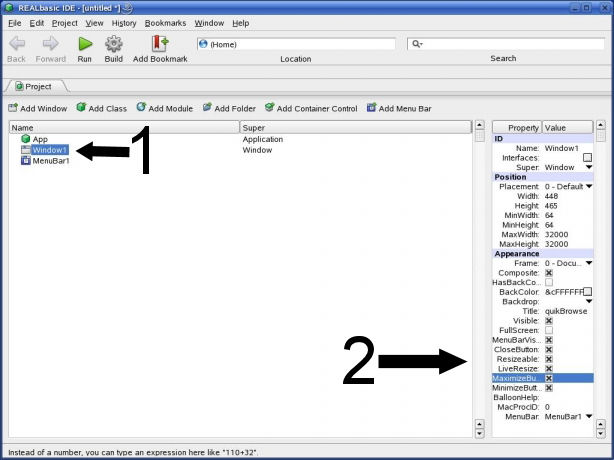
Configuring the Window object for our application
Select the Window1 object (1) and you will have access to the properties for the Window. We make changes to the Window's properties so that we have Minimize, Maximize and Close buttons on the window frame and we also make the window resizable. At this time you can change the title that will appear on the window bar also (2). You should also set the position properties to match those shown so that controls that are added later in this article will fit properly and behave as expected.
Now that the basic window appearance and functionality have been configured, we need to add the components to the window that will create our browser. To begin double-click on the Window1 object on the project window to create a new tab on the project window that provides us with a graphical view of how our application window will look. To begin to create our browser we select a HTMLViewer control from the control tool palette to the left and place it on the window object. This control is the heart of our browser application. It takes the contents of a web page and parses and displays the page in the manner we are accustomed to from using today's modern web browsers. To properly position and size the HTMLViewer control set the properties in the property tool on the right to reflect the values show below.
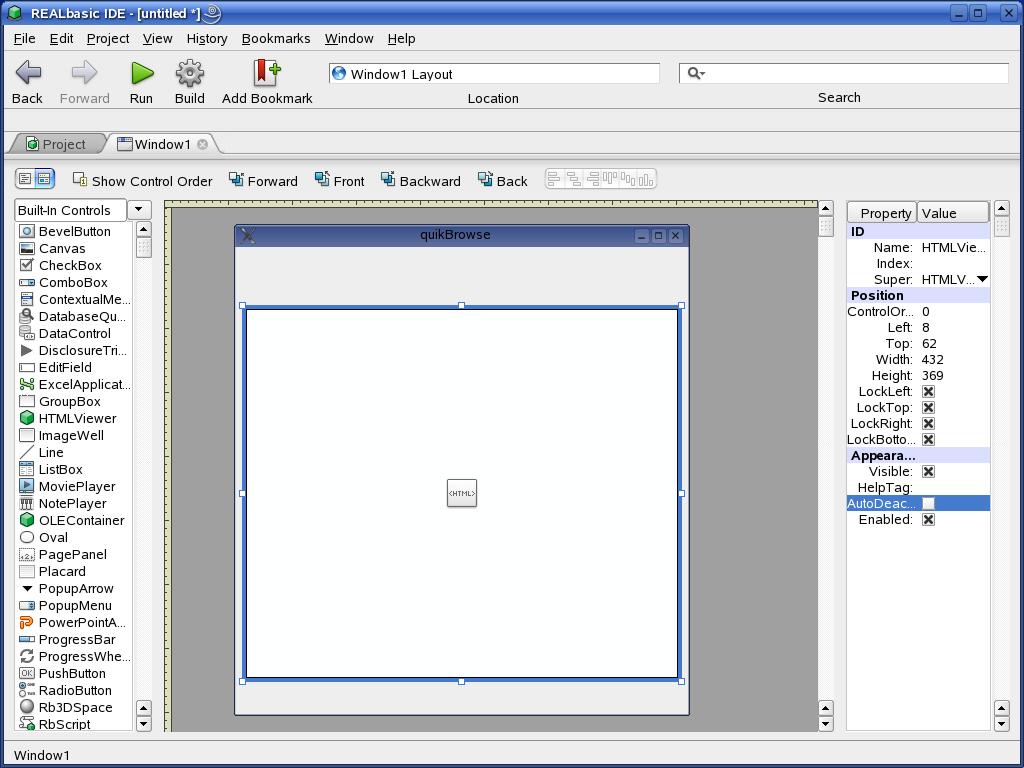
The HTMLViewer control properties configuration
The positioning and sizing properties make the HTMLViewer control properly fit on our current window. Also note the check marks in the four locking options, these insure that our HTMLViewer control will size and position properly if the user changes the size of the application window. Next let's add a ComboBox to the window. This ComboBox will contain the list of URLs that our browser is configured to display. Configure the ComboBox as illustrated below, again pay close attention to the lock checkboxes to insure the ComboBox appears where we want upon resizing of the window.
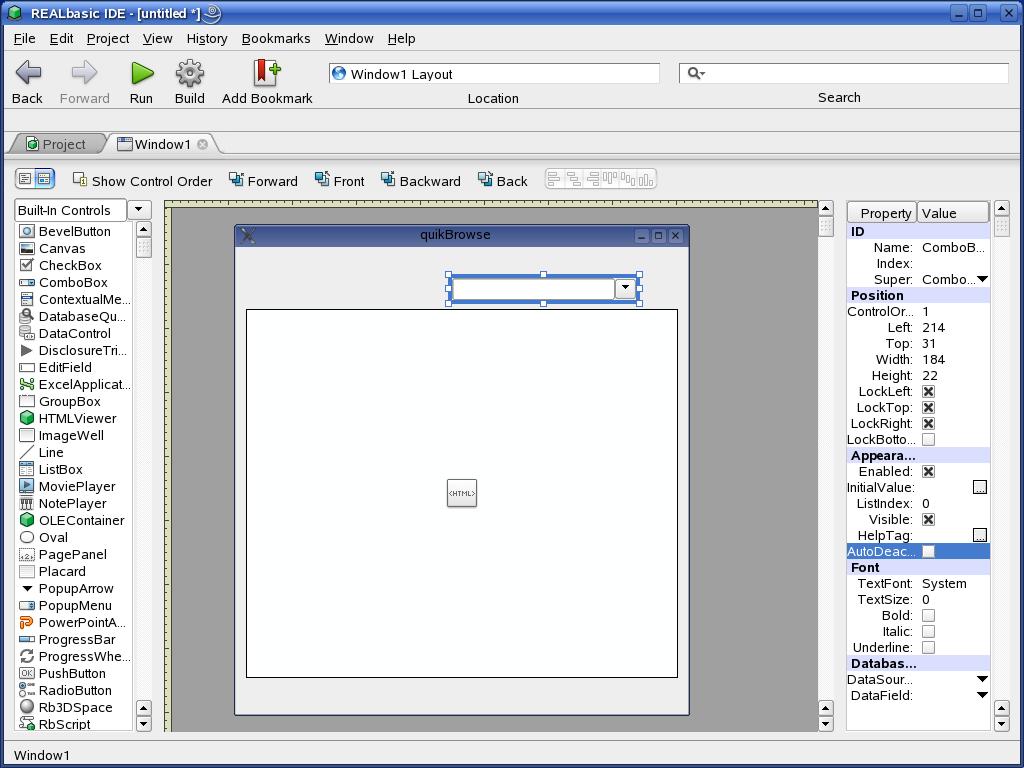
URL ComboBox configuration
We now have a control to hold the list of URLs to visit and now we add a button for the user to push once the URL is selected. To add this select a PushButton control from the controls palette and place it on the window. Configure it as shown below to bit and label it for our browser.
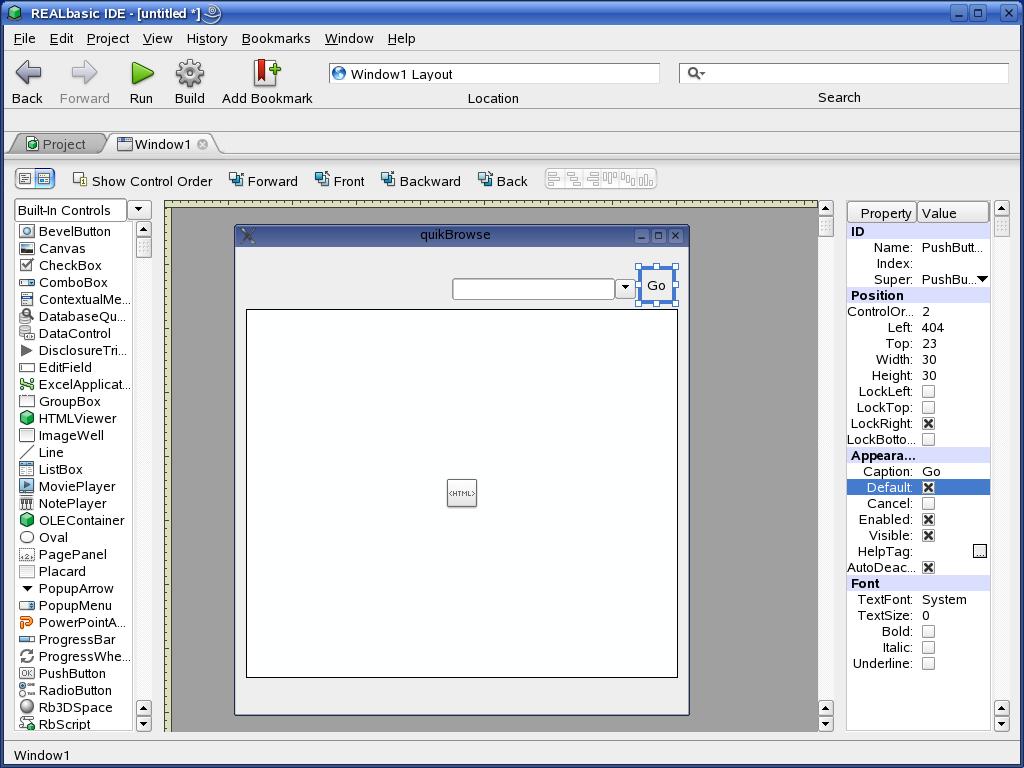
Property settings for the "Go" PushButton control.
Since any useful browser allows the user to navigate through previously visited pages and back forward to additional pages viewed, we need to add "Back" and "Forward" buttons to enable this feature. The following screen shot illustrates this for the "back" button.
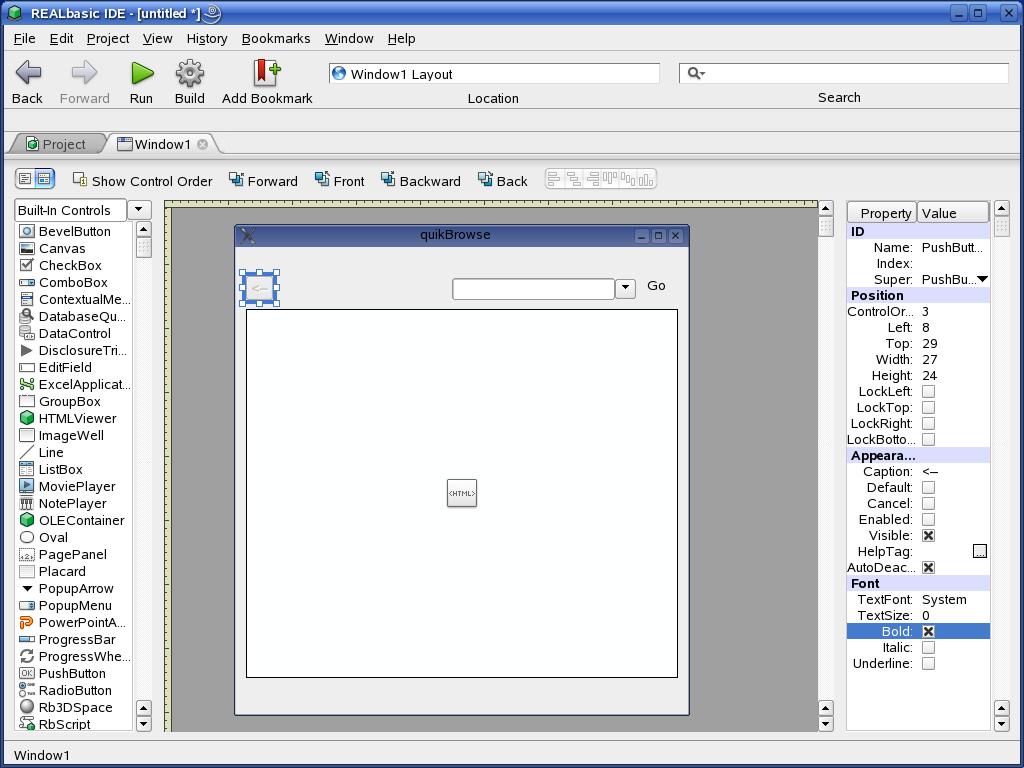
Add a "Back" button and configuring it
You also need to add the "Forward" button and configure it in a similar manner.
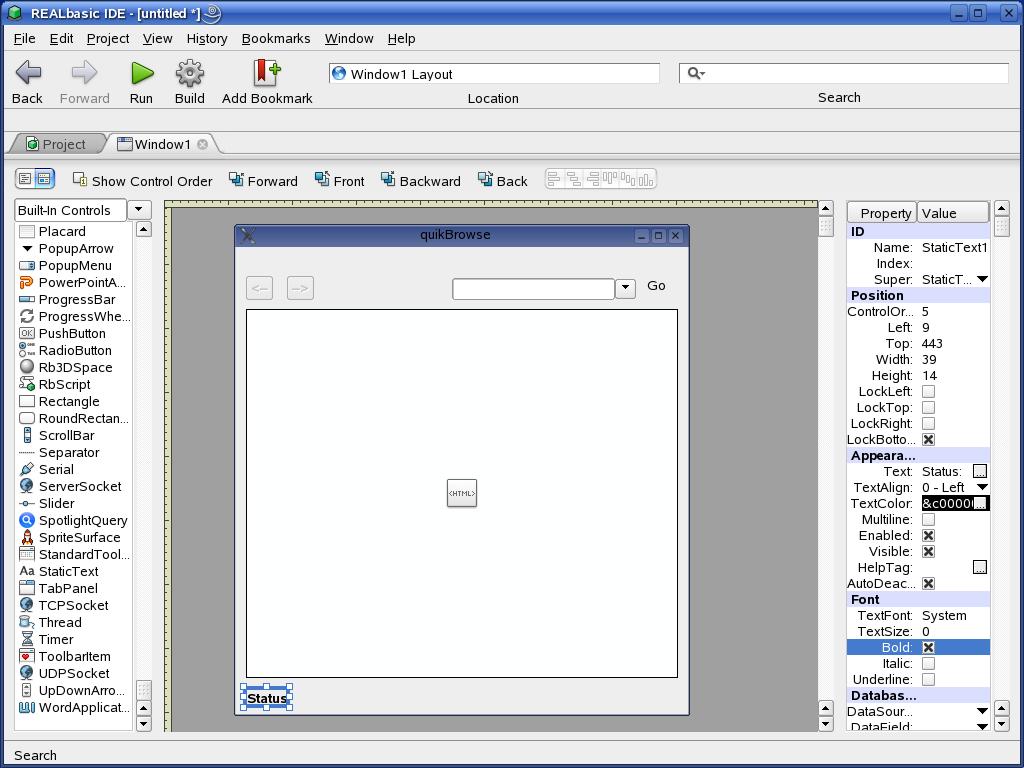
Although in many cases with today's high speed internet connections web pages load very quickly, there will be times when a website might be under heavy load and there could be network problems or any number of issues that might affect load times for pages you visit. We will now add a status display that will monitor and provide visual representation of the loading status of the current page. First add a label to show where the status bar is located.