Director Tutorials
To set up a content management portal page using IFrame portlets. An IFrame portlet invokes an URL inside an IFrame within the portlet window. An IFrame, or inline frame, gets content referenced by an URL and displays it in a browser subwindow—in this case, the window of the portlet on the browser page.
Before you begin See About exteNd Director Tutorials.
Audience This section is for content administrators.
Prerequisites This tutorial requires the following software:
Content Management subsystem. The exteNd Enterprise Suite comes with Content Management; the Professional Suite does not include this subsystem.
Internet Explorer version 5.5 or higher, a requirement for running the Content Management tool in the Director Administration console.
TIP: If you want to access content management functions using portlets that run in all supported browsers and platforms, check out the Content Administration portlets that ship with exteNd Director.
The exercises in this section show you how to use IFrame portlets to access several content management functions from a single portal page. You will also learn how to assign content administrator privileges to a user and import sample content.

In this exercise, you will assign content administrator privileges to a new user. To perform these administrative tasks, you need to log in as a user with locksmith privileges.
Start the exteNd Application Server where the Express Portal application has been deployed.
Start the Express Portal application by entering this URL in your browser:
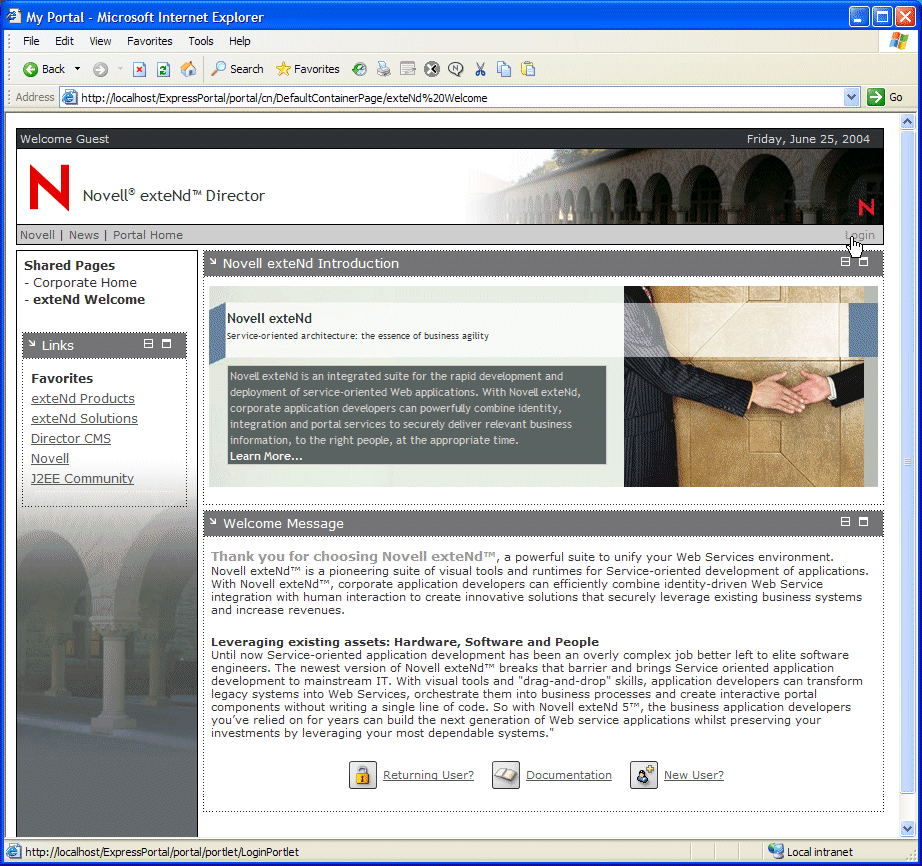
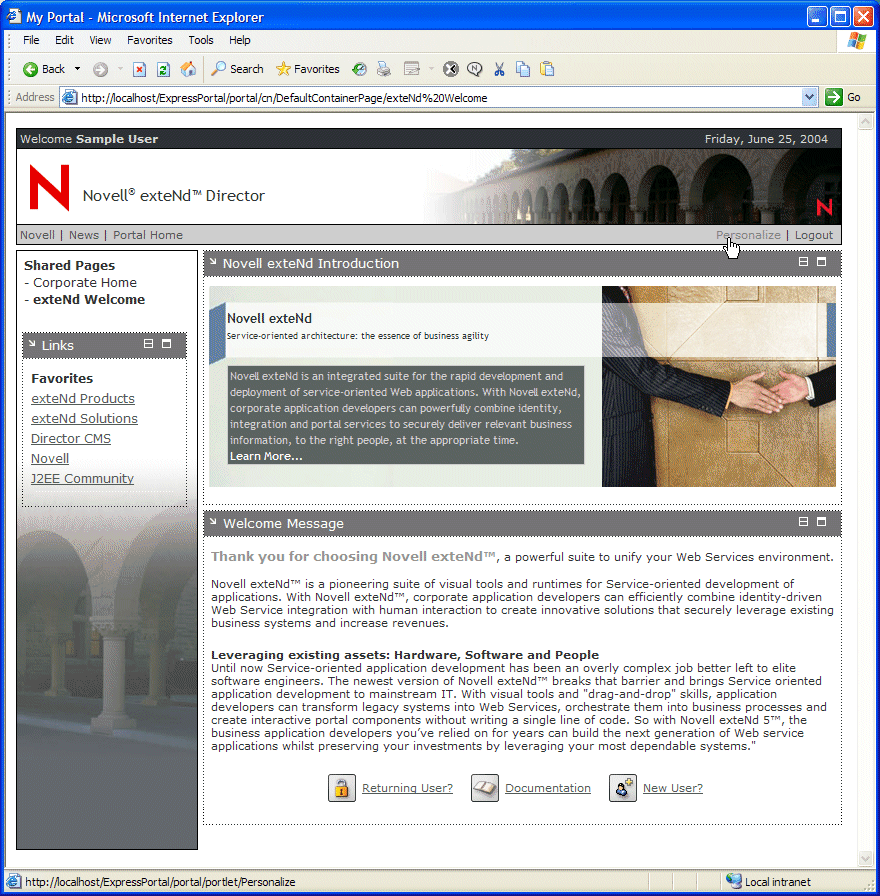
The default home page for a guest user opens in your browser.
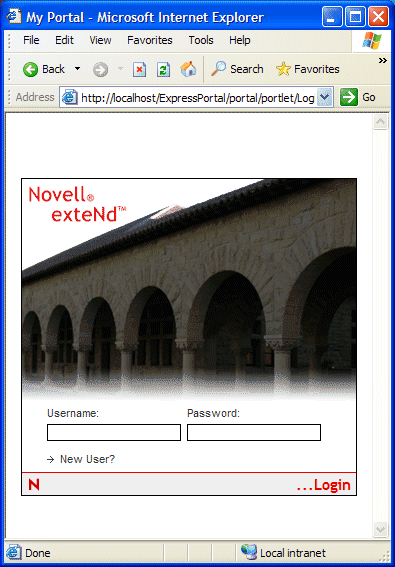
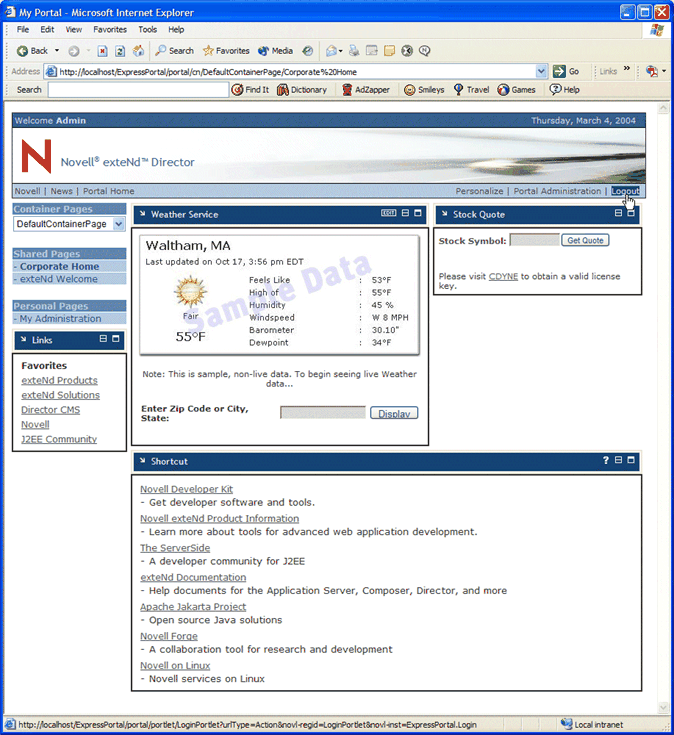
Log in as a locksmith user, then click login or the Enter key.
TIP: A locksmith is a user who is a member of the LocksmithElementType administrator ACL group. Check with your system administrator for the user name and password to use.
The default home page for administrators opens in your browser.
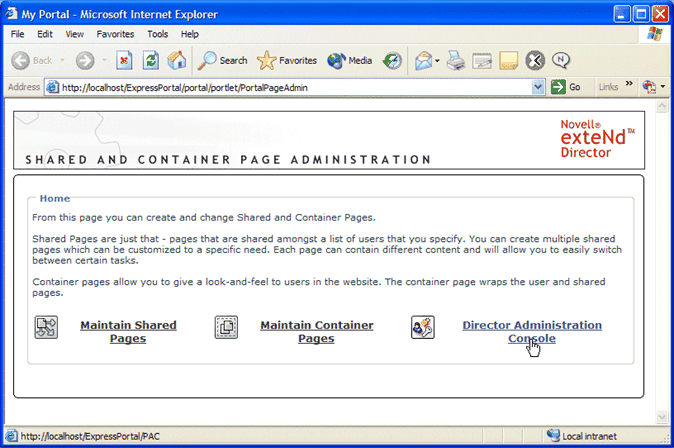
Start the Portal Administration tool by selecting Portal Administration.
Select Director Administration Console.
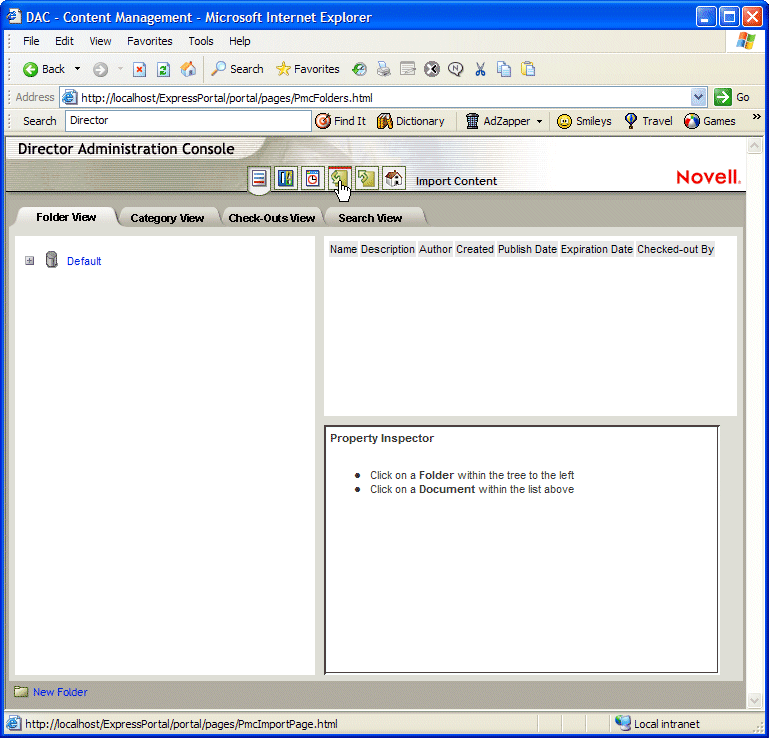
The Director Administration Console (DAC) opens in your browser.
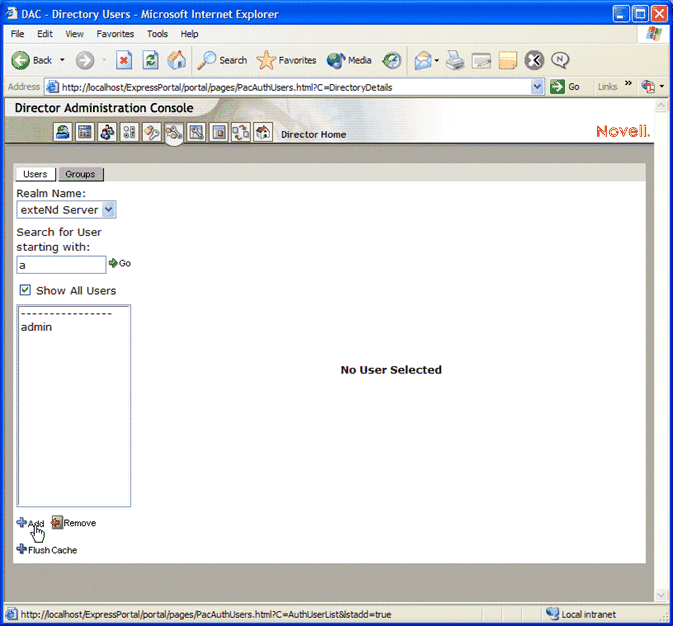
Click the Directory Management icon.
The Directory Management tool opens in your browser with the Users tab selected.
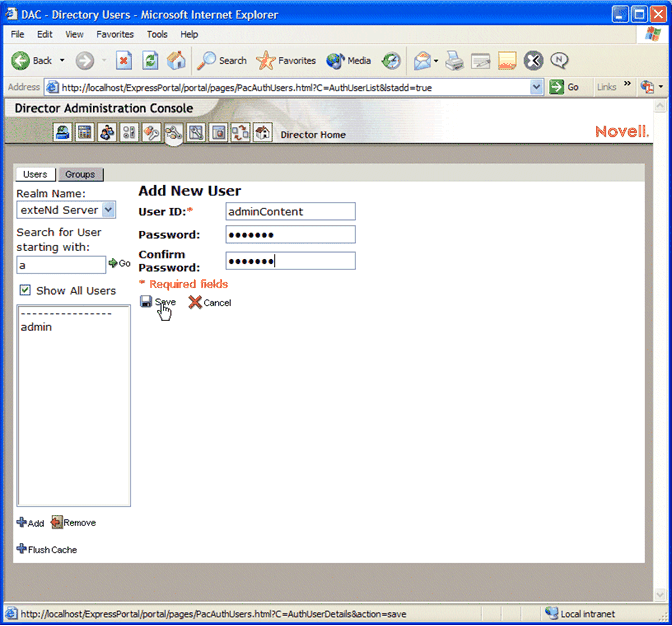
Enter the following information for your new user:
|
Field |
What to specify |
|---|---|
|
User ID |
adminContent |
|
Password and Confirm Password |
content |
Click Save to record your entries.
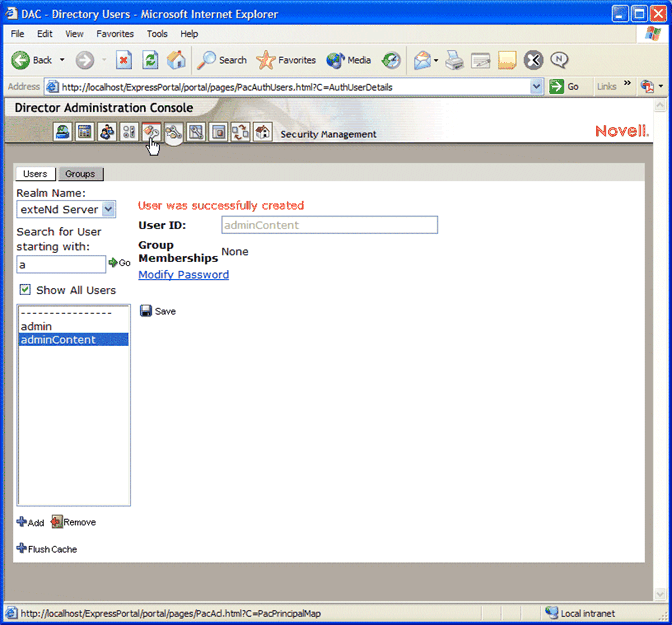
The new user adminContent is added to your portal application.
Now you are ready to assign content administrator privileges to the new user. Leave the Director Administration Console running and move to the next exercise.
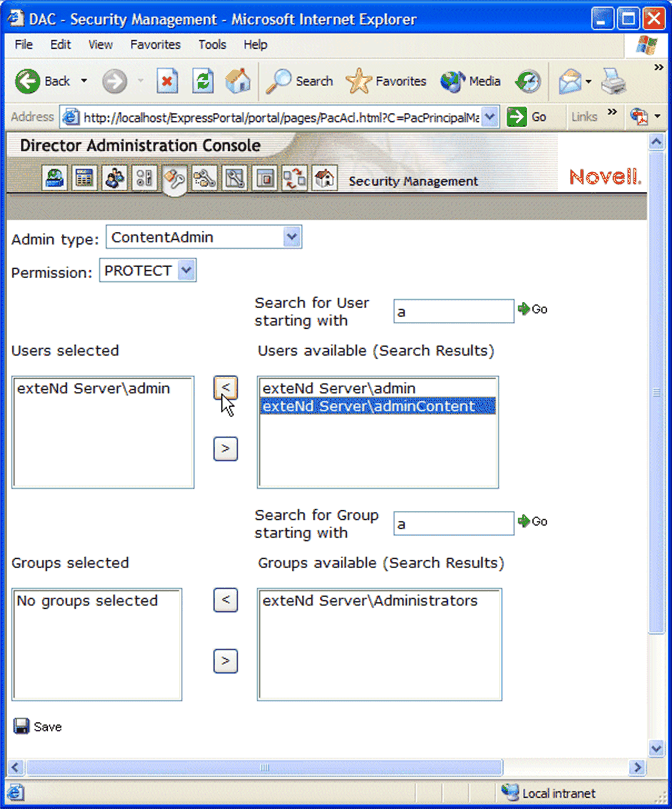
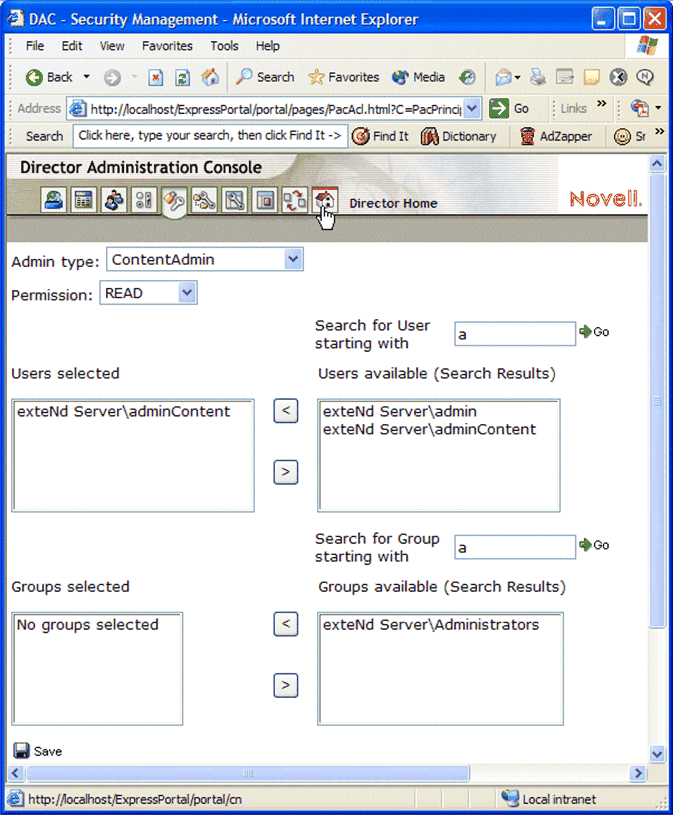
This exercise shows you how to assign content administrator and search administrator privileges to the adminContent user you just added to the Express Portal application. There are several permissions that provide varying levels of access to documents, folders, metadata, and other elements in the content repository:
In this exercise, you will grant all of these permissions to the content administrator.
 To assign security privileges to a content administrator:
In the Director Administration Console, click the Security Management icon.
Assign content administrator permissions to the adminContent user by following these steps:
Select WRITE in the Permission dropdown menu and repeat Step 4.
Select READ in the Permission dropdown menu and repeat Step 4.
Now assign search administrator write permission to the adminContent user by following these steps:
Repeat Step 4.
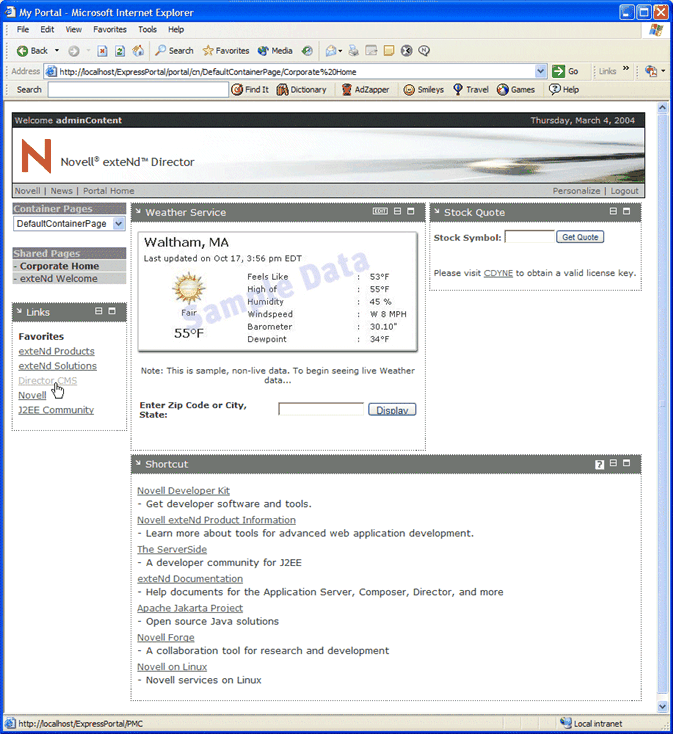
Log back in as the content administrator user you just created:
Recall that the user name is adminContent and password is content.
Now you are ready to import folders and documents into the content repository. Leave the home page open in your browser and move to the next exercise.
exteNd Director provides a repository for storing content through its Content Management (CM) subsystem. The content repository can store any type of content that can be digitized including:
In this exercise you will import sample documents and folders into the repository. This content will be used in subsequent exercises to test your ability to browse the repository and create new documents via IFrame portlets.
Before beginning this exercise, be sure you have downloaded the accessory ZIP file required for the exteNd Director tutorials, as described in the section on how to download accessory files.
To import folders and documents into the content repository:
Open the accessory archive Director52Tutorial.zip and select Director5_data.zip.
NOTE: The file Director5_data.zip contains XML descriptors of documents, folders, and other content elements, as described in structure of the data import or export archive.
Click Extract and extract the file to a location of your choice.
TIP: Be sure to remember the location of the file because you will be entering its path in a later step in this exercise.
On the home page, click the Director CMS link in the Favorites list:
The Content Management tool opens in a separate browser window.
Select the Import Content icon:
The Import Content Management Data panel appears in your browser.
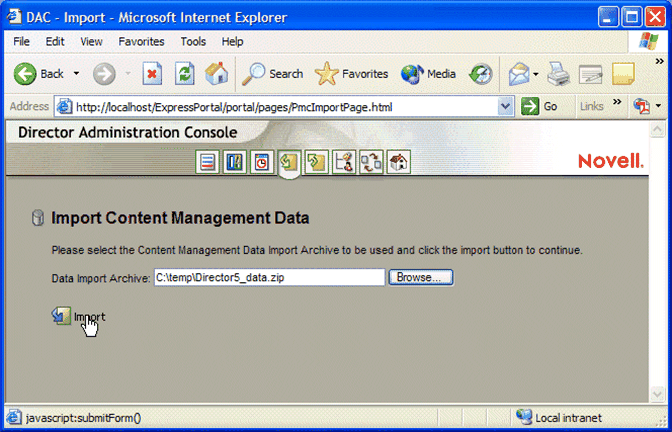
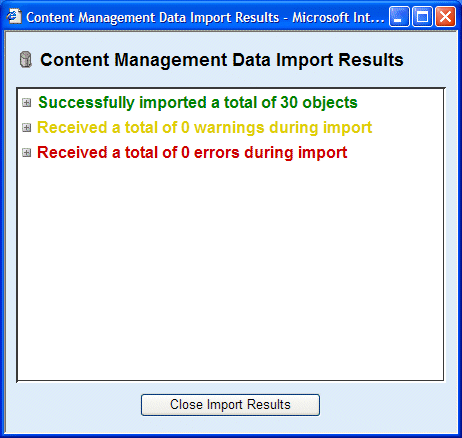
In the Data Import Archive field, enter the path to Director5_data.zip and click Import, as in this example:
When the import completes, a summary window displays the following information:
NOTE: The summary window will not appear if your browser uses a popup blocker. To view the summary window (and verify success), disable the popup blocker and reimport the content.
The imported content includes corporate news stories for various departments in a fictitious organization, as well as folders and document types. In exteNd Director, a document type is like a template that specifies formats and metadata for documents you create.
Now you are ready to add a content browser to a personal page, using the IFrame portlet. Leave the home page open in your browser and move to the next exercise.
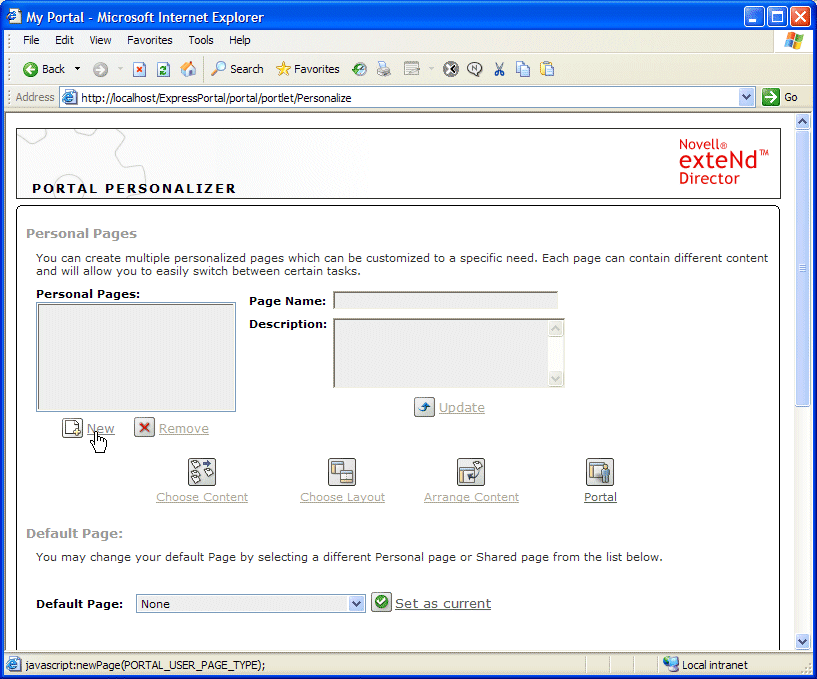
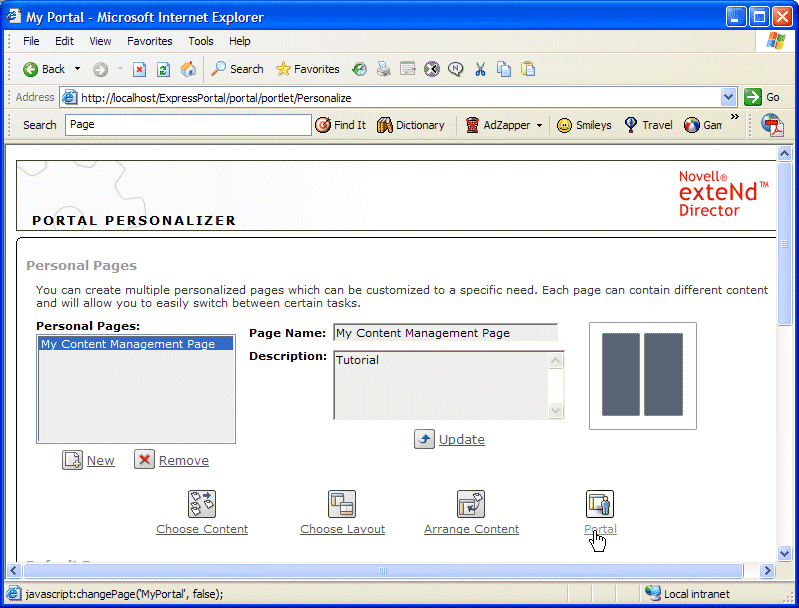
In this exercise you will create and configure a personal page to allow you to browse the exteNd Director content repository through an IFrame portlet.
Enter the following properties for the new page:
|
Property |
What to specify |
|---|---|
|
Page Name |
My Content Management Page |
|
Description |
Tutorial |
Now you are ready to add an IFrame portlet to your personal page and configure it to operate as a content browser. Leave the Portal Personalizer running and move to the next exercise.
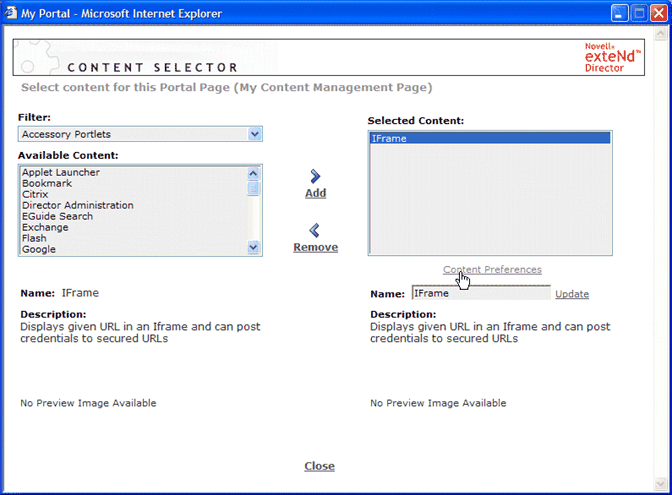
In this exercise, you will use the Content Selector to add an IFrame portlet to My Content Management Page, the personal page you just created. In a later exercise you will learn how to add a portlet to a page using the Layout Selector tool (see Adding an IFrame portlet to a page using the Layout Selector tool).
To add an IFrame portlet to your personal page using the Content Selector:
Select My Content Management Page in the Personal Pages list and click Choose Content.
From the Available Content list select IFrame and add it to the page by clicking Add.
Now you are ready to configure the IFrame portlet as a content browser. Leave the Content Selector open and move to the next exercise.
To configure the IFrame portlet as a content browser:
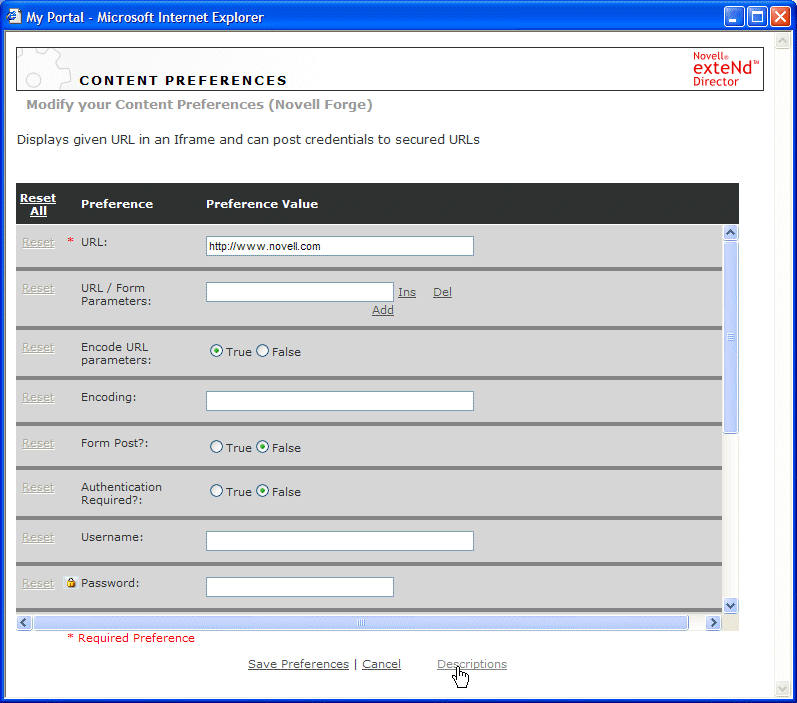
Select the IFrame portlet in the Selected Content list and click Content Preferences.
The Content Preferences sheet opens.
TIP: To get more information about each preference, click Descriptions at the bottom of the sheet:
Change the values of the following preferences:
|
Preference |
What to specify |
|---|---|
|
URL |
http://host name/ExpressPortal/xresources
|
|
Width |
500 |
NOTE: xresources is the extended Content Management resource servlet, which provides access to folders and documents in the exteNd Director content repository.
The Content Preferences sheet closes, returning you to the Content Selector.
Now you are ready to test your content browser. Leave the Portal Personalizer running in your browser and move to the next exercise.
To browse the content repository from your portal page:
Under Personal Pages in the navigation area of the page, click My Content Management Page.
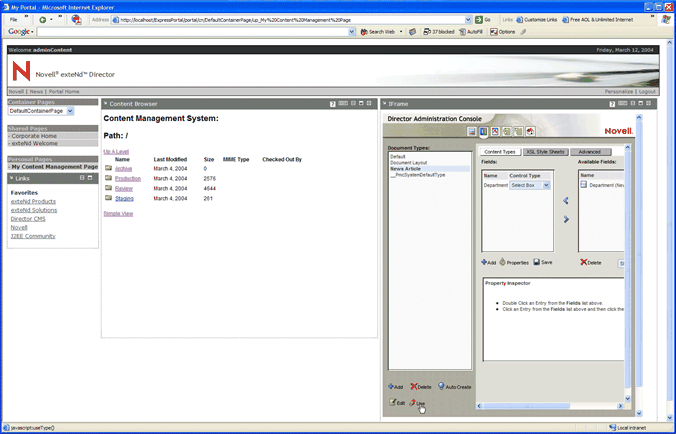
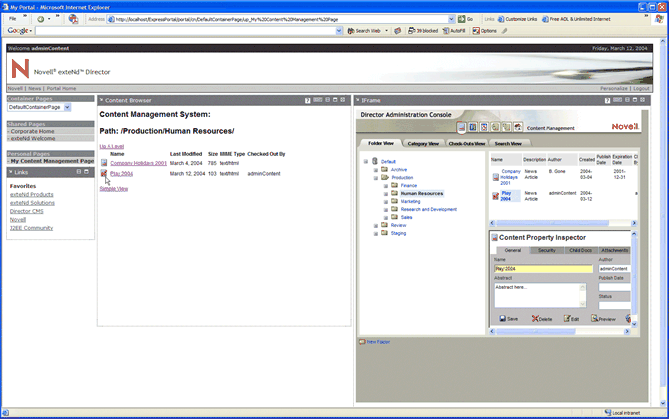
My Content Management Page appears in the content area of your browser, displaying the exteNd Director content repository in your content browser portlet window.
The portlet displays the extended view of the content repository, which includes the following information about each content element:
You will see only those folders and documents you are authorized to view. As a content administrator, you can access all content in the repository.
Your portal page should look something like this:
NOTE: This image shows only the content you imported into the repository in Importing folders and documents into the content repository. You will be able to view and browse any other content in your repository as well.
Browse the content. Click the names of folders and documents to open them.
Now you are ready to add document creation capability to your Content Management Page. Leave your home page open in your browser and move to the next exercise.
In this exercise, you will configure a second IFrame portlet to provide access to the document creation utilities of the exteNd Director Content Management system.
In this exercise, you will use the Layout Selector to add an IFrame portlet to My Content Management Page, the personal page that you just created. Recall that in a previous exercise you added a portlet to a page using the Content Selector tool (see Adding an IFrame portlet to a page using the Content Selector tool).
To add an IFrame portlet to your personal page using the Layout Selector:
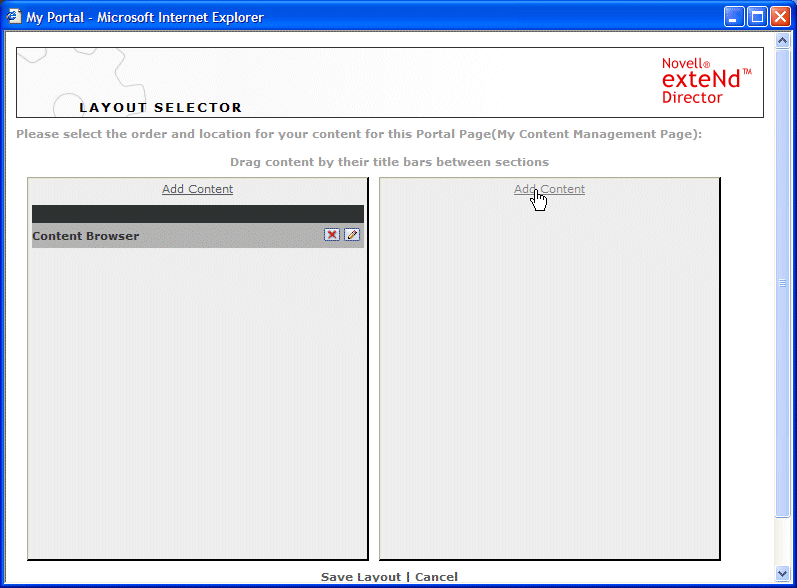
Select My Content Management Page in the Personal Pages list and click Arrange Content.
The Layout Selector opens in a new window:
As you can see, the default layout for personal pages is a two-column layout. The content browser portlet that you added in a previous exercise is placed in the first column of the page by default. This Layout Selector view allows you to add new portlets to specific locations in your layout and to reorganize the page by moving existing portlets to new locations.
From the content selector, select an IFrame portlet from the Available Content list, then click Select Content.
The content selector closes and an IFrame portlet is added to the second column of the layout view of your personal page.
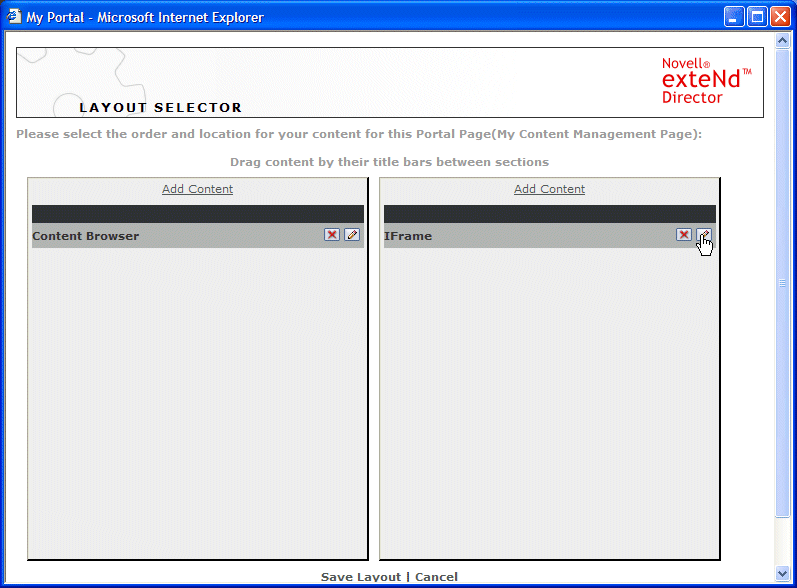
In the tool bar of the IFrame portlet, click the Edit button to modify its properties:
A confirmation window appears, asking if you want to save the layout.
Change the values of the following preferences:
|
Preference |
What to specify |
|---|---|
|
URL |
http://host name/ExpressPortal/portal/pages/PmcTemplates.html
|
|
Height |
700 |
|
Width |
800 |
NOTE: This URL gives you access to the document creation utilities of the exteNd Director Content Management system.
Click Save Preferences to record your changes and return to the Layout Selector.
Now you are ready to test the portal page by creating a document and adding it to the content repository. Leave the Personalizer running in your browser and move to the next exercise.
In this exercise you will use your IFrame portlet to create an HTML document in the exteNd Director content repository. Your document will be based on a pre-existing document type called News Article, which you imported along with other content in the earlier exercise Importing folders and documents into the content repository.
A document type is like a template, used to define custom fields and styles to associate with a group of documents. Custom fields are often used to speed up content queries because they can be searched quickly using a database lookup, as opposed to searching document text.
The document type News Article defines a custom field called Department. Using this field, you can specify the department that wrote the article. In this example, you will create a short news article for Human Resources and store the document in the Production folder for the Human Resources department.
After creating the document, you will publish it and view its content from your content browser portlet.
To create a new document in the content repository from your portal page:
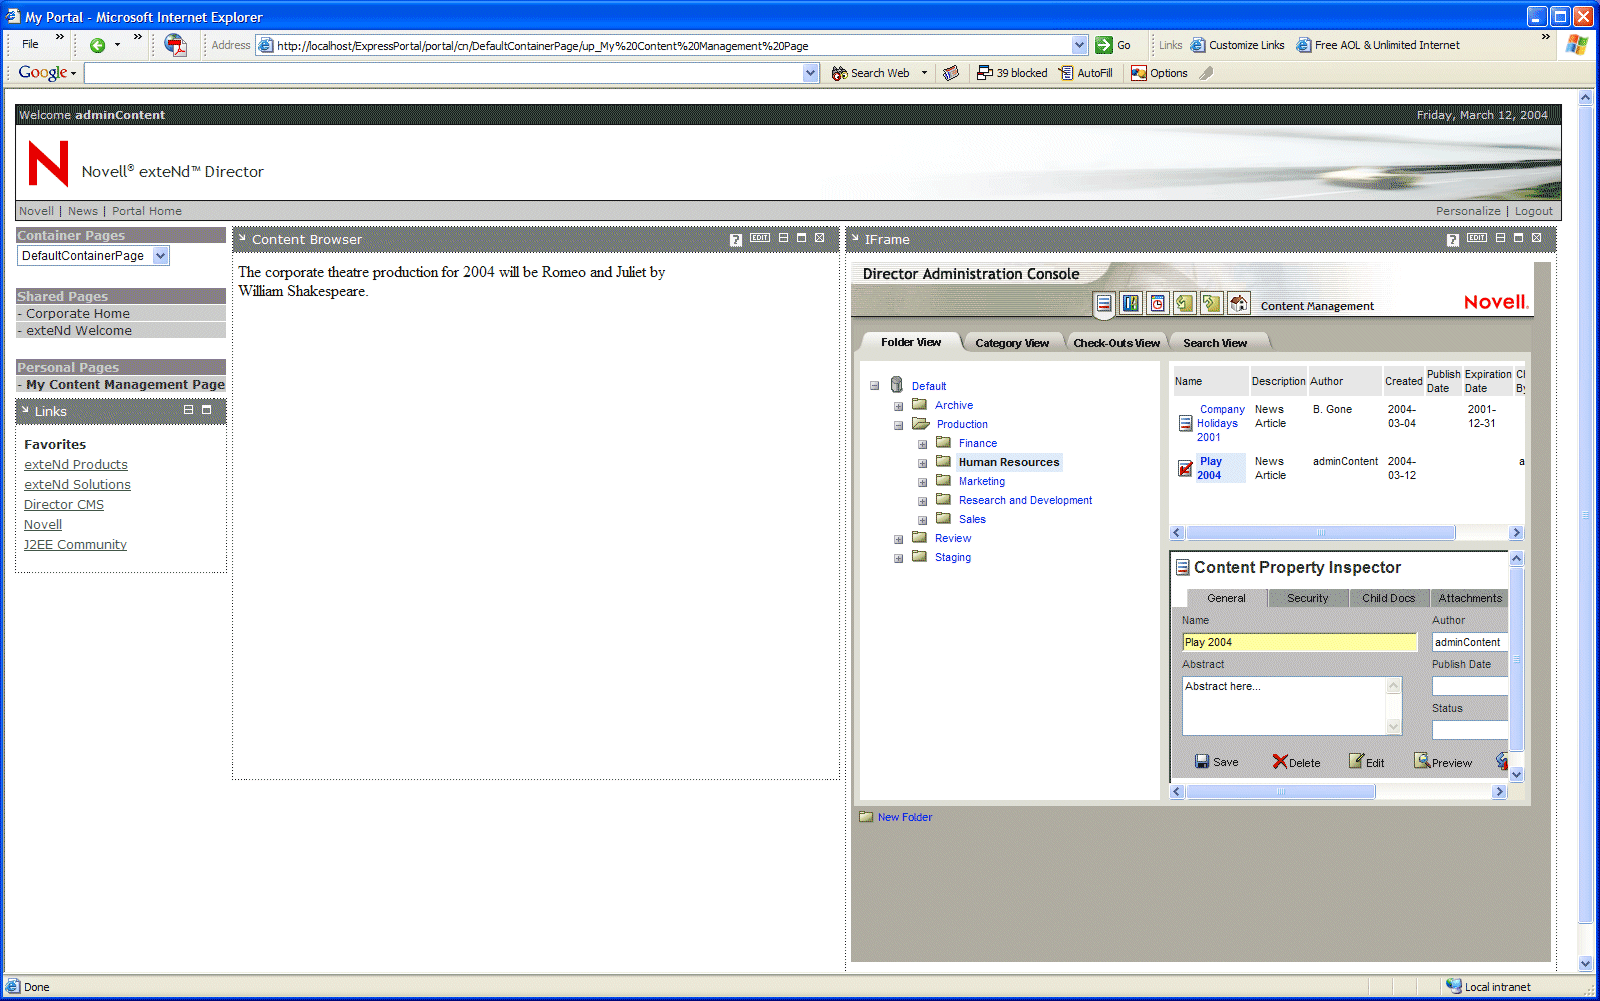
In the navigation area of the page, click My Content Management Page.
My Content Management Page, appears in the content area of your browser. The page displays the content browser on the left and the exteNd Director document creation utility on the right, as shown:
You may want to maximize your browser window to see the content of both portlets.
In the document creation portlet, select News Article in the Document Types list and click Use.
A create document dialog opens in a new window with the General tab selected.
In the General tab panel, enter the following values in the required fields:
|
Required field |
What to specify |
|---|---|
|
Name |
Play |
|
Title |
Corporate Theatre Production |
|
Author |
adminContent |
|
Folder |
Follow these steps: |
A panel appears showing the custom field Department along with a list of values you can assign to the field.
The Create Content radio button should be selected by default.
Click inside the content area and type the following text:
The corporate theatre production for this year will be Romeo and Juliet by William Shakespeare.
Click Add and Close in the bottom tool bar
The document is added to the repository and the Create Content dialog closes.
Now you are ready to publish the document you just created. Leave My Content Management Page open in your browser and move to the next exercise.
To view the content of a document in your content browser portlet, you must first publish the document. In this exercise you will learn how to publish a version of your document.
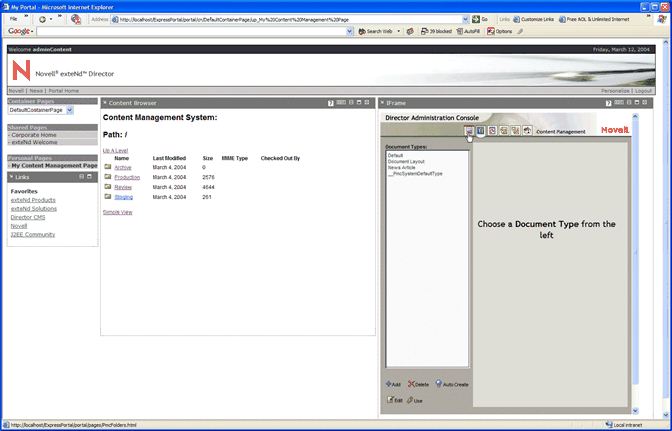
Back in your document creation portlet, click the Content Management icon:
The Content Management tool opens in the IFrame portlet window.
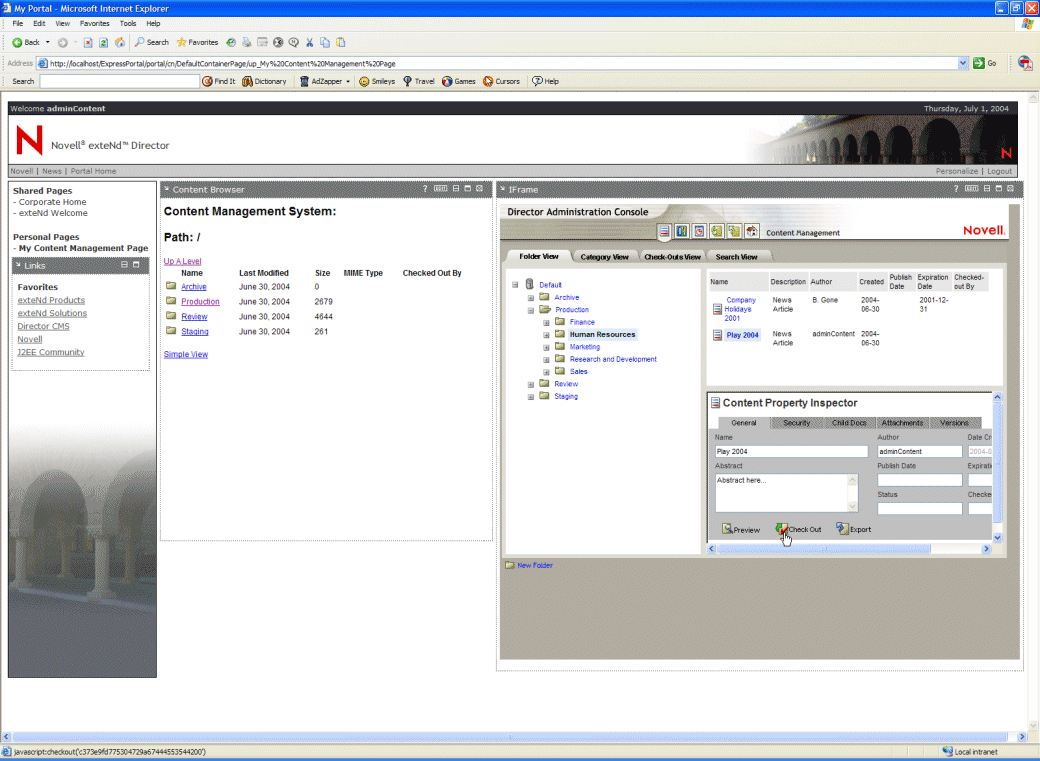
In Folder View of the Content Management tool, navigate to and select Default/Production/Human Resources.
Your new file Play should appear in the list of documents in the upper right panel.
Select Play, then click Check Out in the Content Property Inspector.
A red check mark appears next to Play to indicate it has been checked out.
NOTE: Checking out a document locks it, preventing other users from modifying the content. You must check out a document before you can publish it.
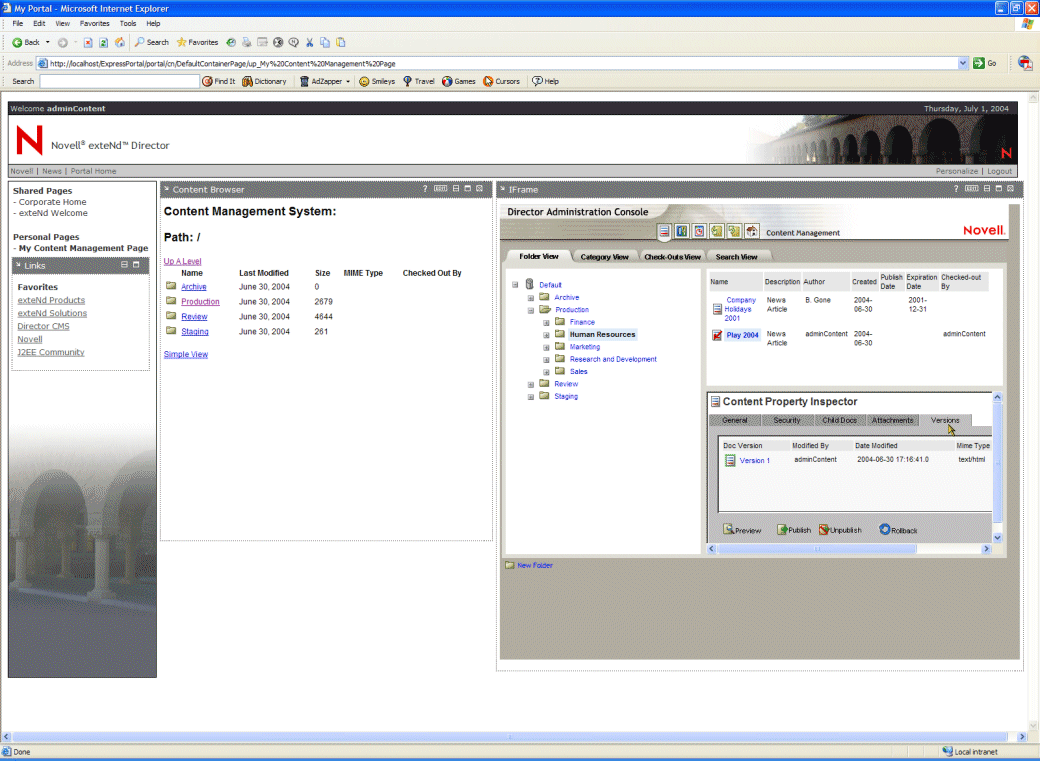
In the Content Property Inspector, select the Versions tab.
TIP: You may need to scroll right in the Content Property Inspector to bring the Versions tab into view.
In the Versions panel of the Content Property Inspector select Version 1, then click Publish.
The Version 1 icon appears with a green border to indicate it has been published.
Now you are ready to open the new document in your content browser. Leave My Content Management Page open in your browser and move to the next exercise.
In this exercise, you will navigate to your new document and open it in the content browser. You can view published content only.
To open a document in the content browser
In the content browser on your personal page, navigate to and select Production/Human Resources—the folder in the content repository where you created the new document.
The document Play should appear in the list of documents:
NOTE: As you can see, the content browser accurately reflects the status of the document Play—specifically, that it is currently checked out to adminContent. Since you are the user who checked out the document, you will be able to open it in the content browser.
Click Play in the content browser.
The content you entered for this document appears in the content browser window:
Use the Back button of your browser to move up a level to Production/Human Resources in the content repository.
Back in the document creation portlet, select the General tab in the Content Property Inspector.
TIP: You may need to scroll left in the Content Property Inspector to bring the General tab into view.
Select Play, then click Check In in the Content Property Inspector.
TIP: You may need to scroll right in the Content Property Inspector to bring the Check In icon into view.
Refresh the content browser portlet to update the status of the Play document.
TIP: Right-click in the content browser portlet window and select Refresh.
Use the Content Selector to change the name of your second IFrame portlet from IFrame to Content Creator.
TIP: The instructions for changing the name of a portlet that you add to a page appear in the procedure for Adding an IFrame portlet to a page using the Content Selector tool.
Copyright © 2004-2005 Novell, Inc. All rights reserved. Copyright © 1997, 1998, 1999, 2000, 2001, 2002, 2003 SilverStream Software, LLC. All rights reserved. more ...