

| |
ConnectView enables you to assign users to the saved accounting profiles in the Profile and User window.
To assign users to your accounting profiles, choose Accounting > Assign Profile to Users. ConnectView opens the Profile and User window, shown in Figure 39.
NOTE: By default, ConnectView creates the DEFAULT.NCP profile with account number 0000 and assigns this profile to all users (<DEFAULT>). This profile does not initially contain any billing formula or rates. The profile can be modified using Accounting > Edit Profile, but cannot be removed from the Profile and User window.
Figure 39
Profile and User Window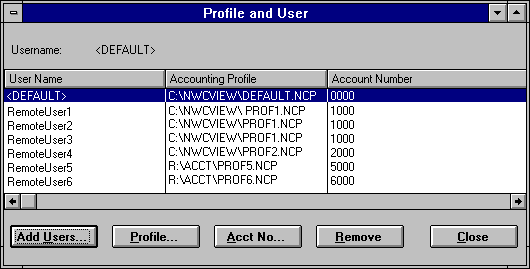
NOTE: No charges are applied for accounting profiles that are unavailable or cannot be found.
You might want to assign users to different accounting profiles to enable you to apply different billing charges to different users.
To select users, click the Add Users button. ConnectView opens the Add Users dialog box, shown in Figure 40.
Figure 40
Add Users Dialog Box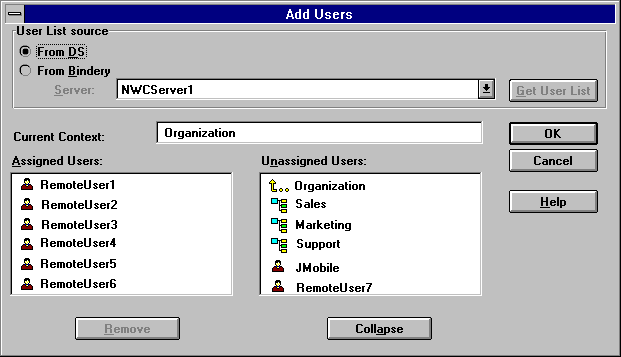
To select users from the current Novell Directory ServicesTM (NDSTM) tree, click the From DS radio button in the User List Source section. Then, either double-click the desired usernames in the Assigned Users list box or select the desired context or usernames in the Unassigned Users list box and click the Add button.
NOTE: If you assign accounting profiles using the bindery username jsmith, then record transactions using the complete NDS context (jsmith.eng.xyzcorp) the transactions will not match the bindery username (jsmith) assigned to the accounting profile and the default accounting profile will be used. NDS usernames are different than bindery usernames.
You can either double-click the objects or use the Collapse/Expand button to browse the tree and select the desired users. You can use the arrow buttons to navigate the tree.
NOTE: To select multiple users, press and hold the left mouse button while dragging the selection over the desired usernames or press and hold Ctrl while clicking the usernames. Selecting multiple users is not possible when you select users from an NDS tree.
To remove users, select the desired usernames in either the Profile and User window or the Assigned Users list box and click the Remove button.
When the desired users have been selected, click the OK button to close this dialog box and add or remove the users to the Profile and User window. To close this dialog box without applying any changes, click the Cancel button.
To select a different accounting profile for a user, select the desired usernames and click the Profile button.
NOTE: To select multiple users, press and hold the left mouse button while dragging the selection over the desired usernames or press and hold Ctrl while clicking the usernames.
ConnectView opens the Select Accounting Profile dialog box, shown in Figure 41.
Figure 41
Select Accounting Profile Dialog Box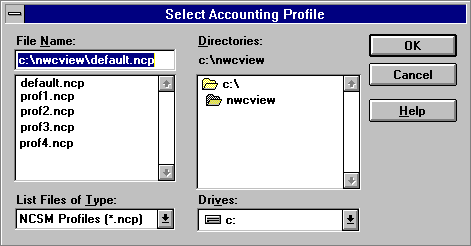
Use the file options to specify the desired drive, path, and accounting profile filename. By default, accounting profiles are stored in the \NWCVIEW directory.
To apply the accounting profile to the selected users, click the OK button. To close this dialog box without applying the profile, click the Cancel button.
To set up or change the account number assigned to a user, select the desired usernames and click the Acct No button.
NOTE: To select multiple users, press and hold the left mouse button while dragging the selection over the desired usernames or press and hold Ctrl while clicking the usernames.
ConnectView opens the Account Number dialog box, shown in Figure 42.
Figure 42
Account Number Dialog Box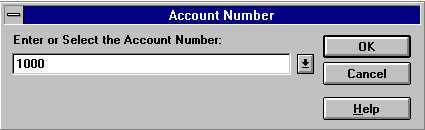
Enter the desired account number and click the OK button. Account numbers can be up to 38 alphanumeric characters, including mixed case and special characters. ConnectView applies the entered account number to the selected users.
To close this dialog box without applying the account number, click the Cancel button.
| |