

| |
ConnectView enables you to enter rates (Step 2) for any or all of the following:
NOTE: Time of day and holiday rates apply only to the rate per minute billing formula.
IMPORTANT: Because NCS cannot report the baud rate used for its dial-out connections, baud rate and port name charges do not apply to NCS dial-out connections. Because an AIOPAD port cannot report the baud rate used for its connections, the rates specified in the baud rate and port name rate tables do not apply to these connections.
Time of day rate tables can be used to specify different costs per minute based on the hour of the day, the day of the week, and whether or not it is a holiday.
To set up a time of day rate table, click the Enter Billing Rates button in the Accounting Profile dialog box. ConnectView displays the Time of Day rate table and the tab buttons for additional rate tables, shown in Figure 33.
Figure 33
Rate Tables (Time of Day) Dialog Box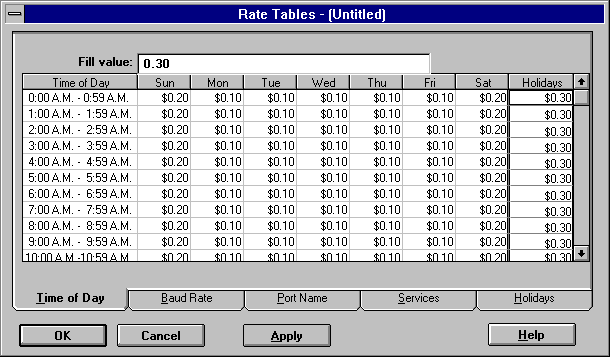
The example Time of Day rate table lists the time in hourly intervals from 0:00 a.m. to 23:59 p.m., and charges for each interval for each day of the week.
Enter the desired rates.
NOTE: To enter the same amount in multiple cells, highlight the desired cells and enter the desired rate in the Fill value edit box. Click the Apply button. This fills the highlighted cells with the entered rate. Rates must begin with an integer, for example 0.50 or 1.20. A leading decimal point will not be accepted.
Also, enter additional rates that apply to holidays under the Holidays column. The Holidays column is the far right column.
When specifying time of day rates, ConnectView enables you to specify holidays of the year to receive special rates. When a connection occurs on a day assigned to be a holiday, holiday rates are used in place of any other rates. Enter the desired holiday rates in the Holidays column in the Time of Day rate table.
Click the Holidays tab button. ConnectView displays the holiday calendar in the Rate Tables dialog box, shown in Figure 34.
Figure 34
Rate Tables (Holiday Calendar) Dialog Box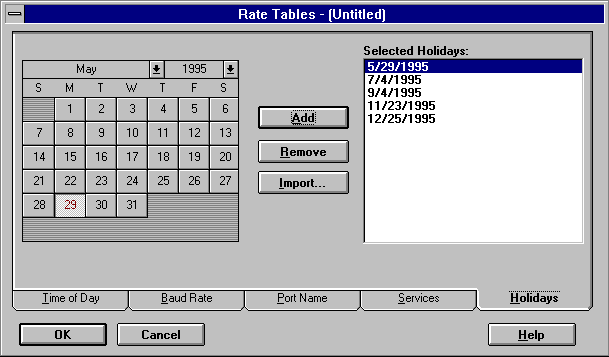
To include dates as holidays, either double-click them in the calendar or select the desired holiday dates and click the Add button. To remove dates as holidays, either double-click them in the Selected Holidays list or select any unwanted dates and click the Remove button.
To copy holiday settings from a previously saved profile, click the Import button. Importing holidays from another profile replaces the current holiday settings with the imported settings.
To close this dialog box and apply the holiday changes, click the OK button. To display additional accounting profile options, click a tab button.
ConnectView enables you to create a rate table based on cost per minute or cost per connection for baud rates used for a connection (connection speeds).
NOTE: Because an AIOPAD port cannot report the baud rate used for its connections, the rates specified in the baud rate or port name rate tables do not apply to these connections. Also, because NCS cannot report the baud rate used for its dial-out connections, baud rate and port name charges do not apply to NCS dial-out connections.
To create a rate table for baud rates, click the Baud Rate tab button. ConnectView displays the rates in the Rate Tables (Baud Rate) dialog box, shown in Figure 35.
Figure 35
Rate Tables (Baud Rate) Dialog Box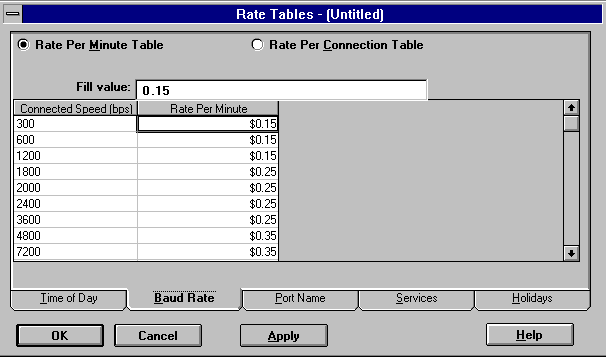
Click the Rate Per Minute Table or Rate Per Connection Table radio button and enter the desired rates for the connection speeds in the rate column.
NOTE: To enter the same amount in multiple cells, highlight the desired cells and enter the desired rate in the Fill value edit box. Click the Apply button. This fills the highlighted cells with the entered rate. Rates must begin with an integer, for example 0.50 or 1.20. A leading decimal point will not be accepted.
To close this dialog box and apply all rate changes, click the OK button. To display additional accounting profile options, click another tab button.
ConnectView enables you to create a rate table based on cost per minute or cost per connection for individual port access on the current server.
NOTE: Because an AIOPAD port cannot report the baud rate used for its connections, the rates specified in the baud rate or port name rate tables do not apply to these connections. Also, because NCS cannot report the baud rate used for its dial-out connections, baud rate and port name charges do not apply to NCS dial-out connections.
To create a rate table for the ports, click the Port Name tab button. ConnectView displays the rates for the different speed on a port in the Rate Tables (Port Name) dialog box, shown in Figure 36.
Figure 36
Rate Tables (Port Name) Dialog Box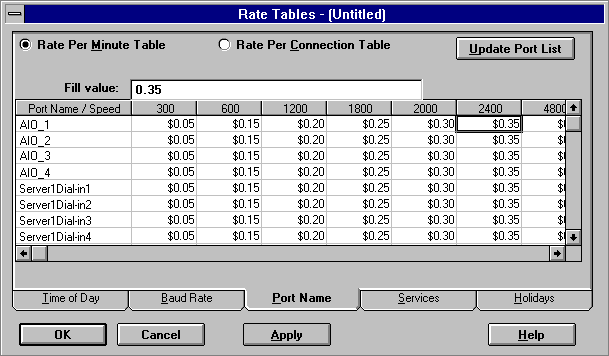
Click either the Cost Per Minute Table or Cost Per Connection radio button and enter the desired rates for each port and port speed. To update the list of available ports to match the available ports on the current server, click the Update Port List button.
NOTE: To enter the same amount in multiple cells, highlight the desired cells and enter the desired rate in the Fill value edit box. Click the Apply button. This fills the highlighted cells with the entered rate. Rates must begin with an integer, for example 0.50 or 1.20. A leading decimal point will not be accepted.
To close this dialog box and apply all rate changes, click the OK button. To display additional accounting profile options, click another tab button.
ConnectView enables you to create a rate table based on cost per minute or cost per connection for each remote access service on the current server.
To create a rate table for the supported services, click the Services tab button. ConnectView displays the service rates in the Rate Tables (Services) dialog box, shown in Figure 37.
Figure 37
Rate Tables (Services) Dialog Box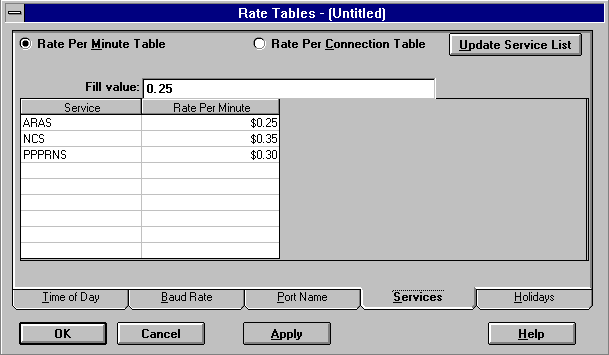
Click the Rate Per Minute Table or the Rate Per Connection Table radio button and enter the desired rates in the rate column. To update the list of available services on the current server, click the Update Service List button.
NOTE: To enter the same amount in multiple cells, highlight the desired cells and enter the desired rate in the Fill value edit box. Click the Apply button. This fills the highlighted cells with the entered rate. Rates must begin with an integer, for example 0.50 or 1.20. A leading decimal point will not be accepted.
To close this dialog box and apply all rate changes, click the OK button. To display additional accounting profile options, click another tab button.
| |