3.11 Initial Configuration

After installing the web server and Retain, you will need to configure Retain to connect to your systems.

You will be:

  1. Setting the storage path.

  2. Connecting to the database.

  3. Configuring the database.

  4. Setting the Retain administrator account.

  5. Connecting to your SMTP server.

  6. Selecting the indexing engine.

  7. (Optional) Configuring your Cloud Mobile Service (CMS) Proxy Connection

  8. Setting the Retain Server connection.

3.11.1 Moving Retain

If you are moving Retain to another server and you are connecting to an existing Retain database on an external database server. Do NOT go through the configuration wizard, or data will be deleted from the database. You MUST transfer the ASConfig.cfg from the previous server.

3.11.2 Retain Setup Post-Install Tasks

After running through the initial install guide for your OS Install Checklist, you are ready to configure Retain. From this point on, Retain works the same regardless which platform it is running on. To get Retain ready for regular use, some final one-time procedures need to be run.

  • Retain Server needs to be configured

  • Configure the relevant module(s)

  • At least one Retain Worker needs to be configured

Initial Setup Overview

  • Choose your storage path

  • Retain prompts you for access information to your SQL Database Server

    • You must create this database beforehand. (See system requirements for documentation for the supported SQL servers.)

    • Retain creates the tables, indexes, and prepares the database for use

You will be prompted to provide SQL connection information for both the configuration and message store databases. For convenience and simplicity most installations store this information in the same database. The database(s) will be used to store Retain configuration, cached address books, and all saved message data.

  • Create at least one administrator account. The first account will be the default admin account. It is created during the initial setup

    • The ‘admin’ account is special:

      -It has ALL admin rights

      -It never expires

      -It always uses “offline authentication” (authenticates using a password stored in the SQL configuration database instead of authenticating against a message system)

    • Additional accounts can be created as desired with as many rights as you wish in the management interface. User accounts may possess a mixture of administrator level and user level rights. As a result, users may have some admin level rights, but would not be considered an administrator

  • Retain prompts you for the following SMTP information for notification and forwarding. (If no SMTP is present, this step may be skipped by typing the word ‘skip’ in the SMTP Mail Server field.)

    • SMTP Server: Server to use for sending messages. (DNS or IP) (use DNS whenever possible)

    • From address: Enter the address that you want to appear in the “From” field on the messages Retain sends

    • To address: Enter the address to which Retain will send notification

    • Username: Enter the username to use for authentication with the SMTP server for relaying mail.

    • Password: Enter the password for this username.

  • Select the indexing engine. There are two choices, but both are High Performance Indexing engines: The Standard Index engine and the High Availability Index (HAI).

    The Standard Index is the High Performance Indexer (HPI) embedded with the Retain Server and is more than sufficient for most systems.

    The High Availability Index is the HPI engine scaled and designed for high availability and rapid searches on very large systems. The HAI requires at least three (3) separate, dedicated, index servers in addition to the Retain Server, as well as a separate license.

    • After initial setup, configuration of a module and creation of a profile, schedule, worker, and job are required before messages can be archived.

Continue with initial configuration Initial Configuration.

3.11.3 Run the Configuration Wizard

  1. Open a web browser

  2. Go to http://<your-RetainServer-ip>/RetainServer

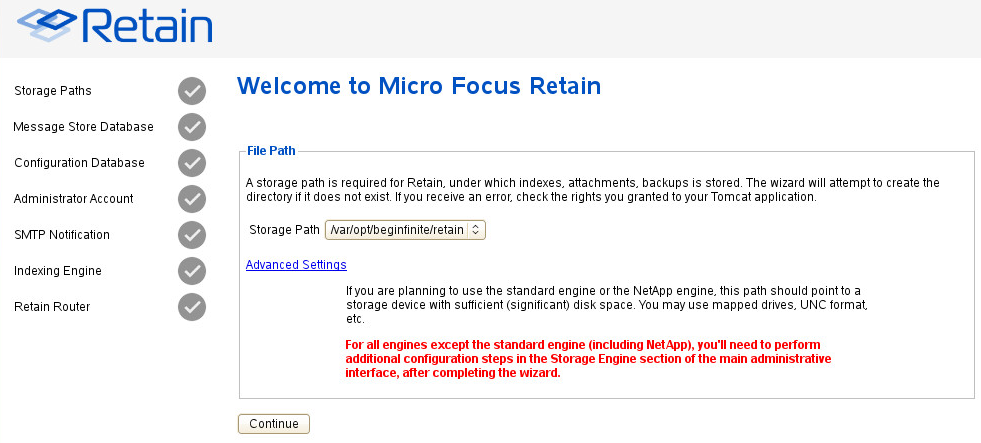
  3. Follow the wizard. You will see this screen initially:

    Please pay special attention to the Storage Path and the Advanced Settings.

3.11.4 About Storage Paths

Retain was designed to be very flexible in allowing you to choose where the data will be stored. Choosing the right hardware and software storage combination is crucial. Storage itself is a function of the operating system and hardware you choose.

As storage needs approach enterprise levels, the need to specify your data storage locations becomes more critical. Some hardware and operating systems have a hard limit of 2 Terabytes, for instance. In situations like these, a SAN might be a good choice for consideration. Either way, it’s imperative that you take the time to investigate your storage needs BEFORE you begin. Retain will monitor the storage space available, and will issue email warnings at 20 GB, and will lock down Retain to a maintenance mode when the storage space drops to 10 GB. This is to avoid possible corruption to the storage and index which may occur when space runs out.

When choosing your storage system, bear in mind the following considerations:

  • Storage size limits. Will storage needs ever exceed this?

  • Ability to add additional storage capacity

  • OS Version and kernel to support the storage system of your choice

  • File system and partitioning

  • Is a SAN right for you?

  • Speed and reliability

  • Backup/restore is your responsibility

3.11.5 Standard Storage Path

You are now ready to start your initial Retain configuration. Specify a storage path for Retain. Accept the default path unless you have a reason to choose a different one. See the next page for an important note about storage paths. If you are specifying a custom storage path, Retain must have rights to the location. For Linux instructions see Custom Storage Path Rights, at the end of the Linux install guide.

3.11.6 Advanced Storage Options

For this reason, Retain offers the advanced storage options. (Located under Server Configuration.) You can specify where you want Retain to store its information.

By default, all data is stored under one master path, specified in the Storage section. From the Retain Server main screen, you can also find this under Server Configuration under the Storage tab. Significant performance increases have been seen when data is stored on separate volumes.

If you wish to specify your storage locations in more detail, click on the “Advanced Settings,” and disable "Derive all file locations from above specified path?".

These fields are automatically populated if you only specify the main storage path. You may change them to point anywhere you wish. You may also change the storage locations later due to storage space needs. Please see the Best Practices Retain Planning and Design Best Practices section for details. You also specify to encrypt the data as it’s stored. We strongly recommend for performance and recoverability that you do NOT encrypt using Retain but consider Block level encryption options (such as BitLocker) that have escrow keys and are processed directly at the operating system level.

Click “Continue”

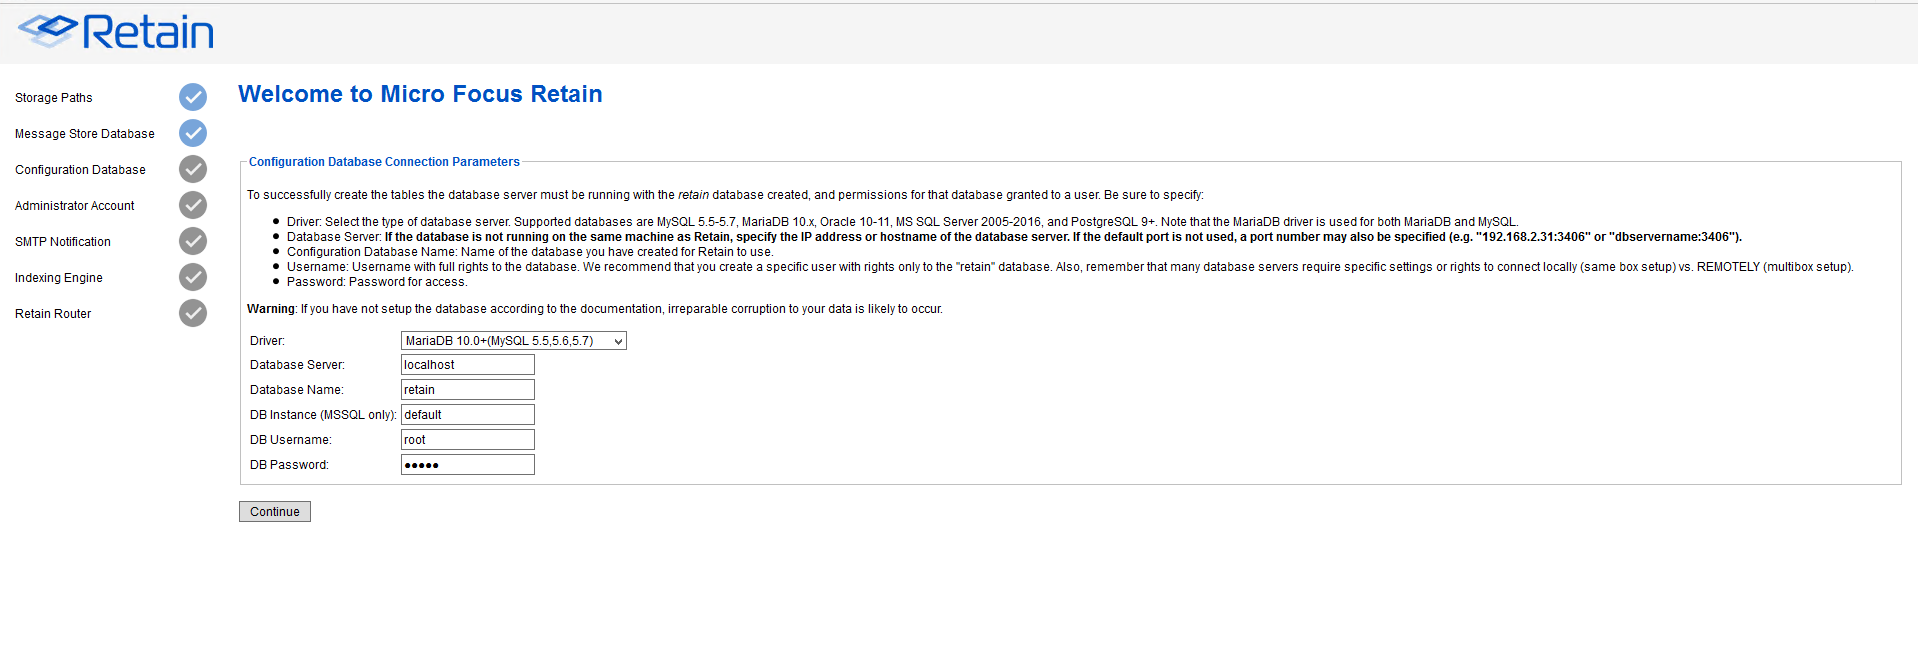
  1. Next, the screen appears for entering the database connection parameters. This is the same information from the database created during the preparation phase. The connection information must be supplied for both the storage and Configuration databases, though they can be housed in the same database

  2. The configuration database must also be specified. Unless otherwise required, the settings here should be identical to the Retain storage database, as they are usually housed together.

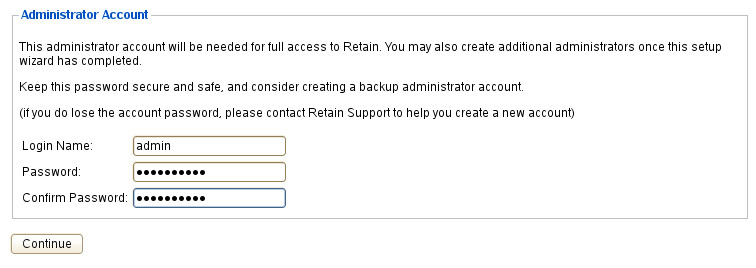
  3. Create the administrator account. This account is special in that this account is the administrator with rights to everything, by default. While other accounts may be created, this administrator account should never be removed or changed. This account may be used by the index engine or other components. Remember the credentials created here; they will be used to log into the Retain system.

    NOTE:Retain allows the creation of many user accounts that share administrative roles. The initial account created is not particularly special; it’s merely a convenience to create one super user with all the Administrative rights granted. Do not delete this account. If the admin account is deleted, please contact support.

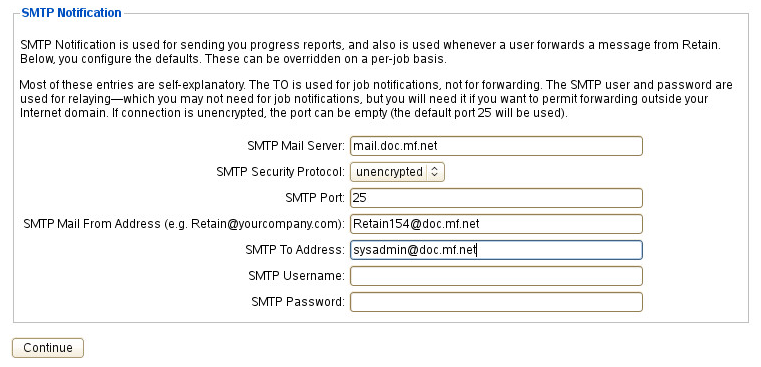
  4. Enter the information for an SMTP relay host that Retain will use to send mail. Setup will attempt to send a test message. You cannot proceed with installation until the SMTP test message is successfully delivered. If you see an error, check firewall settings, (including local desktop/server firewalls such as McAfee, Symantec, and SUSE)

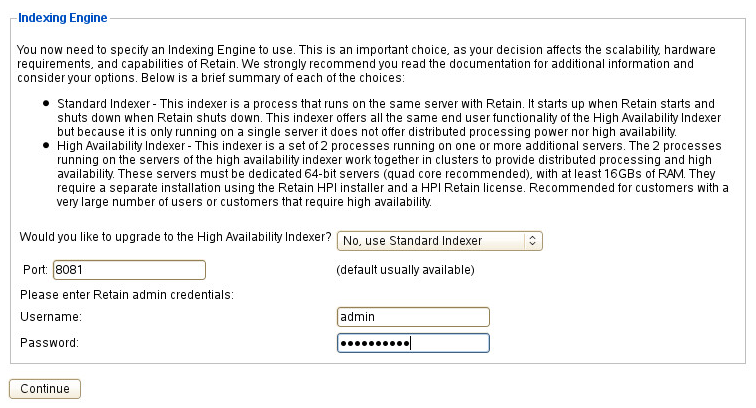
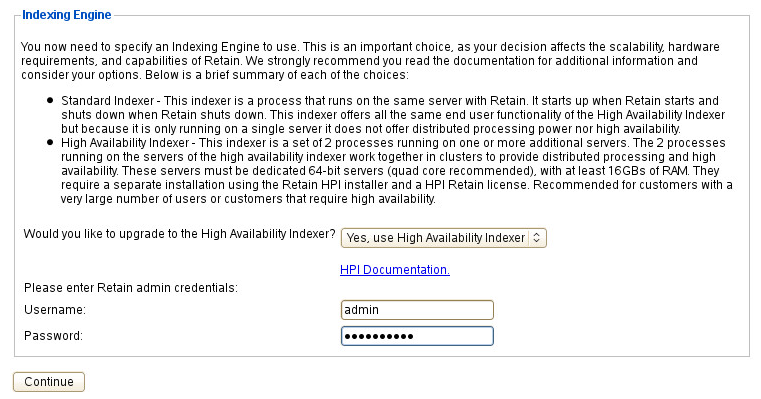
  5. Index Engine Selection

    1. Standard is the High Performance index engine that comes standard with Retain. This engine will handle all but the largest system indexing needs, is housed in the Retain Server, and requires no further configuration.

    2. High Availability Index engine. This index engine is designed for high load systems with very large databases. The HAI requires a separate license, several separate installations and a network plan created in coordination with Support. If you wish to use HAI, it should already be installed and running.

    3. Enter the Retain administrator account name and password for the index engine connection. Once the administrator account has been entered, the system will initialize and connect to the new index engine. This will take a few moments.

  6. (Optional) Configure the Cloud Mobile Service (CMS) Proxy Connection. If you would like to provision and register devices using CMS and have a Proxy server for your Retain server, you can specify the Proxy server information here.

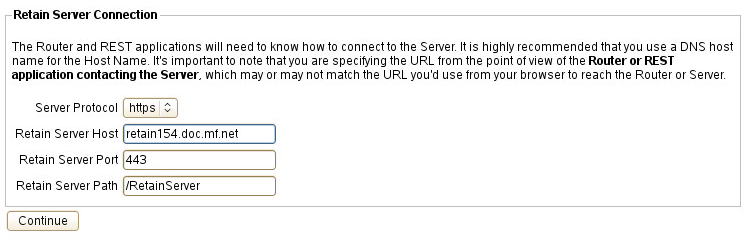
  7. Setup the Retain Server connection. This sets the connection for the Router Retain Message Router Configuration and REST applications, such as Retain Publisher Retain Publisher and Viewer. We recommend that you use a hostname that is set up in your DNS that external devices can resolve to.

  8. Initial setup is now complete.

    Select the 'Complete' button to be presented with the login prompt.