2.2 Installing and Configuring the SMG Appliance
To install the SMG Appliance:
-
Download the OVA file and open it in VMware to import the file.
-
Edit the virtual machine settings to allocate the required CPU (1), RAM (2 GB), and hard drives as specified in the System Requirements.
-
Power on the Virtual Machine to start the appliance install.
2.2.2 Configuring SMG
-
In a browser, open the VAAdmin Console by going to https://<ip or dns of the server>:9443 and login using vaadmin and the password you set earlier.
The VAAdmin Console lets you configure the appliance and SMG.
-
Select to run the SMG install.

-
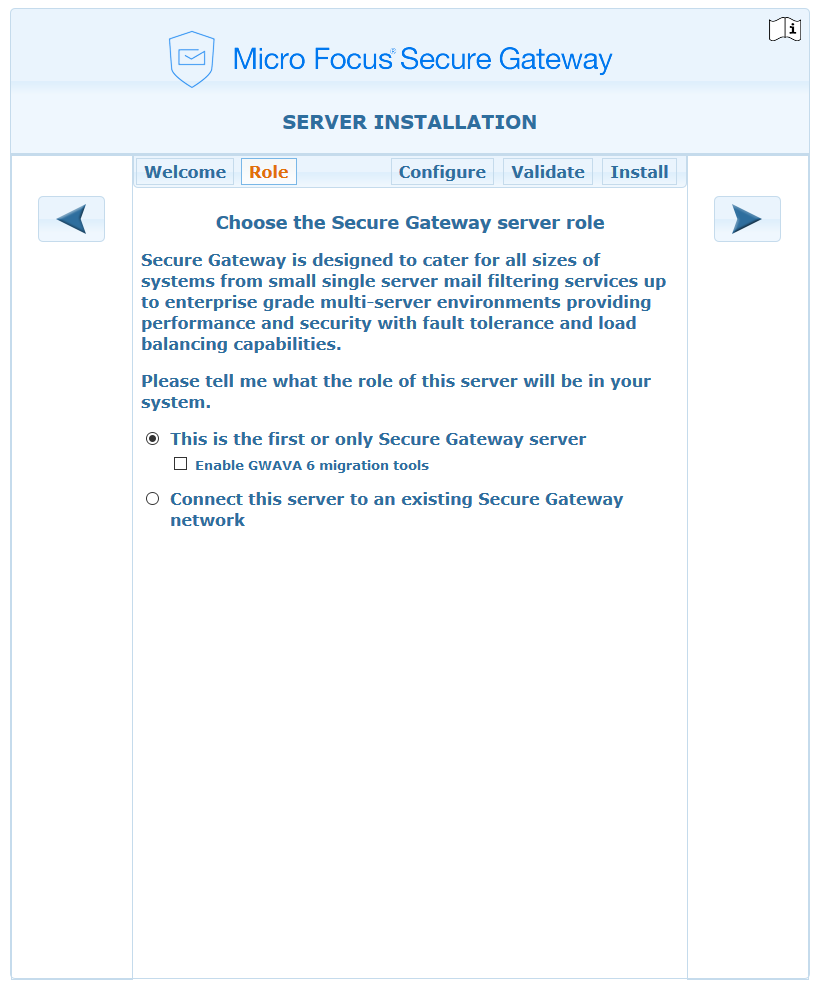
Select the Role this Secure Messaging Gateway server will have.
If this is the first or only server and you have an existing GWAVA 6 system, you may migrate the GWAVA 6 settings with the migration tools GWAVA 6 to Secure Messaging Gateway Migration.
If adding to an existing Secure Messaging Gateway network, see how to connect with an existing network Installing Additional Servers into an Existing Network.
-
Configure the server:
Update the Server name and address.
Add a password for the admin user.
Enter the primary domain.
Enter a contact email, optional.
Enter the mail relay server hostname or IP address and credentials, if required.
Enable Setup default system.

Postgres Database Configuration
If using a external databases, they can be configured here:
-
Config

-
Quarantine

-
Statistics

-
Tracker

-
-
Validate. The installer will validate the entered settings.

-
Select the forward arrow to install the Secure Messaging Gateway server. This may take a few minutes. When complete log in to configure the server with the post install tasks.

-
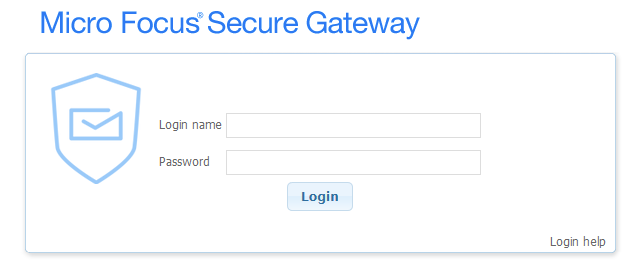
Log into the Secure Messaging Gateway.
-
Continue with Post-Installation Tasks.