Incidents are requests raised for Customers, or raised by a Customer through the Customer Portal. An Incident is raised against a Configuration Item (Item), which may also be a Service, within the system. Incidents are assigned to Technicians and are escalated according to the Service Level Agreement (SLA) applied to the Incident.
The Operations>Incidents view
defaults to display All Incidents logged within the system irrespective
of Incident Status. Available Incident Filters include:
Filter |
Description |
All Incidents |
Displays all Incidents logged in the system regardless of their Status or Assignment. |
Incident Queue |
Displays Incidents assigned to the System User by default, which Technicians can reassign after viewing. (This is only available if the functionality is enabled for the system and Team.) |
My Incidents (Active) |
Displays all Incidents in an active Workflow State that are assigned to the logged-in User. |
My Incidents (All) |
Displays all Incidents, in active and inactive Workflow States, that are assigned to the logged-in User. |
My Teams Incidents (Active) |
Displays all Incidents in an active Workflow State, allocated to the Teams with which the User is associated. |
My Teams Incidents (All) |
Displays all the Incidents, in active and inactive Workflow States, allocated to the Teams with which the User is associated. |
The default display is ten Incidents per batch. The list can be re-sorted by clicking on a column header, and the number of Incidents displayed per batch can be altered using the Display pop-up option.
To create an Incident within the system, the following information is required:
Incidents that are created by Customers through the Customer Portal or via email, can be forwarded to a holding bay or queue, if this functionality is required by the Service Desk. The capability can be enabled system-wide but applied on a per Incident Team basis, as needed.
When an Incident is assigned to the Queue, the name applied in the Technician field is System User.
See: Incident Queue.
Incident Search Tips:
The Incident search option has a default Status to search only Active Incidents. To ensure search success, select the relevant Incident Status, if unsure, select All
To search for multiple Incident numbers at once, insert a comma separator between Incident numbers
To search based on an Incident status, select the Incident Workflow option from the Workflow drop-down list
To search by Classification, select an Item Category from the Category drop-down list. After the Category is applied, a list of Classifications is displayed
To search based on the content of an Incident Description, select the Full Text option within the Search screen and enter a relevant term (See: Full text searches.)
To search using an Item's Custom field information, select the Item Category to display any Custom Fields configured for that Item.
For information regarding request assignment, reviewing a request, adding notes or updating the status, refer to Working on a Request.
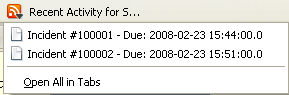
To easily access up to the minute details regarding Incident activity within an RSS feed browser bookmark, Users can subscribe to RSS feeds by selecting the RSS button within the Incident list. When the RSS button is selected, Users are presented with the application options for subscribing to receive the information and where the Recent Activity information is to be accessed. To readily access the information through a browser window, save the feed the to the Bookmark Bar.
The following is an example of the information obtained by clicking on the RSS bookmark: