Novell exteNd 5 Guided Tour
LESSON 3

The exteNd Composer project you just worked in Lesson 2 is part of an exteNd Director project. exteNd Composer is being used as the data layer of the application, and exteNd Director will be used for the presentation layer. Through cleanly separating the two layers, changes may be made to one without necessarily requiring changes in the other.
In this lesson you are going to create a service trigger for the exteNd Composer service you completed, deploy the application, then use exteNd Composer to test the SOAP interface to the service.
In the interest of time, you will use a template project that has some of the artifacts you need already completed, including the addition of the exteNd Composer project. In 4, Completing the exteNd Director Project, you will be reviewing some of these artifacts. When you have completed the required artifacts, you will test the completed application.
Start exteNd Director by going to the Start>Programs>Novell exteNd 5.2>Director menu and selecting Director Designer:
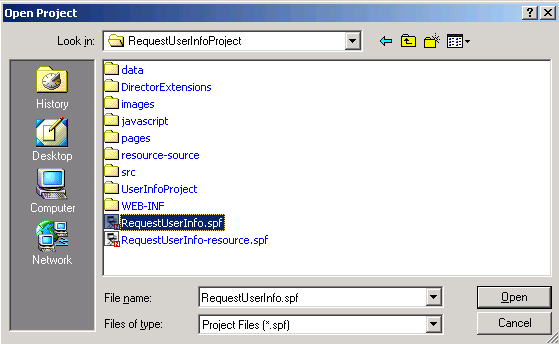
Navigate to the project folder by clicking on the Look in dropdown list. The project folder is D:\GuidedTour\template\RequestUserInfoProject:
Select the project file RequestUserInfo.spf, then click Open:
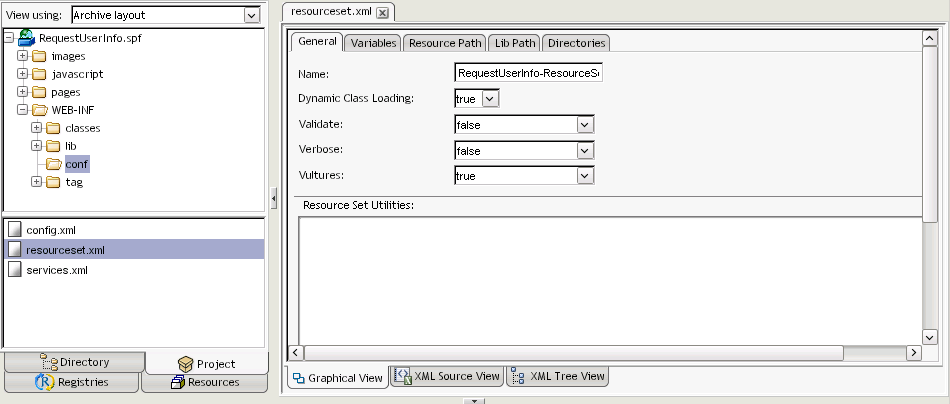
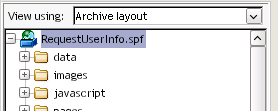
Change the view  in the Navigation Pane to the archive layout view.
What you see in archive layout view This view is a structural view of the archive that will be deployed to the server. It shows you where the various artifacts in your project will be placed in the archive. The default view is source layout, which shows you where the artifacts are actually stored in the development file system. In J2EE, where things are placed in the archive is important.
All the artifacts of the exteNd Composer and exteNd Director projects are stored as files in folders located relative to the project file you opened.
The resource set One of the features of exteNd Director that helps cut down on the amount of developer time required in testing—by reducing the number of deployments required—is the resource set. (For more details on the resource set, see the chapter on using the resource set in an exteNd Director application in Developing exteNd Director Applications.)
An exteNd Director project has a configuration file called resourceset.xml, and for the resource set to be used properly in exteNd Director and the exteNd Application Server (or any other application server), a variable in the file must point to the project's physical location on your drive.
Now you will adjust this variable, because the current location of your project is most likely different from the location used to create the project initially.
In the Folder Pane of the Navigation Pane, click the  icon next to the WEB-INF folder.
Double-click the resourceset.xml file in the Detail Pane of the Navigation Pane to open the file in the Editor Pane:
Locate the WARLOCATION key and change its Value to point to the physical location where you placed the template project—for example: D:\GuidedTour\template\RequestUserInfoProject.
Scroll down until you see the Restart button. Click the Restart button.
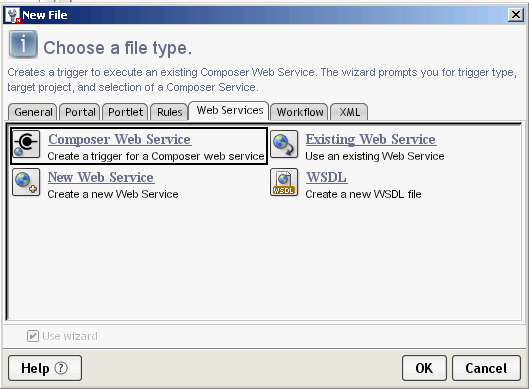
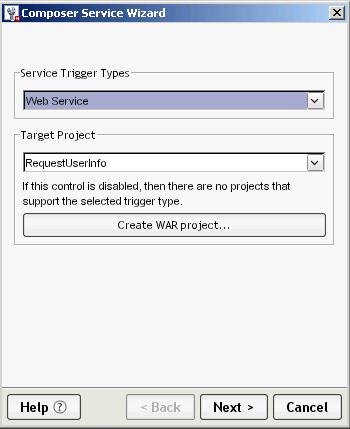
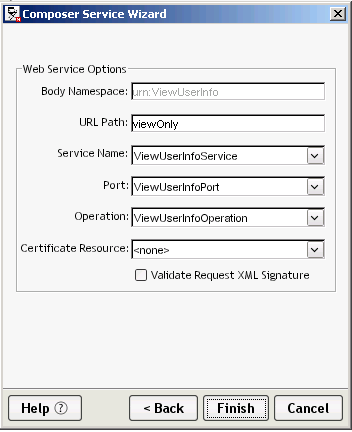
An exteNd Composer service requires a Java service trigger that will interact with the exteNd Composer runtime on behalf of the users of the service.The exteNd Composer service you completed will be invoked as a Web Service using SOAP.
For working with Web Services, you need to have a Java servlet that is listening at the URL specified when you created the WSDL (you did this in EXERCISE 2-9: Create the Web Services Definition Language (WSDL)).
In this exercise, you are going to configure a generic servlet, provided by exteNd Composer, to listen at your specified URL.
Verify that ViewUserInfo is selected as the WSDL in the Web Service Details block. Click Next.
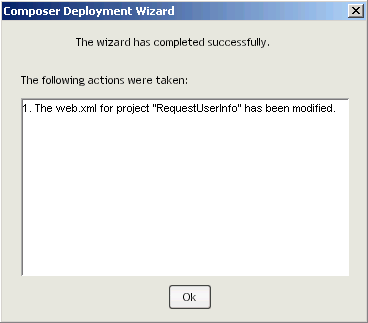
Click OK for the Composer Deployment Wizard confirmation dialog.
The exteNd Director development environment, along with providing you with the ability to visually create exteNd Director artifacts such as portlets and XForms, is also used to keep track of the J2EE-specific artifacts and to build and deploy the J2EE archives that make up your project. In this exercise you will take a slight detour to look at some of the features of exteNd Director that are useful in managing the development of a Web-based solution.
In the last exercise, when you created an exteNd Composer service trigger, you may have noticed that no source file was opened. So you may wonder whether you actually have a service trigger or not.
The answer is yes—the exteNd Composer runtime provides a servlet implementation that accepts the SOAP request, invokes the exteNd Composer service, and formats a SOAP response. This servlet is configured to invoke the correct exteNd Composer service by setting initialization parameters in the web.xml (J2EE Web application descriptor) file of the Web archive. Now you will view these entries.
Scroll up the Folder Pane of the Navigation Pane until you see the RequestUserInfo.spf entry for the project, then select it.
Right-click to open the Context menu, then select Open Deployment Descriptor.
If you get the Select Build Option dialog and do not want to see this dialog again, select No, don't build now, Never automatically build my project—then click OK:
It is usually better to explicitly build your project rather than having it done automatically, especially when all you want to do at this moment is simply view the descriptor file. When you deploy your project in a later exercise, the exteNd Director development environment will check whether a build is required at that point.
You could also have opened this file by navigating to the WEB-INF folder and selecting it in the details. The descriptor file is always called web.xml and will always be located in the WEB-INF folder of the archive.
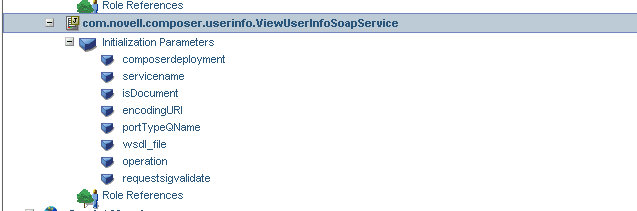
In the Editor Pane, scroll down until you see an entry called com.novell.composer.userinfo.ViewUserInfoSoapService. This is the servlet configuration.
The web.xml file is XML, and the exteNd Director development environment gives you access to the actual XML. But in most situations you will use the Visual Editor to edit the contents of this file, providing a more intuitive way to maintain the file. You may view or change elements in the file by using the right-mouse button to bring up a Property Inspector. The Property Inspector will show you the valid values for the element you are working on or allow you to select its values from other entries in the file when you are entering a cross-reference.
If you scroll further down you also find a Servlet Mapping entry for this servlet that configures the proper URL pattern that this instance will use.
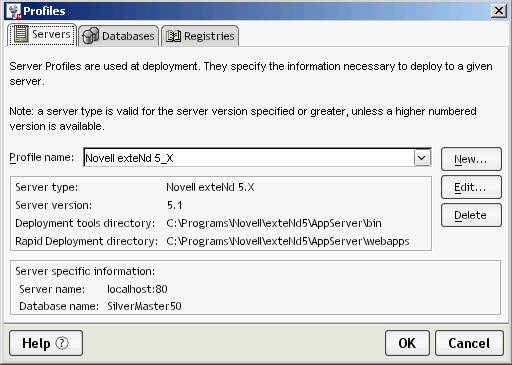
For each type of application server, the exteNd Director development environment uses a separate server profile, which defines the details required for deploying to that type of application server. In this Guided Tour you are using the default profile, which will deploy to an exteNd Application Server running locally on your computer. If you want to review this profile or create a new one, use the profile editor available from Tools>Profiles:
Now you are ready to deploy the application to the exteNd Application Server so that you can test the exteNd Composer service as a Web Service.
Scroll up the Folder Pane of the Navigation Pane until you see the RequestUserInfo.spf entry for the project, then select it:
Right-click to open the context menu, then select Open Deployment Plan.
The deployment plan defines the server-specific details necessary for successfully deploying the application to the exteNd Application Server. It is created and maintained based on the information in the web.xml descriptor file. You should always review and save the deployment plan before doing a deployment.
TIP: If you are deploying to a different server, you will need to change the server profile used by this plan.
Close the open editor by clicking the  on the editor title tab.
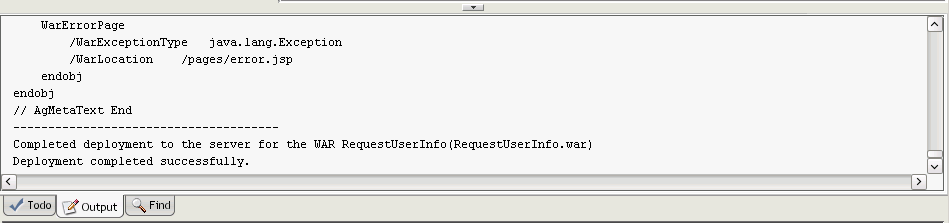
When you see Deployment completed successfully in the Output Pane of the exteNd Director development environment, your deployment has completed.
This first deployment took a little bit longer than is usual, because not only was your application deployed to the server and then started by the server—but the database was also initialized. This was the database you created and defined a connection pool for in EXERCISE 1-4: Create a JDBC connection pool.
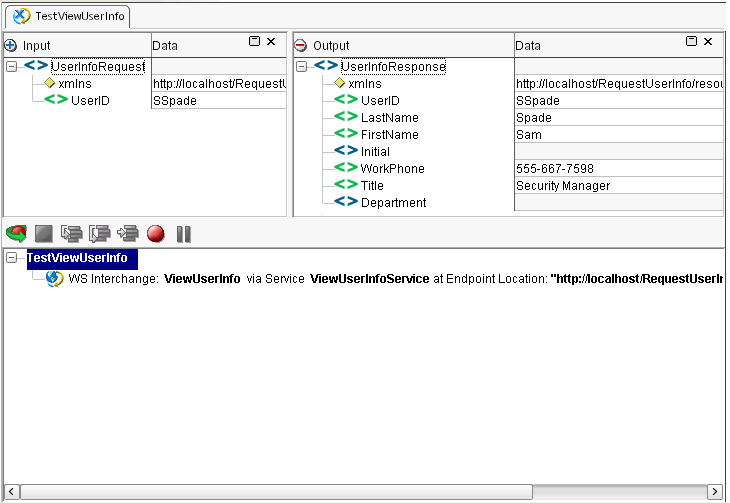
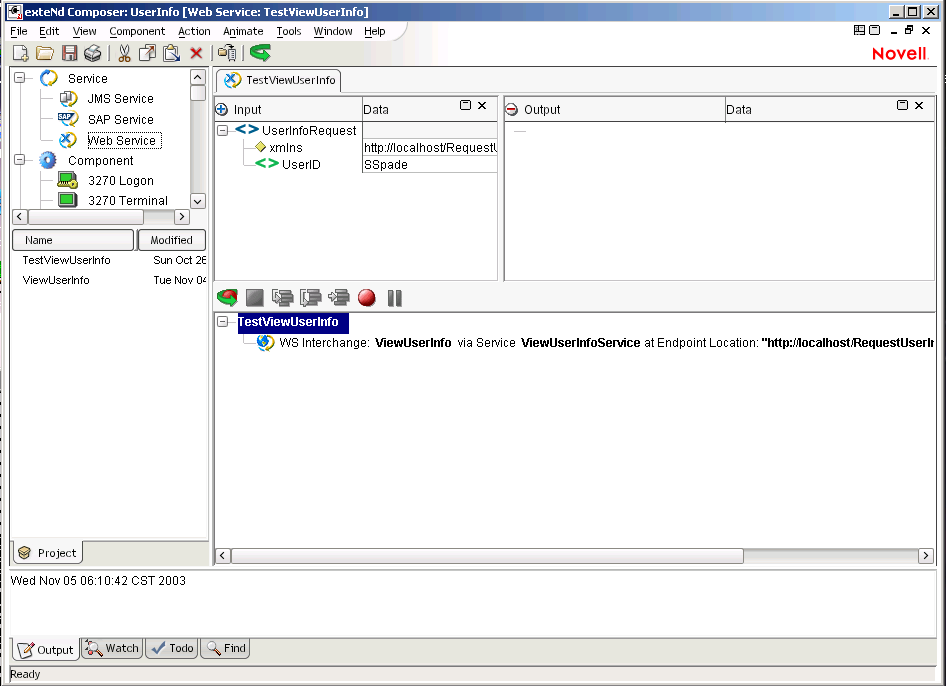
In the exteNd Composer project there is a service (TestViewUserInfo) that was created to test the deployed ViewUserInfo as a SOAP service. This service has one action (the WS Interchange) that is used by exteNd Composer to consume a Web Service that uses SOAP binding. In this exercise you will use this service to test the application you just deployed.
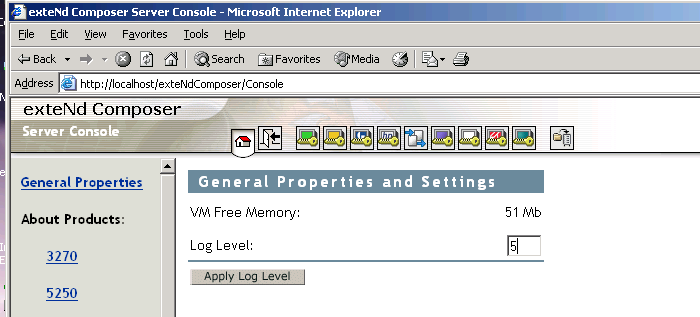
As part of your testing you want to see the output from the Log actions in the Composer Component and Service to appear on the server console. For this to happen you need to set the log threshold on the server using the Composer Administrator Console.
In the address bar, type http://localhost/exteNdComposer/ and press Enter.
Type the exteNd Application Server administrator user ID and password you supplied when you installed the exteNd 5 Suite, then click OK:
Open the exteNd Composer Designer. (It should still be open, and using Alt+Tab should get you to it.)
In the Category Pane of the Navigation Pane, select Web Service under the Service category.
Double-click TestViewUserInfo to open the service in the Editor Pane.
Click OK on the Execution Completed dialog. You should see results returned by the SOAP service in the Output DOM of the editor.
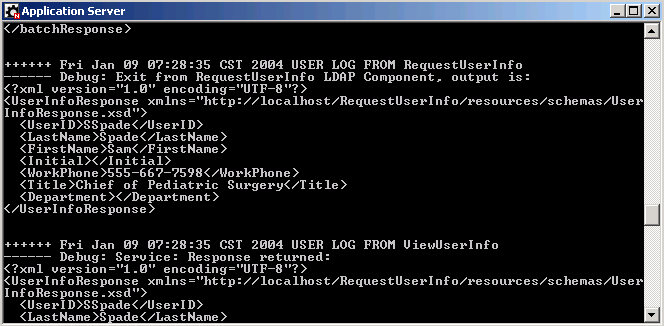
When you look at the server console, you will see the log results from the exteNd Composer runtime:
Congratulations. You have successfully completed an exteNd Composer service and deployed it with a SOAP service trigger.
Close the exteNd Composer Designer application by using File>Exit. You will not need exteNd Composer for the remainder of this Guided Tour.
When prompted to confirm closing exteNd Composer, click Yes.
Next lesson In the next lesson you will complete an exteNd Director portal application that allows end users to consume the service.
Copyright © 2004 Novell, Inc. All rights reserved. Copyright © 1997, 1998, 1999, 2000, 2001, 2002, 2003 SilverStream Software, LLC. All rights reserved. more ...


 toolbar icon to save your changes.
 .
.  .
. 

 .
. 
 on the toolbar.