32.4 Installing and Configuring the MTA and the POA in a Heartbeat Cluster
By following the instructions in Section 14.1, Setting Up a New GroupWise System in a Linux Cluster, you created the primary domain and initial post office in your GroupWise system. You are now ready to install and configure the agents, first on the initial node, and then on additional nodes.
The agents must be installed on each node where the domain might be mounted (Heartbeat Clustering Worksheet item 9) and where the post office might be mounted (Heartbeat Clustering Worksheet item 10).
-
Section 32.4.1, Running the GroupWise Installation Program on the Initial Node
-
Section 32.4.2, Running the GroupWise Installation Program on Subsequent Nodes
-
Section 32.4.3, Creating and Configuring GroupWise Cluster Resources
-
Section 32.4.4, Testing Your Agent Installation on Each Node
-
Section 32.4.5, Changing Agent Paths to Locations on the Shared Storage Partition
-
Section 32.4.6, Setting Up New Instances of the Agents without Installing the Agent Software
If you have added a new secondary domain or a new post office to an existing GroupWise cluster resource group, the agent software has already been installed and you simply need to create a new startup file specific to the new domain or post office. In these circumstances, follow the instructions in Section 32.4.6, Setting Up New Instances of the Agents without Installing the Agent Software instead of running the GroupWise Installation program.
32.4.1 Running the GroupWise Installation Program on the Initial Node
-
In the HA Management Client, select a node where you want to run the agents (Heartbeat Clustering Worksheet item 9 for a domain and item 10 for a post office), then click .
This applies the secondary IP address to the node and mounts the file system where the domain and post office are located, thus setting up the proper environment for an agent installation.
-
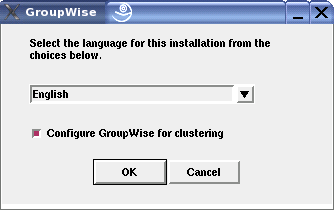
From the software distribution directory you created in Step 6 in Section 14.1, Setting Up a New GroupWise System in a Linux Cluster, start the GroupWise Installation program (install).
IMPORTANT:This time, you should select the option.
-
Install the agent software, following the steps provided in
Installing the GroupWise Agents on Linux
inInstalling GroupWise Agents
in the GroupWise 7 Installation Guide. -
Configure the Linux agents, paying special attention to the cluster resource information on the Domain/Post Office Information page.
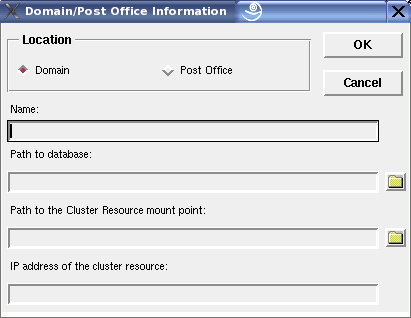
The path to the cluster resource mount point is the mount point for the domain (GroupWise Clustering Worksheet item 2) or the post office (GroupWise Clustering Worksheet item 4). The IP address of the cluster resource is the secondary IP address for the MTA (GroupWise Clustering Worksheet item 3) or the POA (GroupWise Clustering Worksheet item 5).
As a result of selecting on the initial node, the following cluster-specific configuration actions are performed by the GroupWise Installation program:
-
The agent startup files are created in /mount_point/groupwise/agents/share on the shared storage partition so that the agents use the same startup files regardless of which node they run on. The --home switch includes the mount point and the path to the domain database or the post office database so that the startup file is valid when mounted to each node.
-
The --cluster startup switch is added to the agent startup files to inform the agents that they are running in a cluster.
-
The --ip startup switch is set to the secondary IP address for the cluster resource group where the domain and post office are located. This ensures that the MTA and the POA run with the same IP address regardless of which node the agents are running on.
-
The --log startup switch is set to a location on the shared storage partition (/mount_point/groupwise/agents/log) so that agent logging information is written to the same log file regardless of which node the agents run on.
-
The GroupWise High Availability service (GWHA) is automatically configured on the current node and its configuration file (gwha.conf) is created in the /etc/opt/novell/groupwise directory of the node.
-
The OCF Resource Agent script is installed. The OCF Resource Agent provides support for the GroupWise agents (POA, MTA, Internet Agent, and WebAccess Agent) and the Messenger agents (Messaging Agent and Archive Agent) in the HA Management Client. The script is installed as part of the novell-groupwise-gwha package and depends on the High Availability service configuration file (gwha.conf) to identify the agents that are being managed by the HA Management Client. The script is named GroupWise and is located in the /usr/lib/ocf/resource.d/novell) directory on the current node.
-
A clusterimport.conf file is created in the gwinst subdirectory of the software distribution directory from which you ran the GroupWise Installation program, so that the cluster-specific information collected when you configured the agents on the initial node is available when you install the agents on subsequent nodes.
-
The agents are not configured to start automatically on system startup. In a cluster, you do not want the agents to start automatically whenever a node restarts.
-
-
For optimum security, configure the agents to run as a non-root user, as described in
Running the Linux GroupWise Agents as a Non-root User
inInstalling GroupWise Agents
in the GroupWise 7 Installation Guide. -
Continue with Running the GroupWise Installation Program on Subsequent Nodes.
32.4.2 Running the GroupWise Installation Program on Subsequent Nodes
-
In the HA Management Client, select a different node where you want to run the agents (Heartbeat Clustering Worksheet item 9 for a domain and item 10 for a post office), then click .
This applies the secondary IP address to this node and mounts the file system where the domain and post office are located, thus setting up the proper environment for an agent installation on the next node.
-
From the software distribution directory you created in Step 6 in Section 14.1, Setting Up a New GroupWise System in a Linux Cluster, start the GroupWise Installation program.
IMPORTANT:You should select the option again.
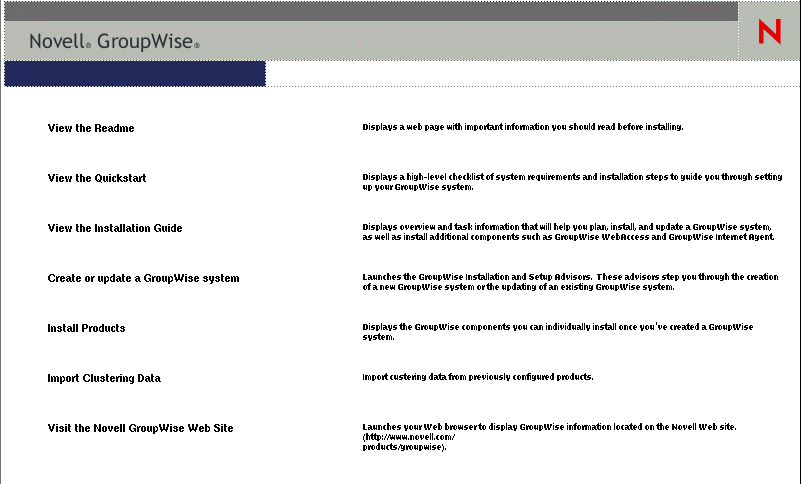
Because of the existence of the clusterimport.conf file in the gwinst subdirectory of the software distribution directory, a new installation option, , is now available on the main GroupWise Installation program page.
-
Install the agent software on the node as usual, but do not use the option.
You will use the option instead of the option.
-
On the main page of the GroupWise Installation program, click , then click .
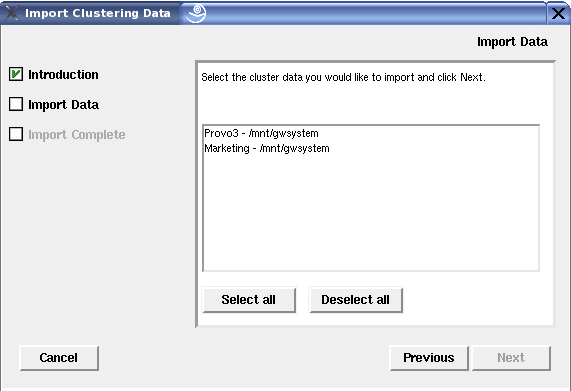
All GroupWise agents that you have installed from the software distribution directory are listed, based on the information stored in the clusterimport.conf file.
-
Select the GroupWise agents that you want to configure on the current node, then click .
The option performs the following configuration actions for each subsequent node where you run it:
-
The grpwise script is created in the /etc/init.d directory on the current node. It is configured specifically for the agents you just selected.
-
The GroupWise High Availability service (GWHA) is automatically configured on the current node and its configuration file (gwha.conf) is created in the /etc/opt/novell/groupwise directory of the node. It is configured specifically for the agents you just selected.
-
The OCF Resource Agent script (GroupWise), required by the HA Management Client to support GroupWise resources, is installed in the /usr/lib/ocf/resource.d/novell) directory on the current node.
Because the agent startup files and log files are located on the shared storage partition with the domain or post office, they do not need to be customized for each node.
-
-
For optimum security, configure the agents to run as a non-root user, as described in
Running the Linux GroupWise Agents as a Non-root User
inInstalling GroupWise Agents
in the GroupWise 7 Installation Guide. -
Repeat Step 1 through Step 6 for each node where you want the agents to be able to fail over (Heartbeat Clustering worksheet item 9 for a domain and item 10 for a post office).
-
When the agent software has been installed on all nodes specified by the Heartbeat constraints (Heartbeat Clustering Worksheet item 9 for a domain and item 10 for a post office), continue with Creating and Configuring GroupWise Cluster Resources.
32.4.3 Creating and Configuring GroupWise Cluster Resources
Now that you have installed the GroupWise software, you can create and configure GroupWise resources in the cluster resource groups you have already created in Section 31.0, Setting Up a Heartbeat Cluster:
Creating GroupWise Resources
-
In the HA Management Client, select a cluster resource group, then click .
-
In the field, select , then click .

-
In the field, specify a unique name for the GroupWise resource (Heartbeat Clustering Worksheet item 7 for a domain or item 8 for a post office).
-
In the field, select the cluster resource group where you want to create the GroupWise resource.
-
In the list, select .
The OCF Resource Agent script (GroupWise) added this item to the list.
-
In the list, set the value of the object_name parameter to the identifier for the agent that services the domain or post office (GroupWise Clustering Worksheet item 2 or item 4).
For a domain, the identifier is the domain name. For a post office, the identifier is the name of the post office, followed by the name of the domain it belongs to (PostOffice.Domain).
-
Click to create the GroupWise resource.
You need to add one GroupWise resource for the domain and one for the post office, regardless of whether they are in the same resource group or different resource groups.
-
Continue with Enabling Automatic GroupWise Agent Restart.
Enabling Automatic GroupWise Agent Restart
If you want Heartbeat to automatically restart a GroupWise agent that has stopped:
-
In the HA Management Client, select each GroupWise resource, then click .
-
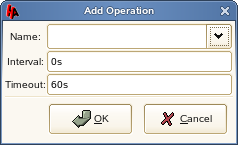
Click , then select .
-
Select the time interval for how often you want the GroupWise agent to be polled to see if it is still running.
The GroupWise script causes the agent to restart, using the GroupWise High Availability service. (GWHA)
-
Click to save the monitoring setting.
Because Heartbeat can perform such agent monitoring, you do not need to set up GroupWise Monitor to perform this task, as described in
Configuring the Monitor Agent to Communicate with the High Availability Service
inInstalling GroupWise Monitor
in the GroupWise 7 Installation Guide. Heartbeat and the GroupWise High Availability Service can work together to keep the GroupWise agents running on Linux. -
Continue with Preventing GroupWise Agent Failback.
Preventing GroupWise Agent Failback
If you do not want a resource group to automatically fail back when the initial node is online again:
-
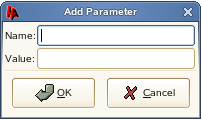
In the HA Management Client, select each GroupWise resource group, click , then click .
-
In the field, specify resource_stickiness.
-
In the field, specify INFINITY.
-
Click to save the setting.
-
Continue with Testing Your Agent Installation on Each Node.
32.4.4 Testing Your Agent Installation on Each Node
-
On the node where the shared storage partition is currently mounted, test the agents by starting them with a user interface, as described in
Starting the Linux Agents with a User Interface
inInstalling GroupWise Agents
in the GroupWise 7 Administration Guide./opt/novell/groupwise/agents/bin/gwmta --show @domain.mta & /opt/novell/groupwise/agents/bin/gwpoa --show @post_office.poa &
-
Stop the agents by clicking
-
After you can see that the agents start successfully, test them by starting them as daemons, as described in
Starting the Linux GroupWise Agents as Daemons
inInstalling GroupWise Agents
in the GroupWise 7 Administration Guide./etc/init.d/grpwise start /etc/init.d grpwise status
-
Stop the agents.
/etc/init.d/grpwise stop
/etc/init.d grpwise status
-
In the HA Management Client, activate a different node where you have installed the agent software.
-
Repeat Step 1 through Step 5 for each node where you have installed the GroupWise agents.
-
After you have tested the agents on all nodes manually, start and stop their GroupWise resources in the HA Management Client to make sure that their Heartbeat resources are properly configured.
If you receive the error Unmanaged on node, then you have failed to test the agents on one or more nodes. On each node, view the gwha.conf file in the /etc/opt/novell/groupwise directory. Each section should be preceded by the name of a domain for an MTA or a post office and domain for a POA. If any section is preceded by a startup file variable (for example, @strtup.mta), then that agent has not yet been initialized by being run manually. To resolve the problem, you can run the agent manually on that node, or you can replace the startup file variable with the appropriate domain and/or post office information, being sure to follow the same format as the other section headings in the gwha.conf file.
-
When you have installed and tested the agents on all of the nodes where the domain and post office can fail over, continue with Changing Agent Paths to Locations on GroupWise Partitions.
32.4.5 Changing Agent Paths to Locations on the Shared Storage Partition
The default locations for some agent files are on the nodes along with the agent software, rather than being located with the domain and post office on a shared storage partition. To avoid having multiple copies of these files in multiple locations, you should set the locations in ConsoleOne.
When you have changed the paths, skip to Section 14.5, Testing Your Clustered GroupWise System.
Setting the MTA Message Log File Path
If you plan to enable message logging, as described in Enabling MTA Message Logging
in Message Transfer Agent
in the GroupWise 7 Administration Guide:
-
On the shared storage partition of the cluster resource group where the domain is located, create the directory where you want to store MTA message log files.
-
In ConsoleOne, browse to and select the Domain object.
-
Right-click the MTA object, then click .
-
Click .
-
In the field, browse to and select the directory you created in Step 1, then click .
Setting the MTA Certificate and Key File Path
If you plan to enable SSL for the MTA, as described in Securing the Domain with SSL Connections to the MTA
in Message Transfer Agent
in the GroupWise 7 Administration Guide:
-
On the shared storage partition of the cluster resource group where the domain is located, create the directory where you want to store the certificate file and key file required for SSL.
-
Copy the certificate file and key file into the new directory.
If you need assistance obtaining these files, see
Server Certificates and SSL Encryption
inSecurity Administration
in the GroupWise 7 Administration Guide. -
In ConsoleOne, browse to and select the Domain object.
-
Right-click the MTA object, then click .
-
Click .
-
In the field, browse to and select the certificate file.
-
In the field, browse to and select the key file.
-
Click .
Setting the POA Certificate and Key File Path
If you plan to enable SSL for the POA, as described in Securing the Post Office with SSL Connections to the POA
in Post Office Agent
in the GroupWise 7 Administration Guide:
-
On the shared storage partition of the cluster resource group where the post office is located, create the directory where you want to store the certificate file and key file required for SSL.
-
Copy the certificate file and key file into the new directory.
If you need assistance obtaining these files, see
Server Certificates and SSL Encryption
inSecurity Administration
in the GroupWise 7 Administration Guide. -
In ConsoleOne, browse to and select the Post Office object.
-
Right-click the POA object, then click .
-
Click .
-
In the field, browse to and select the certificate file.
-
In the field, browse to and select the key file.
-
Click .
NOTE:When the MTA and the POA run in the same cluster resource group, they can use the same certificate file and key file.
-
Skip to Section 14.5, Testing Your Clustered GroupWise System.
32.4.6 Setting Up New Instances of the Agents without Installing the Agent Software
If you want to run a second instance of an agent that is already installed on a node, you do not need to run the GroupWise Installation program a second time. You can simply create a new startup file for the second instance of the agent.
Each MTA startup file is named after the domain it services, with a .mta extension. Each POA startup file is named after the post office it services, with a .poa extension. When you select the option, the GroupWise Installation program creates agent startup files in /mount_point/groupwise/agents/share on the shared storage partition.
To create a new startup file without installing the agent software:
-
Make a copy of an existing startup file and name it after the domain or post office that will be serviced by the agent.
-
Edit the setting of the --home startup switch to point to the location of the new domain directory or post office directory.
Be careful to maintain the syntax of the original line.
-
Scroll down through the new startup file looking for other active (not commented out) startup switches, then modify them as needed for the new agent.
-
Save the new startup file.
-
Edit the GroupWise High Availability service configuration file (/etc/opt/novell/groupwise/gwha.conf).
-
Make a copy of the section for an existing domain and its MTA or post office and its POA, then modify the information for the new domain or post office and its accompanying agent.
-
Save the gwha.conf file.
For more information about the High Availability service, see
Enabling the High Availability Service for the Linux GroupWise Agents
inInstalling GroupWise Agents
in the GroupWise 7 Installation Guide. -
As if you had run the GroupWise Installation program, skip back to Section 32.4.3, Creating and Configuring GroupWise Cluster Resources.