1.5 Configuring the Access Gateway for Authentication
The procedures in Section 1.4, Configuring the Access Gateway set up the Access Gateway to protect your Web server by hiding its IP address and DNS name from Internet users. The procedure does not require the user to log in before accessing resources on the Web server. This section explains how to configure the Access Gateway so that the users are required to authenticate by supplying login credentials before they can access a protected resource. There are two parts to enabling authentication to protected resources:
1.5.1 Verifying Time Synchronization
The time must be synchronized between the Identity Server and the Access Gateway or set so the time difference is within one minute of each other for trusted authentication to work.
For the Identity Server, use YaST to verify the time settings. If you have a Network Time Protocol server, configure the server to use it.
For an Access Gateway, complete the following steps:
-
In the Administration Console, click > > > .
-
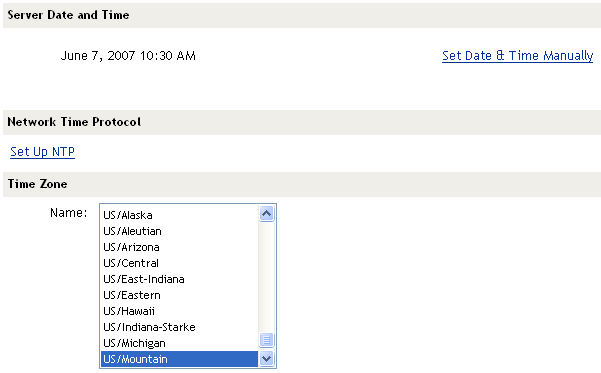
Select the method you want to use for time:
Set Date & Time Manually: Allows you to select the current time. Click this option to select the year, month, day, hour, and minutes in your current time zone, then click .
Set Up NTP: Allows you to specify the IP address of an NTP server. Click . Use the public pool.ntp.org server or click , then specify the IP address of an NTP server. To accept the configuration, click .
If the time on the machine is wrong by more than an hour, use both methods to set the time. Set it manually first, and then configure it to use NTP.
-
In the section, select your time zone, then click .
Regardless of the method you used to set the time, you must select a time zone.
-
(NetWare only) Configure daylight saving time.
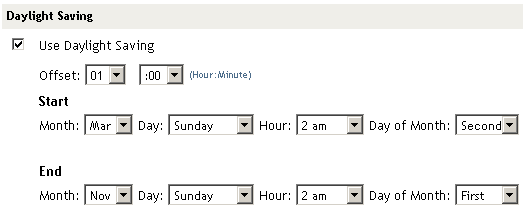
In the Daylight Saving section, configure the following fields:
Use Daylight Saving: Enables daylight saving time for your time zone.
Offset: The hours and minutes that daylight saving time varies from standard time.
Start: The month, day, hour, and day of month when daylight saving time starts.
Stop: The month, day, hour, and day of month when daylight saving time ends.
-
To save the changes to browser cache, click .
-
To apply your changes, click the link, then click > .
-
Continue with Enabling Trusted Authentication.
1.5.2 Enabling Trusted Authentication
Trusted authentication requires an authentication contract that specifies the type of authentication credentials. The Identity Server and the Access Gateway control these authentication requirements. You do not need to configure your Web server to require authentication. Access Manager enforces the requirements for you.
In this example, you set up an authentication contract that requires a username and a password to access a directory on a Web server.
-
In the Administration Console, click > > > > > > .
-
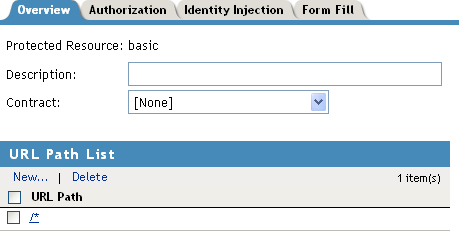
Specify a display name for the protected resource, then click .
-
Select either the or the contract:
-
Name/Password - Basic: Basic authentication over HTTP using a standard login page provided by the Web browser.
-
Name/Password - Form: Form based authentication over HTTP.
Others are available, but for this basic setup, which does not enable SSL, select one of the above contracts. The contract needs to match the protocol.
If these default authentication contracts are not available, you have not configured a relationship between the Access Gateway and the Identity Server. See Section 1.4.1, Configuring a Reverse Proxy and select a value for the field.
-
-
In the , configure the URL path to the page that this authentication contract will protect. For the Web server configuration described in Prerequisites for Setup, click the /* path and modify it to specify the following path:
/protected/*
-
Click .
-
To save the changes to browser cache, click .
-
To apply your changes, click the link, then click > .
-
(Optional) To test this configuration from a client browser, log in to the Access Manager Portal:
-
Specify the published DNS name to this resource in the browser. For the example illustrated in Figure 1-2, you would enter the following URL:
http://www.mytest.com
-
Click the link to the protected page. This should be a link to the same page you configured in Step 4.
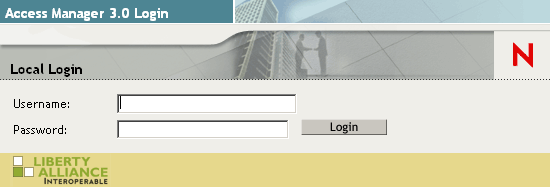
Your browser should prompt you with a login page. If you selected as the contract, the standard login page issued by your browser is displayed. If you selected , the default Access Manager login page is displayed.
-
Log in to the Identity Server with a username and password that is stored in your LDAP directory (Server 3 in Figure 1-2).
You should have access to the information you have placed in the protected directory on your Web server.
If you have set up your Web server to require basic authentication to access this directory, you are prompted again for login credentials.
-
-
Continue with Section 1.6, Setting Up an Identity Injection Policy.