5.4 Managing Cluster Resources
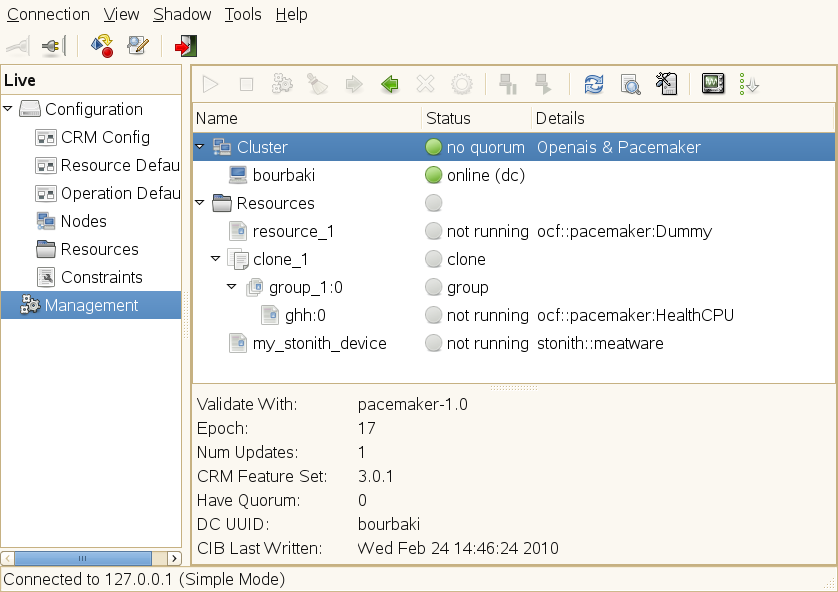
Apart from the possibility to configure your cluster resources, the Pacemaker GUI also allows you to manage existing resources. To switch to a management view and to access the available options, click in the left pane.
Figure 5-8 Pacemaker GUI - Management
5.4.1 Starting Resources
Before you start a cluster resource, make sure it is set up correctly. For example, if you want to use an Apache server as a cluster resource, set up the Apache server first and complete the Apache configuration before starting the respective resource in your cluster.
NOTE: Do Not Touch Services Managed by the Cluster
When managing a resource with the High Availability Extension, the same resource must not be started or stopped otherwise (outside of the cluster, for example manually or on boot or reboot). The High Availability Extension software is responsible for all service start or stop actions.
However, if you want to check if the service is configured properly, start it manually, but make sure that it is stopped again before High Availability takes over.
For interventions in resources that are currently managed by the cluster, set the resource to unmanaged mode first as described in Section 5.4.5, Changing Management Mode of Resources.
During creation of a resource with the Pacemaker GUI, you can set the resource's initial state with the target-role meta attribute. If its value has been set to stopped, the resource does not start automatically after being created.
Starting A New Resource
-
Start the Pacemaker GUI and log in to the cluster as described in Section 5.1.1, Connecting to a Cluster.
-
Click in the left pane.
-
In the right pane, right-click the resource and select from the context menu (or use the icon in the toolbar).
5.4.2 Cleaning Up Resources
A resource will be automatically restarted if it fails, but each failure raises the resource's failcount. View a resource's failcount with the Pacemaker GUI my clicking in the left pane, then selecting the resource in the right pane. If a resource has failed, its is shown in the middle of the right pane (below the entry).
If a migration-threshold has been set for that resource, the node will no longer be allowed to run the resource as soon as the number of failures has reached the migration threshold.
A resource's failcount can either be reset automatically (by setting a failure-timeout option for the resource) or you can reset it manually as described below.
Cleaning Up A Resource
-
Start the Pacemaker GUI and log in to the cluster as described in Section 5.1.1, Connecting to a Cluster.
-
Click in the left pane.
-
In the right pane, right-click the respective resource and select from the context menu (or use the icon in the toolbar).
This executes the commands crm_resource -C and crm_failcount -D for the specified resource on the specified node.
For more information, see also Recheck one node for resources started outside the CRM: and Query the current failcount for the resource myrsc on the node node1:.
5.4.3 Removing Cluster Resources
If you need to remove a resource from the cluster, follow the procedure below to avoid configuration errors:
NOTE: Removing Referenced Resources
Cluster resources cannot be removed if their ID is referenced by any constraint. If you cannot delete a resource, check where the resource ID is referenced and remove the resource from the constraint first.
Removing a Cluster Resource
-
Start the Pacemaker GUI and log in to the cluster as described in Section 5.1.1, Connecting to a Cluster.
-
Click in the left pane.
-
Select the respective resource in the right pane.
-
Clean up the resource on all nodes as described in Cleaning Up A Resource.
-
the resource.
-
Remove all constraints that relate to the resource, otherwise removing the resource will not be possible.
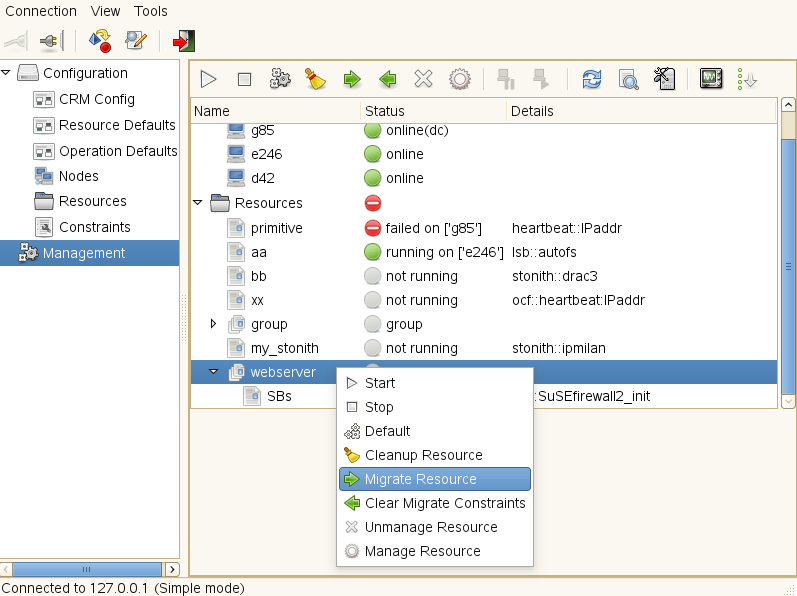
5.4.4 Migrating Cluster Resources
As mentioned in Section 5.3.4, Specifying Resource Failover Nodes, the cluster will fail over (migrate) resources automatically in case of software or hardware failures—according to certain parameters you can define (for example, migration threshold or resource stickiness). Apart from that, you can also manually migrate a resource to another node in the cluster resources manually.
Manually Migrating a Resource
-
Start the Pacemaker GUI and log in to the cluster as described in Section 5.1.1, Connecting to a Cluster.
-
Click in the left pane.
-
Right-click the respective resource in the right pane and select .
-
In the new window, select the node to which to move the resource to in . This creates a location constraint with an INFINITY score for the destination node.
-
If you want to migrate the resource only temporarily, activate and enter the time frame for which the resource should migrate to the new node. After the expiration of the duration, the resource can move back to its original location or it may stay where it is (depending on resource stickiness).
-
In cases where the resource cannot be migrated (if the resource's stickiness and constraint scores total more than INFINITY on the current node), activate the option. This forces the resource to move by creating a rule for the current location and a score of -INFINITY.
NOTE: This prevents the resource from running on this node until the constraint is removed with or the duration expires.
-
Click to confirm the migration.
To allow a resource to move back again, proceed as follows:
Clearing a Migration Constraint
-
Start the Pacemaker GUI and log in to the cluster as described in Section 5.1.1, Connecting to a Cluster.
-
Click in the left pane.
-
Right-click the respective resource in the right pane and select .
This uses the crm_resource -U command. The resource can move back to its original location or it may stay where it is (depending on resource stickiness).
For more information, see Recheck one node for resources started outside the CRM: or Pacemaker 1.0—Configuration Explained, available from http://clusterlabs.org/wiki/Documentation. Refer to section Resource Migration.
5.4.5 Changing Management Mode of Resources
When a resource is being managed by the cluster, it must not be touched otherwise (outside of the cluster). For maintenance of individual resources, you can set the respective resources to an unmanaged mode that allows you to modify the resource outside of the cluster.
-
Start the Pacemaker GUI and log in to the cluster as described in Section 5.1.1, Connecting to a Cluster.
-
Click in the left pane.
-
Right-click the respective resource in the right pane and from the context menu, select .
-
After you have finished the maintenance task for that resource, right-click the respective resource again in the right pane and select .
From this point on, the resource will be managed by the High Availability Extension software again.