2.9 Archiving Google Apps ( GSuite)
2.9.1 Preparing Google Apps to Work with Retain
The Google Apps module for G Suite allows Retain to archive Gmail data items. To configure Retain for Gmail archiving, Retain needs Gmail to be configured to allow Retain access, and the appropriate information entered into Retain.
Google Apps requires that a project be created, an OAuth key created and a Service Account specified and enabled before the Retain system can connect and archive mail.
To archive from Google Apps:
-
Create a project
-
Create a new Client ID key
-
Record client secret
-
Create a Service Account and Manage API Client Access
-
Generate a P12 key certificate
Google Apps Authentication Setup
Retain supports two-factor authentication with OpenId Connect for OAuth 2.0. To utilize OpenId the Retain Server needs to be accessible from the Internet. The URL through which the Retain Server is accessible from the Internet must be specified. For this, you must create a Project and Client ID.
IMPORTANT:You must use the Google Apps Admin user when following the step below. If you use a user that has been given admin rights, the connection fails.
To configure OpenID for Retain use:
-
Go to the Google API Console, and select 'Create a project'
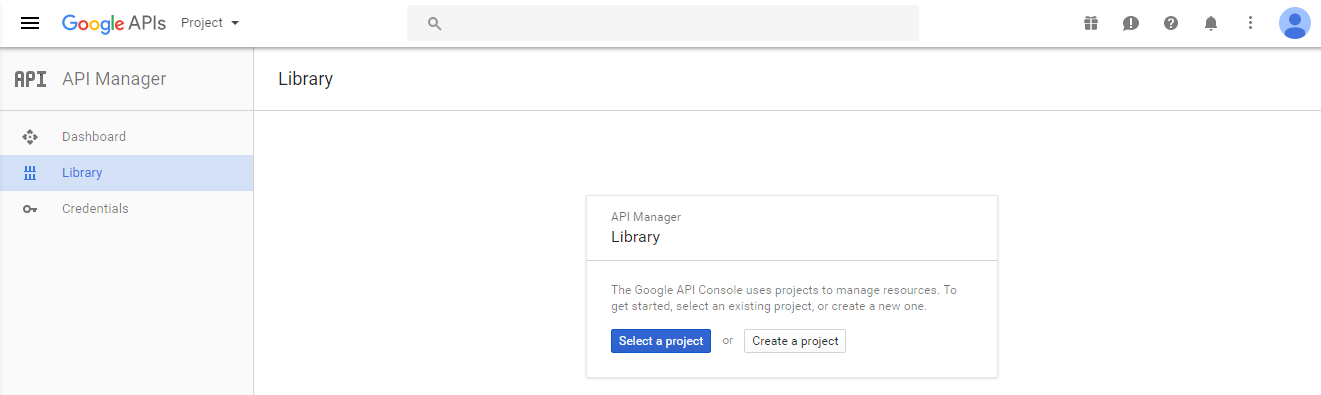
-
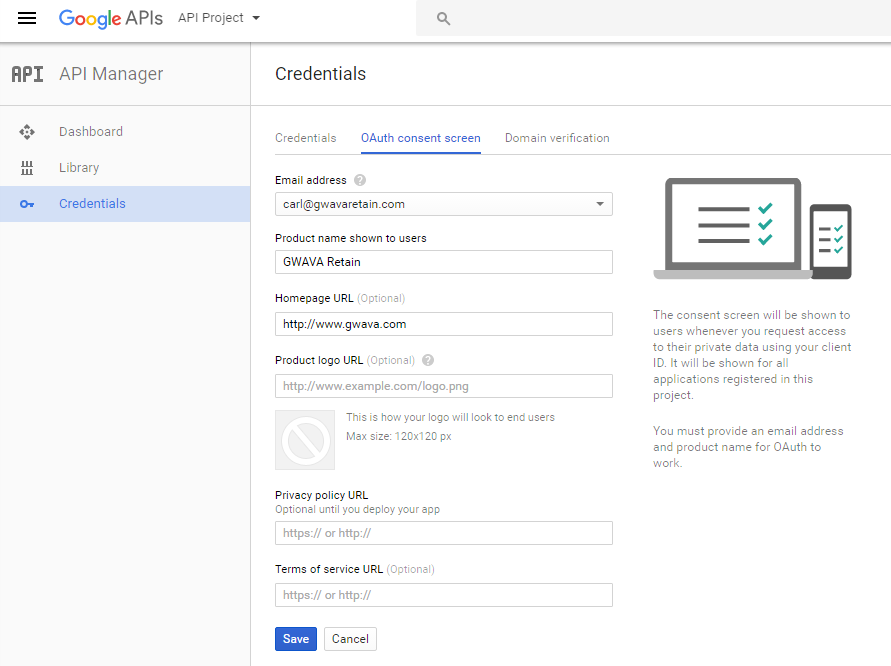
In the sidebar under "API Manager", select 'Credentials' and then select 'OAuth consent screen tab.
-
Choose an 'Email Address', specify a 'Product Name', and press 'Save'.
-
In the 'Credentials' tab, select the 'Create credentials' drop-down list, and select OAuth client ID
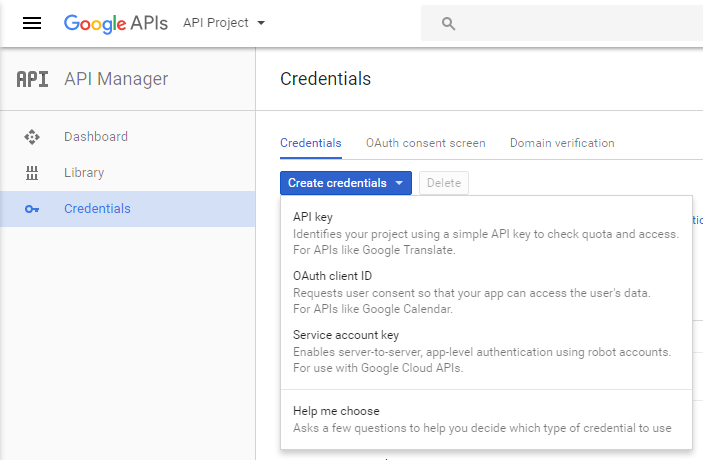
-
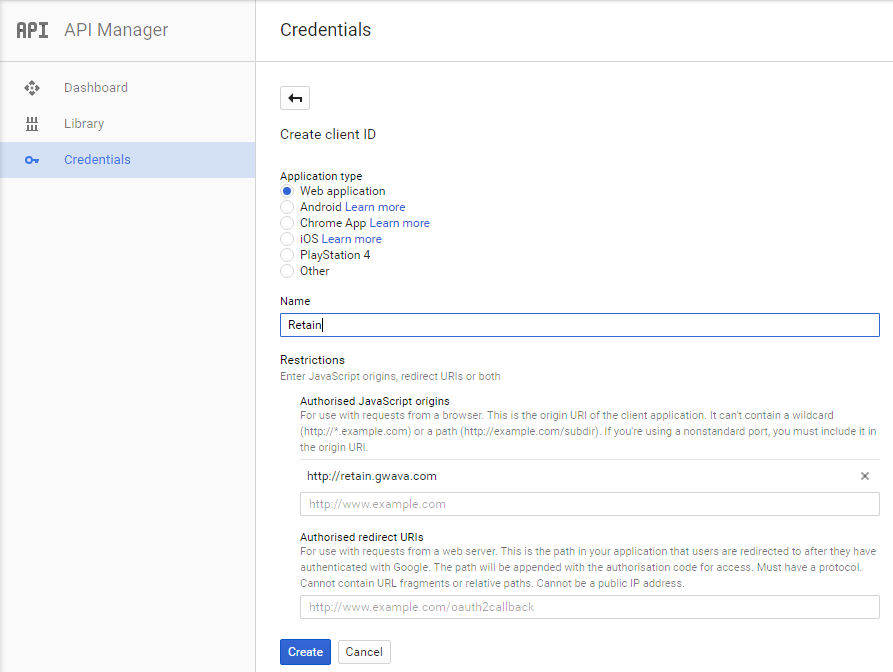
Under 'Application type', select 'Web application' and Specify a name. The origin field should be the Retain Server's URL.
If using two-factor authentication for GMail login, enter an Authorized redirect URL (e.g. http://retain.gwava.com/RetainServer/Server/openIdConnect.jsp?).
When complete, select the 'Create' button.
-
The OAuth client dialog box should be displayed. This dialog box contains the Client ID and Client secret.
-
Copy the Client ID and paste it into the Retain Client ID field in the Google Apps module configuration. Do not lose the client secret.
-
OAuth access requires the secret and ID. This is the only time the secret will be displayed.
.png)
To attain the client secret for an existing project:
-
Select the Web Client and click the Edit OAuth Client button
.png)
-
Copy the Client ID and Client Secret which is required to configure OpenId tab for Google apps module.
.png)
The OAuth Client needs to be enabled for domain-wide delegation to function. To enable domain-wide delegation, Retain requires a service account.
-
-
From the Products and Services hamburger menu at the top-left: Select IAM & Admin
-
Select the 'Service Accounts' and click the 'Create service account' button
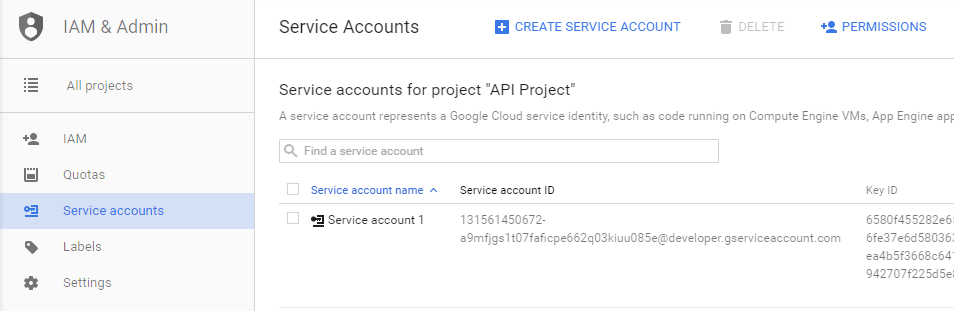
-
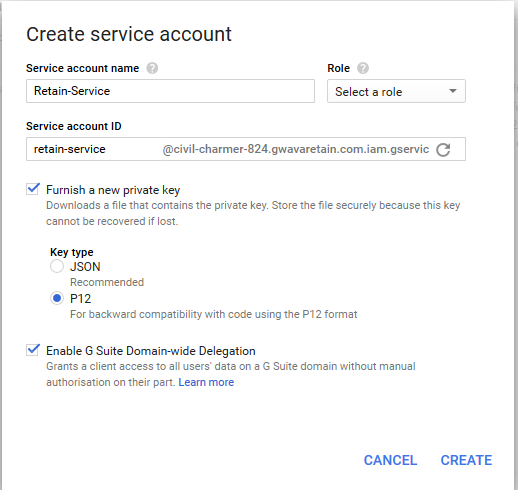
Configure the Service Account Name and ID. No Role is needed.
-
Select the option to Enable Google Apps Domain-wide Delegation.
-
Enable "Furnish a new private key" and select the P12 file.
-
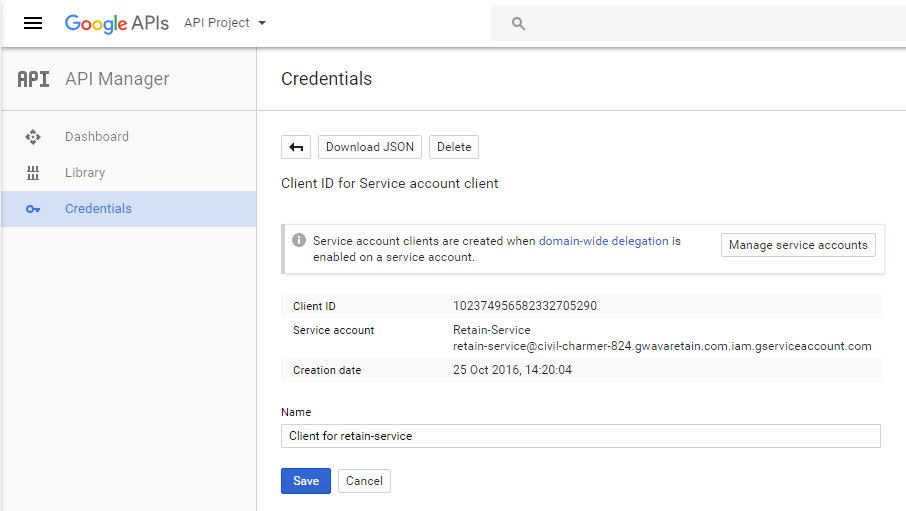
Copy the Service Account name and ID. These are required by Retain.
-
Click 'Create'.
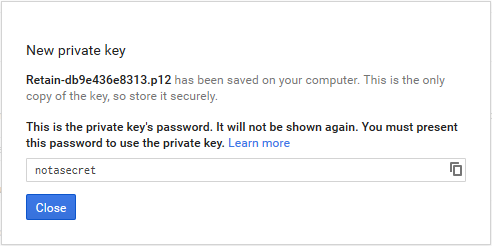
The key will be automatically created and downloaded to the local machine. Do not lose the P12 file. This is the only copy and it is required to configure Retain.
-
-
You will need the Client ID from the Service Account
-
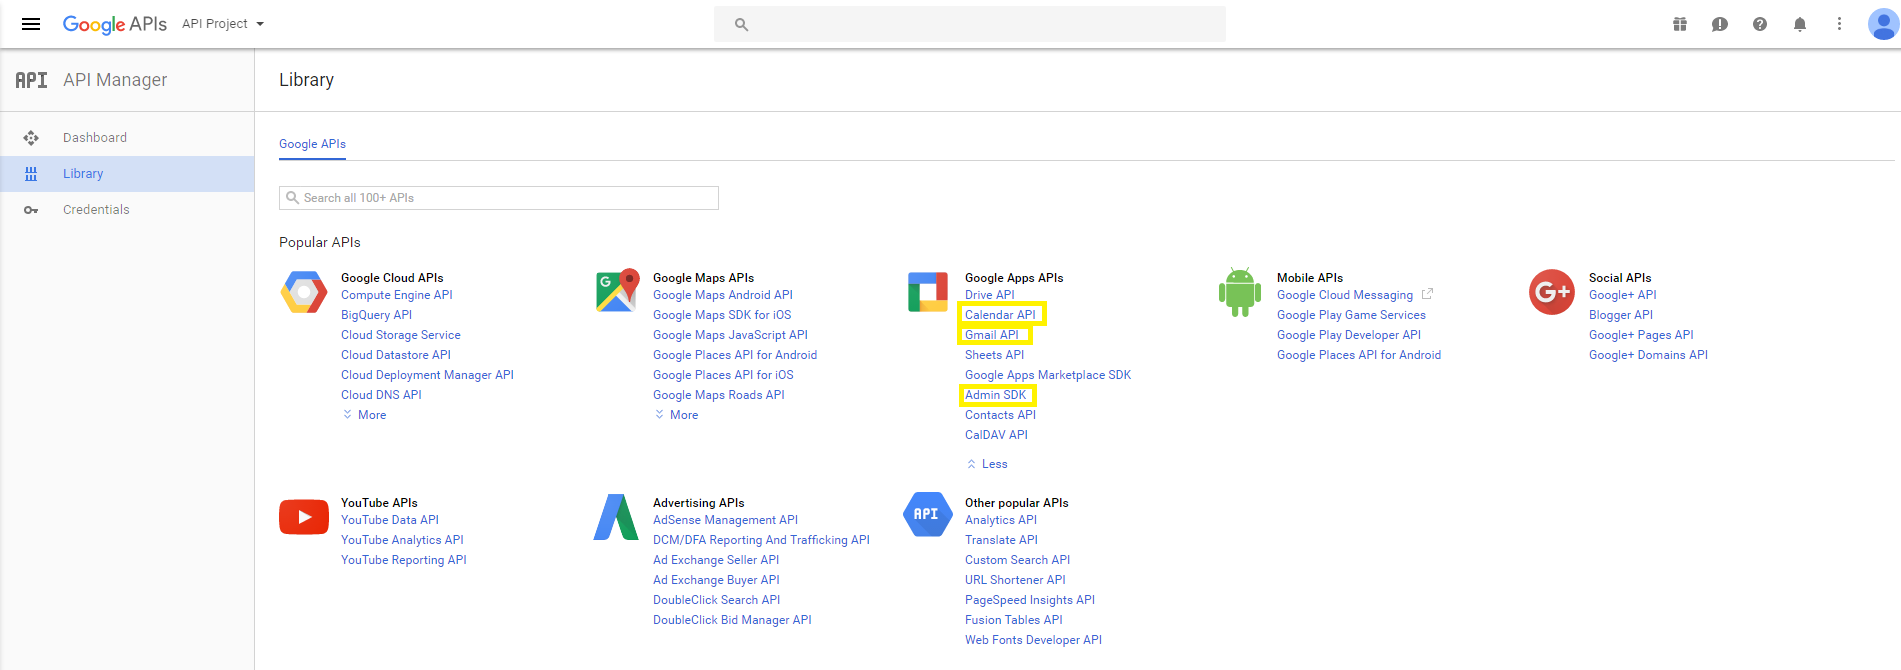
Go back to the API manager and enable: Calendar API, Gmail API and Admin SDK. Click on each one and click Enable on top.
-
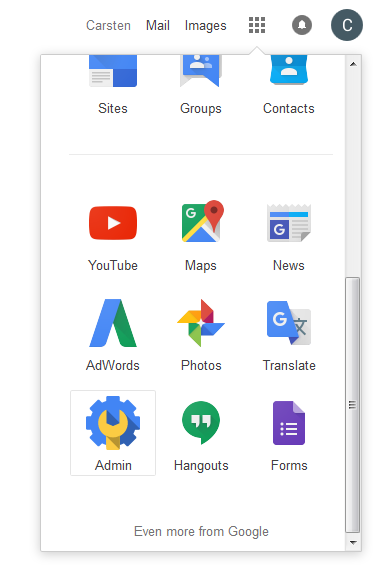
The last step is to authorize the domain. Browse to the Google home page and select 'Admin' from the drop down menu at the top right.
-
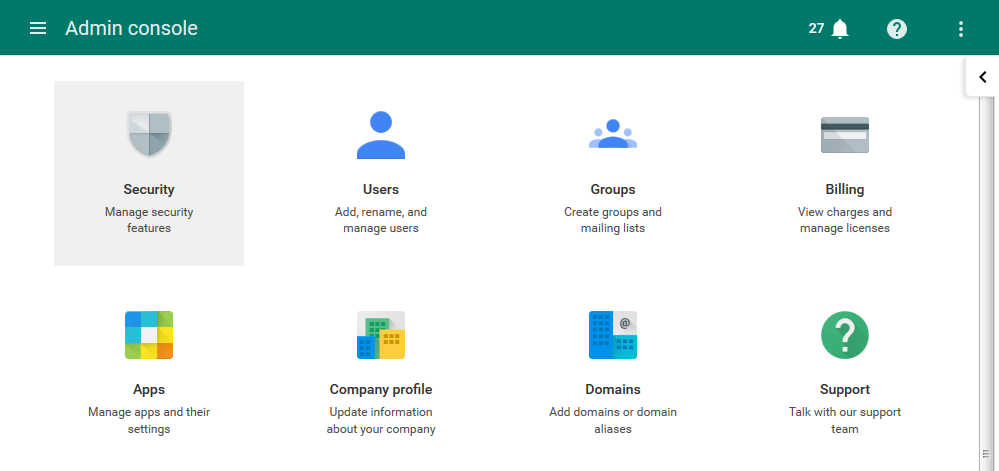
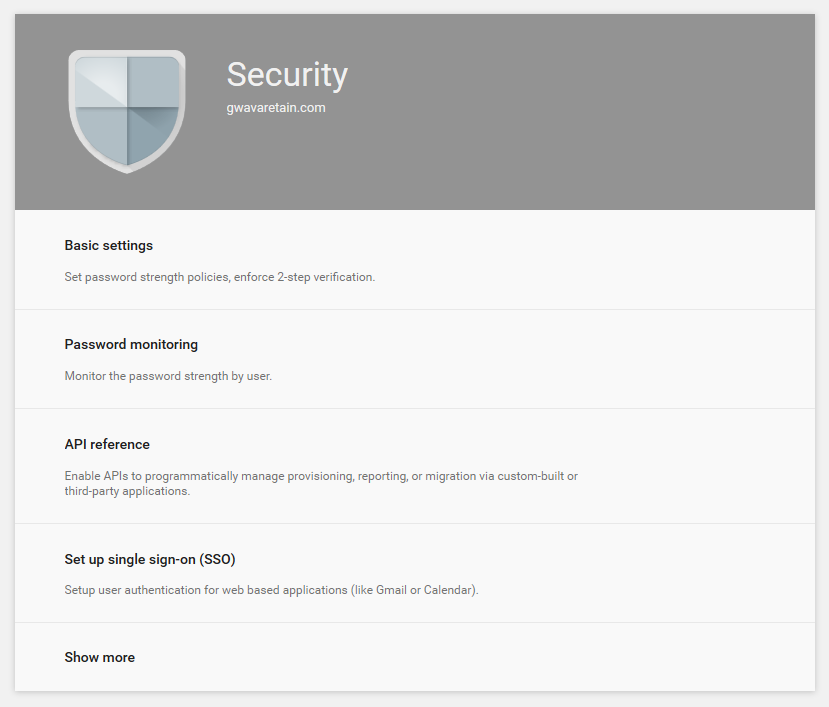
Select 'Security' from the administration menu.
-
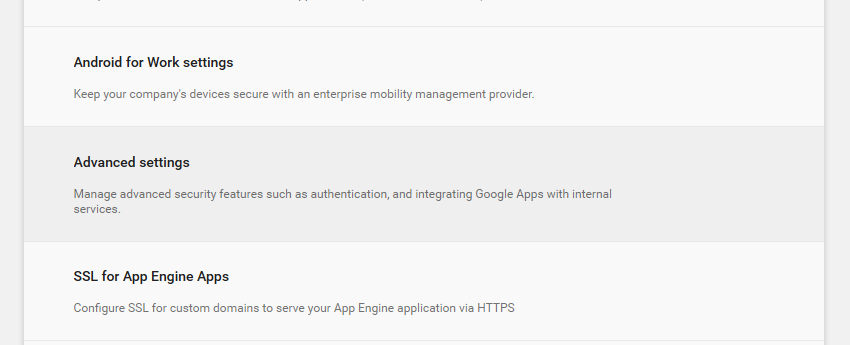
From the Security menu, click 'Show More'
-
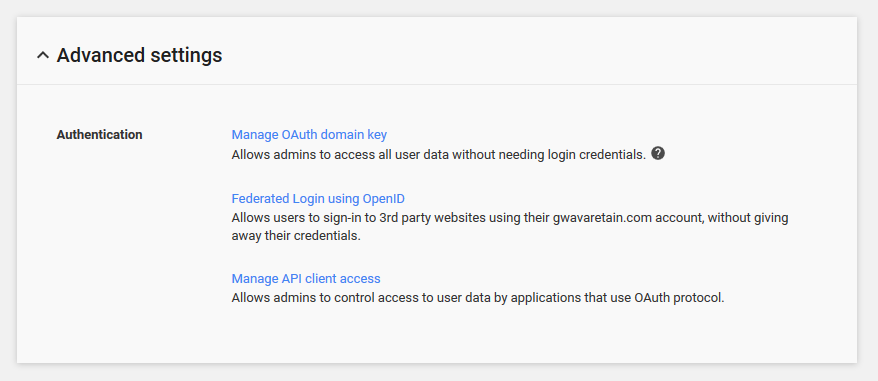
Select the 'Advanced Settings' option.
-
On Advanced Settings, select 'Manage API client access'
-
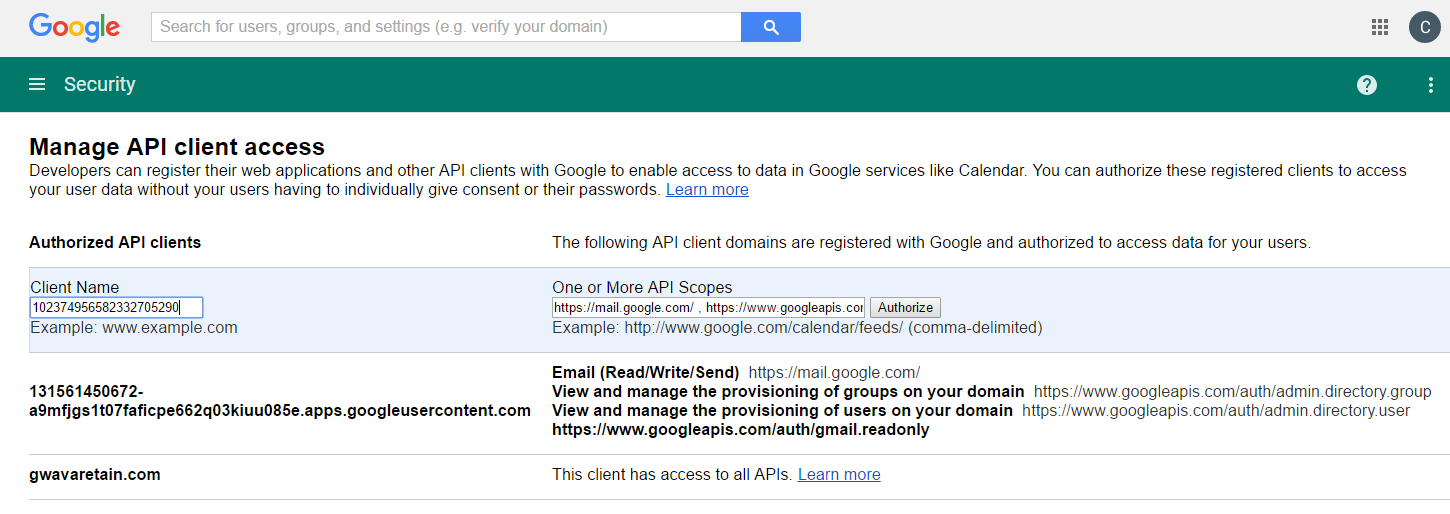
In this window, enter the client ID created with the service account, and then input the entire domain the client will be accessing.
The Service Account name would be like Retain-Service as above and the API Scopes (listed in the module) would be:
https://mail.google.com/ , https://www.googleapis.com/auth/admin.directory.group ,https://www.googleapis.com/auth/admin.directory.user ,https://www.googleapis.com/auth/gmail.readonly
-
Once entered, click 'Authorize'.
All configuration required is now complete in Google Apps, and the information and files keys are available for configuration of Retain.
2.9.2 Creating a Google Apps Module
IMPORTANT:To create a Google Apps Module, you must first complete the instructions in Preparing Google Apps to Work with Retain.
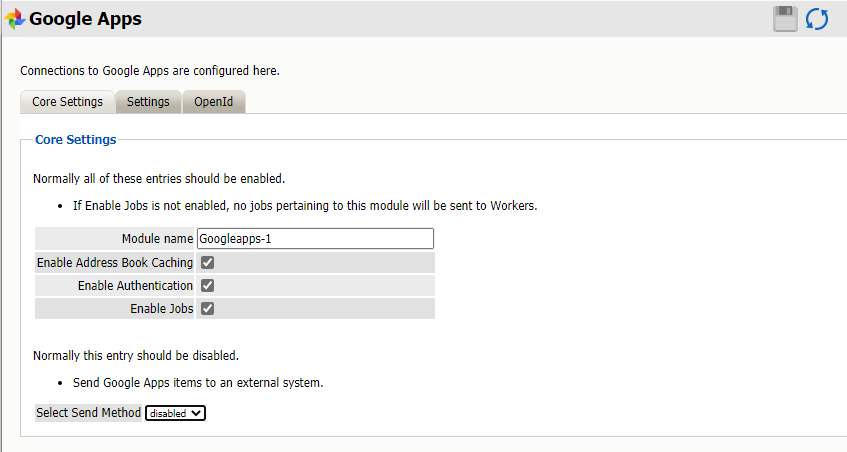
Core Settings Tab (Google Apps Module)
Path: Retain Server Manager > > >
-
Configure the Core Settings options as follows:
-
Module Name: Type a name for the module.
-
Enable Address Book Caching: This lets Retain gather and maintain a list of users
-
Enable Authentication: This is required for users to authenticate and access the Retain message store.
-
Enable Jobs: This must be enabled for Google App jobs to run.
-
-
The Send Method lets you send Google Apps message items to an external system using FTP or SMTP. In most cases this should be disabled so that items are archived in Retain. To select the SMTP Forwarding or FTP features, you must first add and configure them in the Module Forwarding Tab on the Server Configuration page, otherwise the drop-down list is empty.
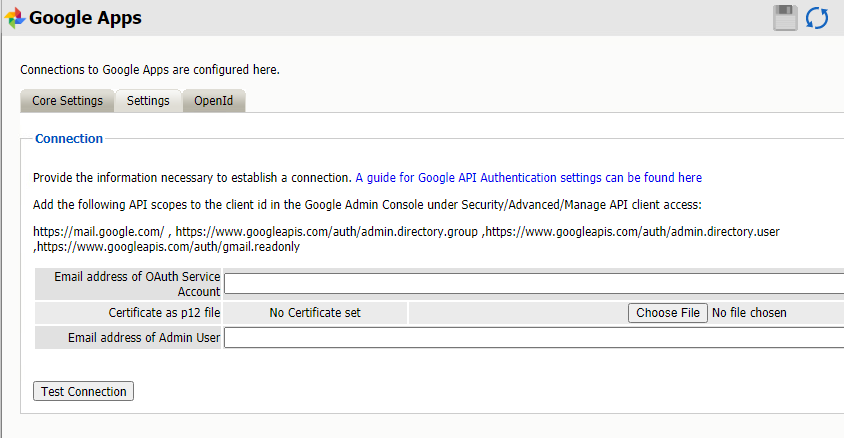
Settings Tab (Google Apps)
Path: Retain Server Manager > > >
In order to connect to the Google system, Retain requires the email address of the Admin user OAuth Service Account and a p12 Certificate for authentication. Retain archives the Gmail system through IMAP, and will login and download the message data to the Retain data store.
Test the connection to ensure that the configuration has been completed correctly.
Jobs and profiles for Gmail will not be visible until the address book has been cached. After the module has been cached, all configuration options for profiles, workers, schedules, jobs, and data storage will be enabled and visible.
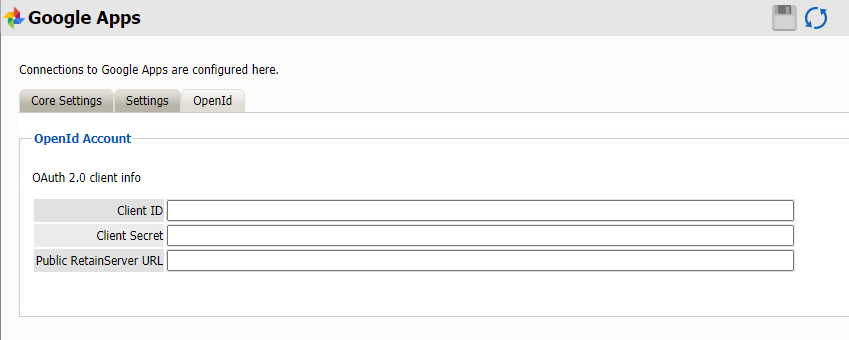
Open ID Tab (Google Apps module)
Path: Retain Server Manager > > >
Configure the OpenId tab in Retain by inputting the Client ID, the Client Secret, and the Public RetainServer URL and saving changes.
IMPORTANT:The public RetainServer URL is http://yourdomain.com/RetainServer.
Only specify up to the /RetainServer portion of the URL, the rest is automatically supplied in the request.
If you specify the path after your domain name, users receive a connection error.
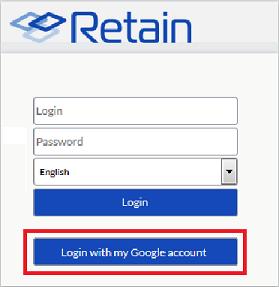
If Retain has been configured with OpenId credentials, the Login Page displays an option to log in with Google credentials. If the user is currently logged-in to their Gmail account, clicking the button automatically logs them in to Retain.
2.9.4 Specifying a Google Apps Profile
After you have created a Google Apps Module and one or more schedules, you can create a Google Apps Profile.
-
To begin configuring the Google Apps Profile, open Retain Server Manager > >
-
Click > .
-
Use the information in the sections that follow to configure each tab.
Core Settings Tab (Google Apps Profile)
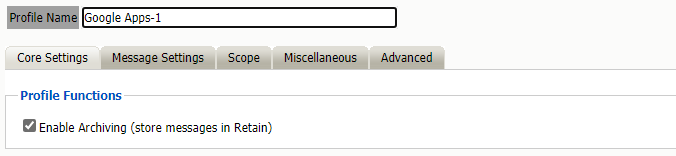
Path: Retain Server Manager > > > > tab
The profile will not become active and will not allow jobs to be run unless the profile is enabled. Enable the profile by placing a check mark in the ‘Enable Archiving’ checkbox.
Message Settings Tab (Google Apps Profile)
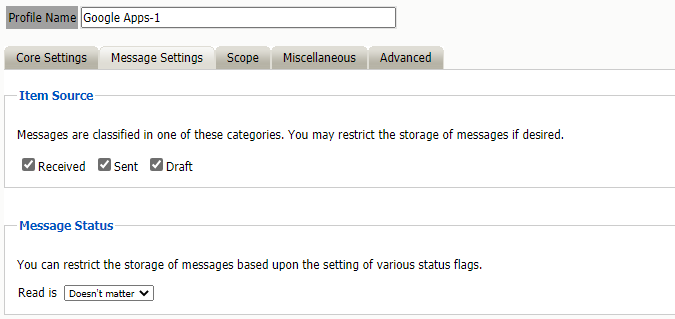
Path: Retain Server Manager > > > > tab
The Message Settings tab contains the source and status settings for the messages to be archived. Message types and sources which are checked will be archived in this profile.
Any item type or status which is not selected or specified will exclude qualifying items from being archived in Retain.
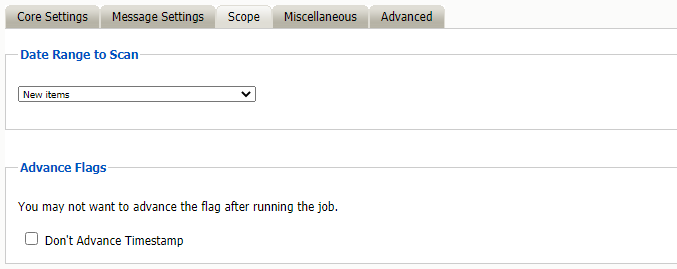
Scope Tab (Google Apps Profile)
Path: Retain Server Manager > > > > tab
This is the most critical tab to fill out as it sets the limits on how much to archive.
Date Range to Scan
The Date Range determines which message items are collected, depending on the date of the message.
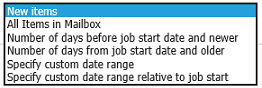
New Items: All items that have not been archived by Retain since the last time the job ran.
All Items in Mailbox: All items in the mailbox starting from 1/1/1970, duplicates will be processed but not stored if they already exist in the Retain archive.
Number of days before job start date and newer: Only items from the relative number of days from the time the job began will be archived. E.g. messages that came into the email system 7 days ago or less.
Number of days from job start date and older: Only items previous to the relative number of days from the time the job began will be archived. E.g. messages that came into the email system 7 days ago or more.
Specify custom date range: Only items between two absolute dates will be dredged.
Specify custom date range relative to job start: Only items between two relative dates will be dredged. E.g. messages that came into the email system between 7 and 5 days ago.
Advance Flags
Enabling "Don't Advance Timestamp" will not update the timestamp flag. Items that are dredged will still be considered new by Retain the next time the job runs.
This is useful when troubleshooting, but is generally not used for normal jobs.
Miscellaneous Tab
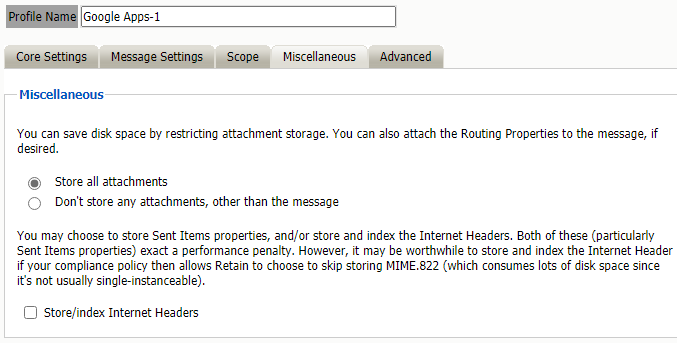
Path: Retain Server Manager > > > > tab
The miscellaneous tab allows the configuration to allow or deny archiving and indexing of attachments in Retain. If attachments are to be archived, they may also be indexed to provide searching capability in the browse messages interface.
Advanced Tab
Generally, since storage space is inexpensive, Micro Focus recommends that you archive all message content.
However, if you need to limit what is archived, you can use the Advanced tab to do it.
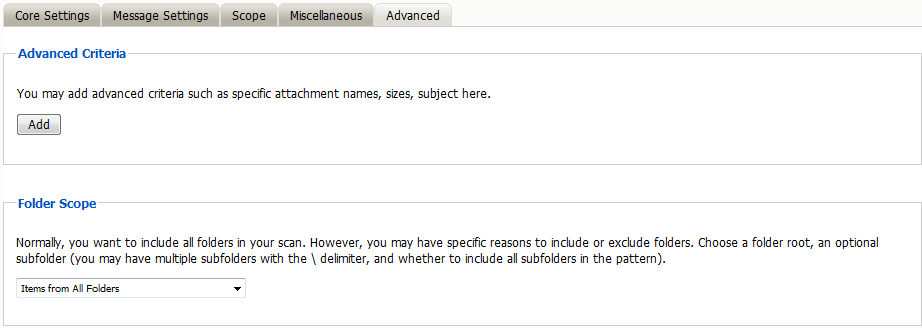
Path: Retain Server Manager > > > > tab
Table 2-32 Configuring Google Apps Profile Advanced Settings
|
Option, Field, or Sub-panel |
Information and/or Action |
|
|---|---|---|
|
Use this dialog to define the conditions Retain uses to determine what to archive. |
||
|
|
Each line sets a specific parameter and the lines are all added together (AND-ed). To check how Retain will interpret your settings, read through the lines in turn, inserting AND between each one.
|
|
|
|
By default, Retain archives the items from all folders. Using this panel, you can restrict which folders are archived, by either:
To specify the folders to include or exclude, do the following:
|
|
2.9.6 Creating a Google Apps Job
All data collection for Google Apps is configured through the Google Apps job interface. The jobs here combine the Profile, the Schedule, and a Worker together to archive a specified mailbox, distribution list, or domain. A Job must have a Profile, Schedule, Worker, and a target, mailbox, list, or domain, before it can be saved or run.
The Schedule, Profile, and Worker selected here will determine what is archived, when it is archived, and what worker does the actual archival work. The Job MUST be enabled to run. Only previously configured Schedules, Profiles, and Workers can be selected.
Core Settings Tab (Google Apps Job)
Core settings allows you to enable the job and set the Schedule, Profile and Worker needed to run the job.

Path: Retain Server Manager > > > >
The Data Expiration is an option to place a timestamp on the mail in the Retain database, which allows for ease of automation for the deletion manager. In addition, devices such as NetApp, Centera, and Hitachi HCAP may use this number to enforce hardware level protection of the stored item so that no one (including Retain) may delete the item before its expiration date.
Job Expiration is not retroactive for mail in the database, and only applies to mail archived by the job that it is active for. The base folders and criteria are specified under the custom expiration dates accessed through the ‘Add’ button at the bottom. All messages included in any specified folders will have a different date or be exempted from the standard expiration date. To have messages with custom job or folder expiration dates properly expire, the deletion management date scope must be set to delete messages with an Expiration Date older than 1 day.
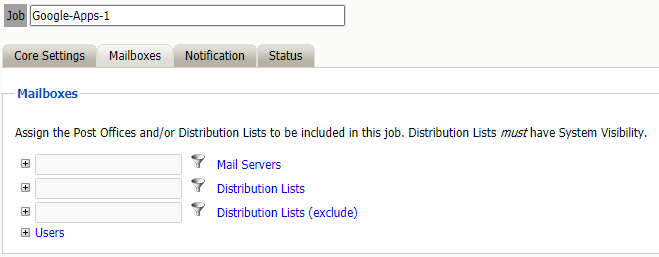
Mailboxes Tab (Google Apps Job)
The mailboxes tab is where the administrator specifies which entities (mail servers and/or Distribution Lists) are to be scanned.
Expand the Post Office and/or Distribution List trees, and check off the items you want to be dredged.
NOTE:If you desire to have a job backup a single user, or selected group of users, select the Users menu and assign the users desired.
Path: Retain Server Manager > > > >
The users section allows you to select individual users to include, or exclude them from an archive job. For example: you can select an entire Mail Server to be archived, and then expand the users section to include or exclude users to the job.
This can also be used to select only certain users in the system for an archive job.
To add a user to the Include or Exclude list, select the respective ‘Add user’ button and search for the user. It can be helpful to deselect the ‘only show recently cached items’ option.
Add the selected users to the list in the search window, then select ‘Ok’ to add them to the include or exclude list.
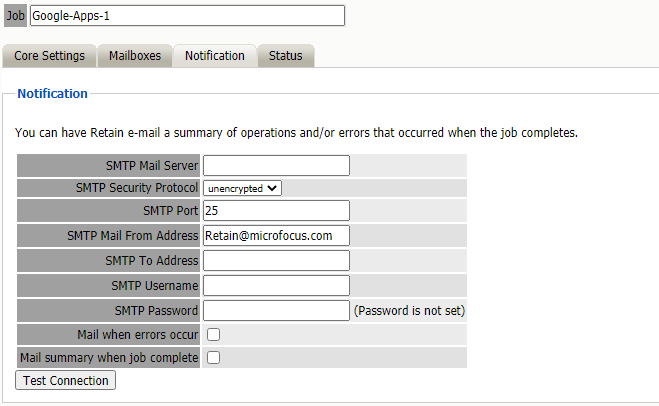
Notification Tab (Google Apps Job)
When a job is run, the notification option allows the administrator to be emailed a summary of each running job if desired.
Path: Retain Server Manager > > > >
For notification to function correctly, the SMTP information for the desired SMTP server must be fully filled-out. How much information is required varied depending on the mail system used.
Status Tab (Google Apps Job)
The Status tab displays the status of any currently running jobs, as well as the stats of the last completed job.

Path: Retain Server Manager > > > >
This tab is informational only unless a job is currently running. If the selected job is running, an option to abort the job is displayed.
This window will refresh every ten seconds to keep you up to date as to the status of the selected job. The completed line is displayed during an active job. The completed status is a display of how many mailboxes have been completed, the job mailbox total, and gives an incrementing percentage for the amount completed. This amount is based entirely on the number of mailboxes, not the amount of mail. Because the last mailbox could be larger than the rest of the system, this percentage may not be accurate according to time.
You may now configure Schedules, Workers and Jobs.
Next Step
Once a job has completed you can confirm the items are in the archive by checking the Search Message interface. See Using Retain’s Archives
in the Retain 4.9.2: User Guide. .