3.8 Archiving Ionlake MyRepChat
3.8.1 Creating an Ionlake Module
The ionlake module lets you send messages from ionlake MyRepChat to Retain for archiving. The data is pushed from ionlake to Retain so no Job or Profile is required. Because there is no Job or Profile, you can monitor the data flow using the Archive Summary by Module report. To configure the ionlake module, complete the sections that follow:
Configuring the Ionlake Module in Retain
Path: Retain Server Manager > > >
-
Install the ionlake module license and the REST License. See
Submitting a PEM License
andInstalling a REST License
in Retain 4.9.2: Installation and Upgrade. -
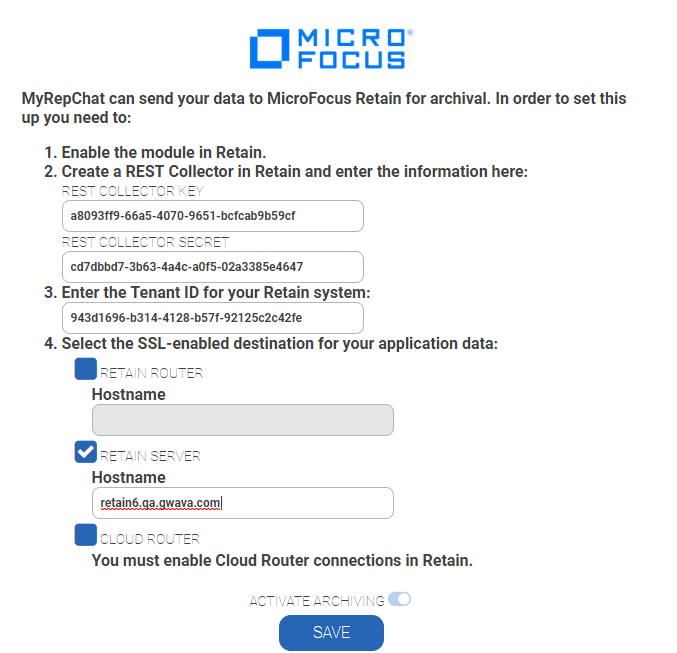
Create a REST Collector in the REST Collectors Panel for ionlake MyRepChat. Export the key and secret to enter into ionlake MyRepChat.
-
Obtain the Retain server Hostname or Cloud Router configuration for your Retain system.
-
Enter the Tenant ID for your Retain system into ionlake MyRepChat.
-
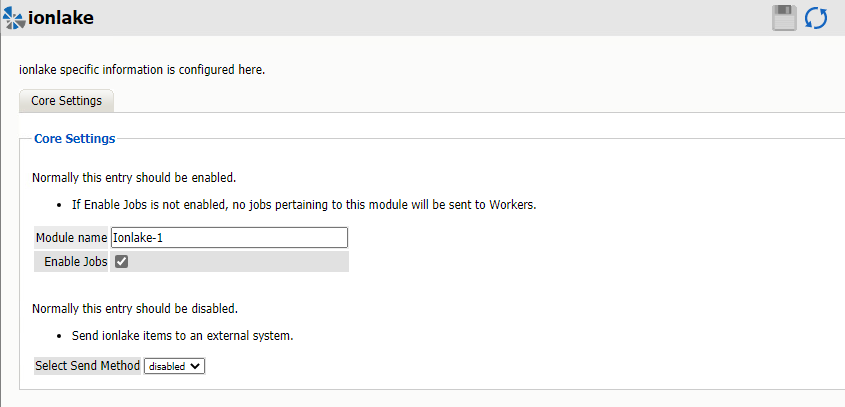
Configure the ionlake module in Retain with a Module Name.
-
Make sure that is selected.
-
Leave the Send Method disabled unless you are forwarding Ionlake message data to another system.
The Send Method lets you send Ionlake items to an external system using FTP or SMTP. In most cases this should be disabled so that items are archived in Retain. To select the SMTP Forwarding or FTP features, you must first add and configure them in the Module Forwarding Tab on the Server Configuration page, otherwise the drop-down list is empty.
Configuring Ionlake MyRepChat
Enter the information gathered in Configuring the Ionlake Module in Retain in your ionlake MyRepChat system to send the archive data to Retain. Below is a screen shot of the MyRepChat interface to enter your Retain information: