New Request
As a Customer, you have the option to enter your own requests by clicking the tab, if the option is enabled within the tab. As part of the request creation process, it should be noted that you can only access Items and the details of the Items that you own or have shared ownership of, or globally assigned Items (that is, Items that are available to all Customers in the system).
As a Customer, you have an option to select the request type from Generic request, Incident, Service Request, Change Request, or Quick calls. The options displayed are based on the system configuration; if only one option (such as Incident) is available, it will be automatically applied.
If the system has the option enabled in the tab, you can view all Services offered by the Service Desk, regardless of the ownership status. It also means that you can log a Service Request against any Service listed within the tab of the Customer Portal.
To create a new request:
-
Click the tab
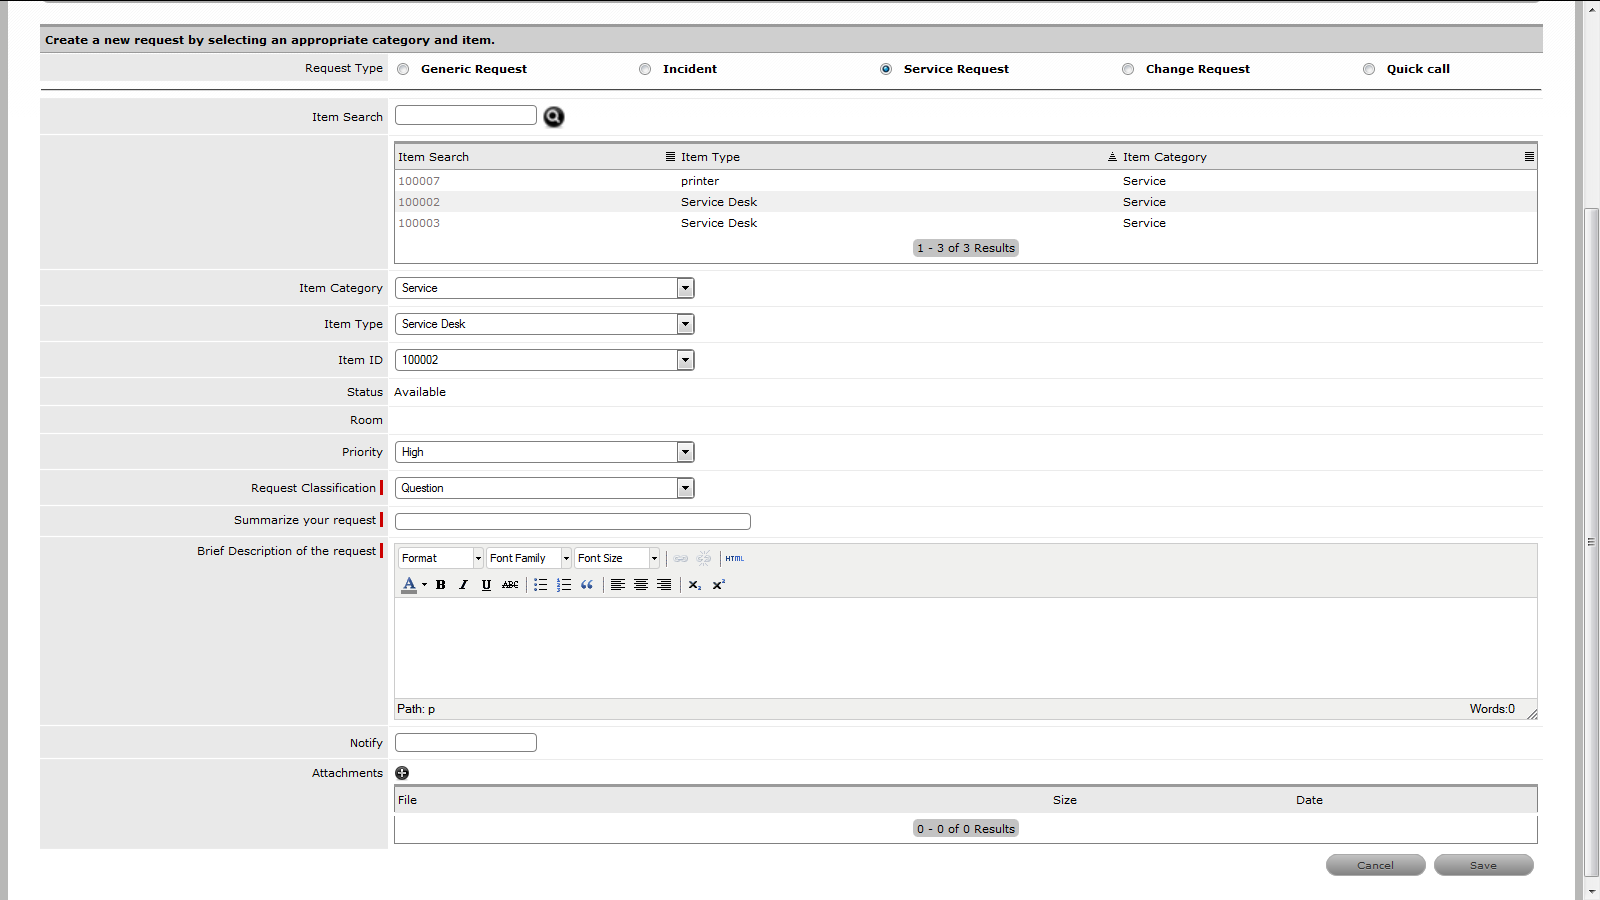
The New Request screen is displayed.

-
Select the Request Type: Generic Request, Incident, Service Request, Change Request, or Quick call.
-
Specify an Item # ID to search for a specific Item (if the option is enabled).
-
Select an Item Category.
The Category list is generated based on the Items that are assigned to you as a Customer within the system. The Item Type list is then displayed relative to the Category selected.
-
Select an Item Type.
An Item list is generated based on the Item Type selected. The Item list consists of Items owned by you as a Customer, your Organizational Unit, and the globally assigned Items.
-
Select an Item to assign to the request.
Alternatively, select
 if the option is available to create a new Item. For details, see Items.
The request editor is displayed in full.
NOTE: If a Service Contract is required, a message is displayed. For details, see Contracts under Self Help.
-
Select the Classification from the drop-down list.
-
Enter a Description to define the issue. This information is required in order to save the request.
-
Complete the Notify field, if required.
Enter email addresses for other customers that are to be informed about the request. Separate multiple addresses with a comma.
-
If relevant, click
in the Attachments field, to upload an associated file.
At the point of request creation, only one attachment (maximum size 100 MB) can be added. After the request is saved to the database, multiple attachments can be added in a single transaction.
-
Click Save to enter the support request into the system.
This will trigger an email message to be sent to the Customer and to the Technician assigned to the request, if email polling is enabled for the system.

Proposed Solutions for Requests
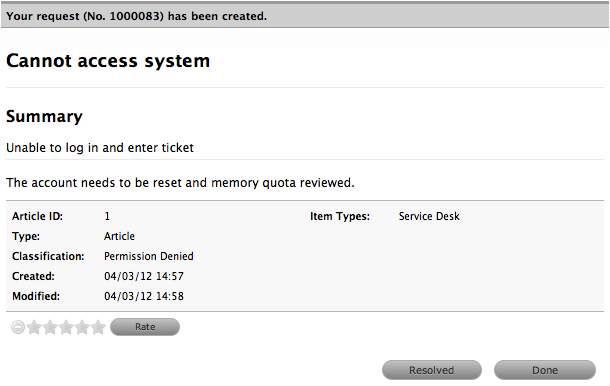
Within the Thank You message, a list of possible helpful Knowledge Base Articles are presented to the Customer. This list is generated by the application based on the Description, Classification, and Item assigned to the request.
The list includes an Article ID number, Item Type, Classification, and Summary column. If relevant, use the arrows at the base of the list to scroll through to the next list screen.
To apply a Proposed Solution:
-
Click the Article number hyperlink.
The screen displays a summary of the Article.
-
Rate the Article, if desired.
-
If the Article was not helpful, click Done to return to the Article List.
If the Article resolves the issue, select the Resolved button and the request will be closed.
Generic Request
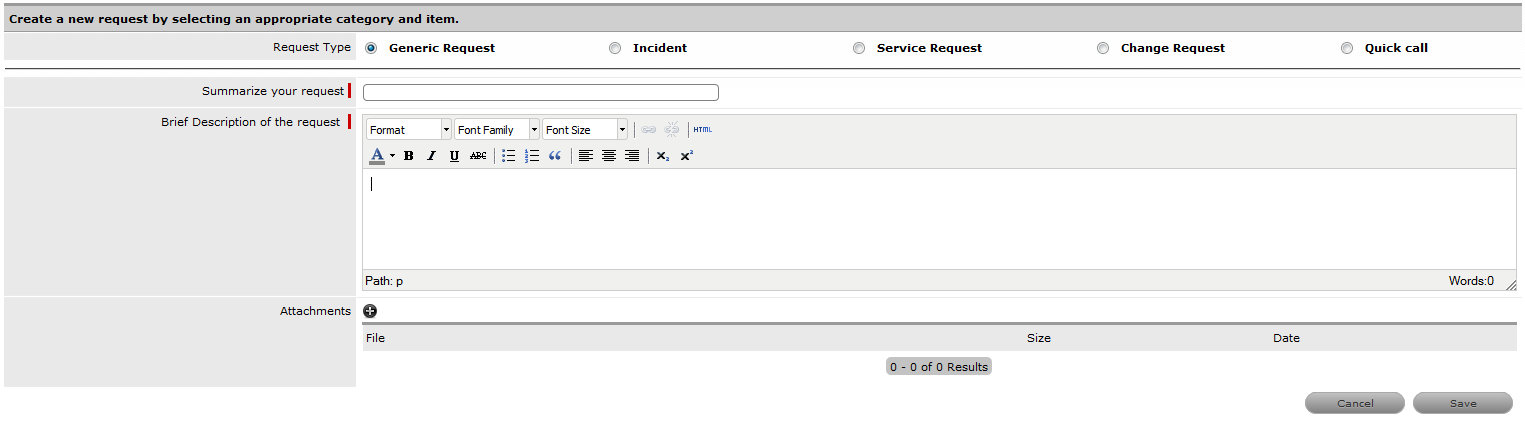
Generic Request is the simplest form of request, wherein the Customer provides basic information on an issue or request.
To Create a Generic Request:
-
Select the option.
-
Provide a summary of the request and a description of the issue.
-
Add attachments if needed.
-
Click Save to enter the request into the system.
This will trigger an email message to be sent to the Customer and to the Technician assigned to the request, if email polling is enabled for the system.
Quick Call
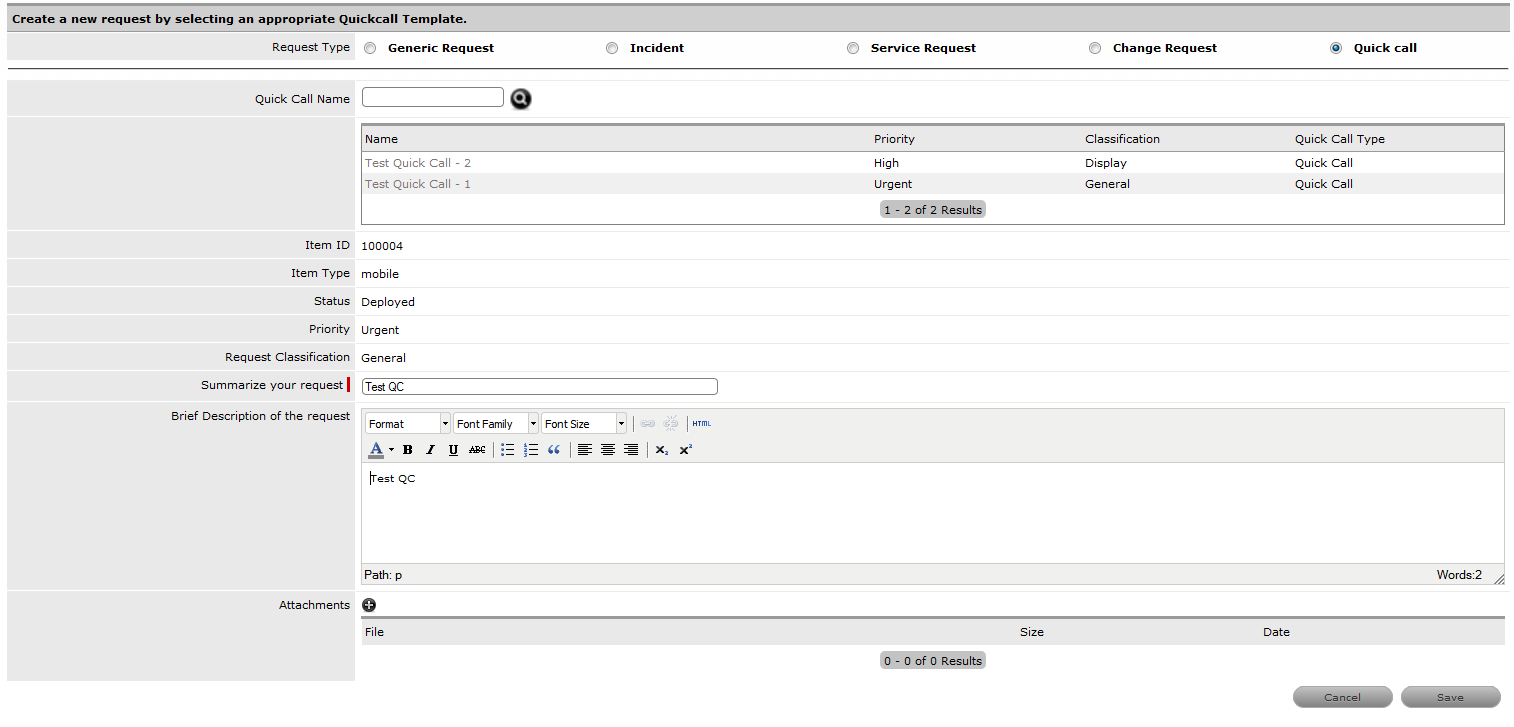
Quick Calls are pre-defined templates for commonly created requests. Using a Quick Calls saves time and effort because the details can be customized as part of a template that is automatically applied.That is, when a quick call is selected, all the details of the request are automatically completed based on the template created by your Service Desk supervisor.
To use a Quick Call:
-
Select the option. You will see the list of quick calls. If you have a long list, enter the name to search for a specific quick call.

-
Select your request from the list. The remaining details are automatically populated.
-
Click Save to submit the request to the system.
This will trigger an email message to be sent to the Customer and to the Technician assigned to the request, if email polling is enabled for the system.
 previous
