1.4 Exploring the Dashboard
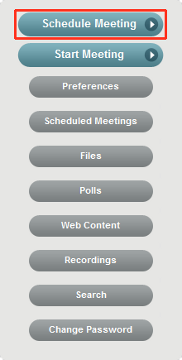
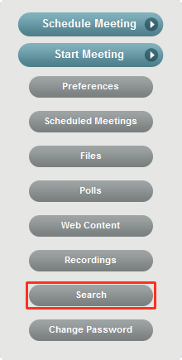
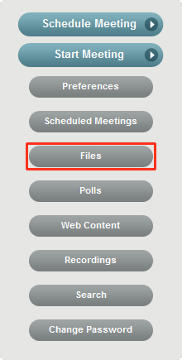
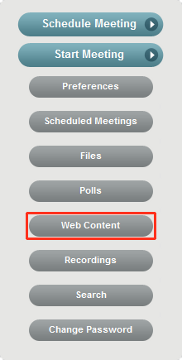
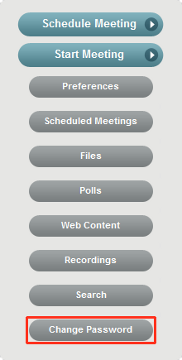
When you log in to Novell Conferencing, the personal dashboard opens. The dashboard offers a single point of access to host and schedule meetings, view scheduled meetings, search for meetings and recordings, view and edit your preferences, and change your password.
Schedule Meetings: Lets you view your scheduled meetings and view the widget that is automatically created after you schedule a meeting. You can schedule a meeting for any of the rooms that are available to your account.
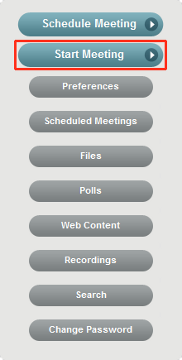
Start Meeting: Lets you instantly start a meeting for your default room. For more information about the default rooms, see Section 1.1, Conferencing Rooms.
Preferences: Lets you set meeting preferences.
Scheduled Meetings: Lets you view your scheduled meetings.
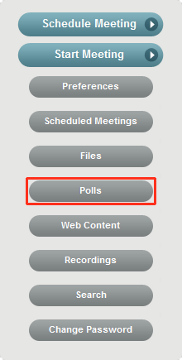
Files: Lets you upload presentations and documents to share during your meetings.
Polls: Lets you create polls to survey participants during your meetings.
Web Content: Lets you configure real-time Web content such as YouTube videos, Picasa videos, or embedded videos to share during your meetings.
Recordings: Lets you preview, download, securely share, and delete recordings.
Search: Lets you search for your meetings.
Change Password: Lets you change your login password.
1.4.1 Scheduling a Meeting
Scheduling a meeting allows you to ensure that all the necessary people are invited and are able to attend.
-
Log in to your Novell Conferencing account.
For information on how to log in, see Section 1.3, Logging In.
-
Click .
-
In the Schedule Meeting dialog box, specify the meeting name, agenda, start and end dates, start time, time zone, meeting duration, and the e-mail addresses of the people you want to invite to the meeting.

You can also specify a meeting key to make it a private meeting. For more information, see Section 8.1, Making Your Meeting Private.
-
Click .
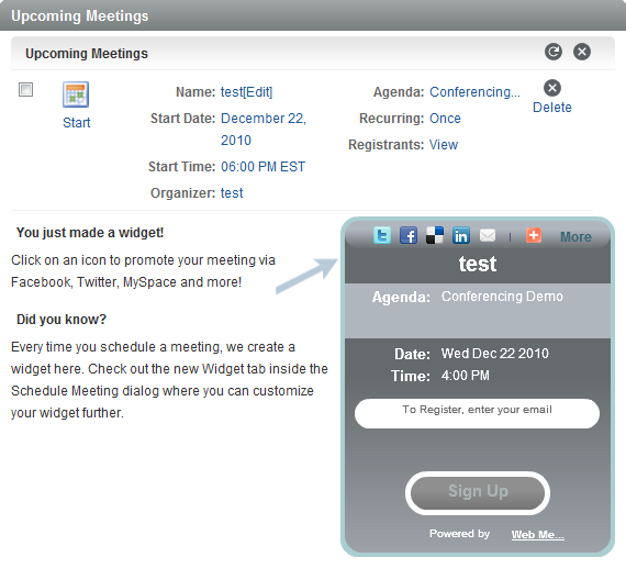
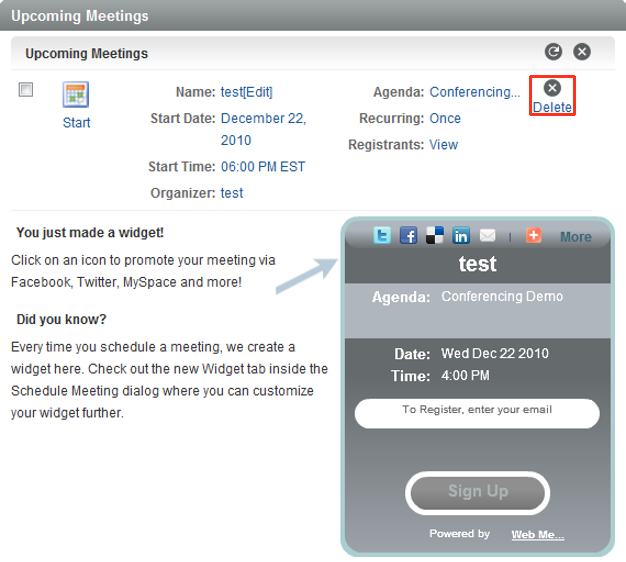
An e-mail with details of your scheduled meeting is sent to the invitees.
A widget is also created, which you can use to invite people to your meeting and to track meeting details. For more information, see Section 5.1, Viewing the Widget.
1.4.2 Hosting an Instant Meeting
Novell Conferencing allows you to instantly start a meeting whenever you want. You don’t need to schedule the meeting and you can invite anyone to the meeting while it is in session (see Section 1.5, Inviting Attendees to the Meeting). When you click , it automatically starts your default meeting with your saved preferences.
-
Log in to your Novell Conferencing account.
For information on how to log in, see Section 1.3, Logging In.
-
Click .
1.4.3 Changing Your Preferences
Novell Conferencing allows you to change your default settings for your meetings. The default settings are found in the section of the dashboard. There are four different tabs of settings that can be modified. The first tab, , is your personal preferences. The second tab, , is about the meeting’s settings. The third tab, , deals with any call-in numbers that might be available for the meetings. The fourth tab, , lets you change the appearance of Conferencing.
The basic settings for your meetings are talked about in Section 3.0, Modifying Settings.
Information about additional settings is found in the following locations:
1.4.4 Viewing Your Scheduled Meetings
This feature allows Conferencing users to see a list of all the meetings that they have scheduled for the next seven calendar days.
-
Log in to your Novell Conferencing account. For information on how to log in, see Section 1.3, Logging In.
or
If you are already logged in, click .

A list of your meetings scheduled in the next seven days is displayed.
1.4.5 Starting a Scheduled Meeting
After you schedule a meeting, you must start the meeting for attendees to enter at the scheduled time.
-
Log in to your Novell Conferencing account. You are taken to your
or
If you are already logged in, click .
For information on how to log in, see Section 1.3, Logging In.
-
In the Scheduled Meetings dialog box, select the meeting that you want to start.
-
Click .
1.4.6 Rescheduling a Meeting
Novell Conferencing allows the host to change the date, time, and time zone of a scheduled meeting.
-
Log in to your Novell Conferencing account. You are taken to your
or
If you are already logged in, click .
For information on how to log in, see Section 1.3, Logging In.
-
In the Scheduled Meetings dialog box, select the meeting that you want to change.
-
Click the link next to the meeting name.
-
In the Edit Meeting dialog box, specify the new start date, end date, start time, and time zone.
-
Click .
An e-mail with details of your rescheduled meeting is sent to all the invitees, and the meeting widget is updated.
1.4.7 Viewing the Registration Report
Before a meeting begins, the host can view a registration report listing individuals who have received an invitation to the meeting and individuals who have used the widget to register for the meeting.
Before retrieving the report, complete the following prerequisites:
-
Schedule a meeting and invite people to it.
-
Select the option from the widget tab.
-
Log in to your Novell Conferencing account. For information on how to log in, see Section 1.3, Logging In.
or
If you are already logged in click .
-
In the Scheduled Meetings dialog box, click next to the field.
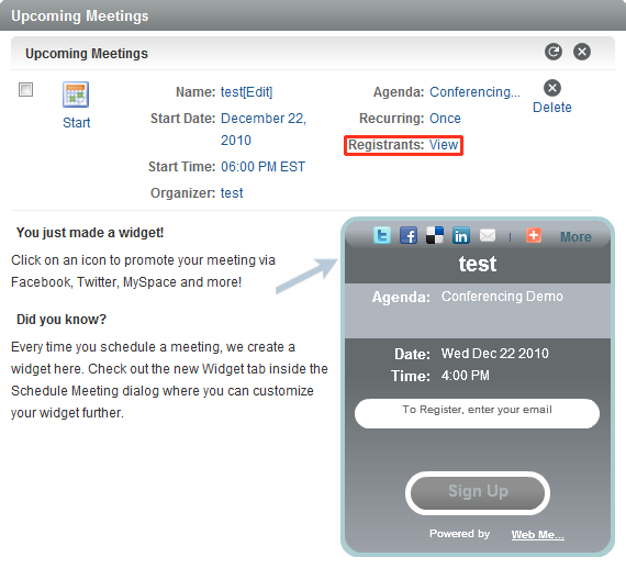
The Registration Report dialog box appears.
-
To view the report, click .

1.4.8 Deleting Your Meetings
Novell Conferencing allows users to delete the logs of the meetings that they have previously held. You can also delete scheduled meetings before they happen.
Using the Scheduled Meetings List to Delete a Meeting
-
In the dashboard, click .
-
Select the scheduled meeting that you want to delete and click the button.
An e-mail is sent to all registered attendees telling them that the meeting has been deleted.
Using the Search Feature to Delete Meeting Logs
-
Log in to your Novell Conferencing account.
For information on how to log in, see Section 1.3, Logging In.
-
In the dashboard, click .
-
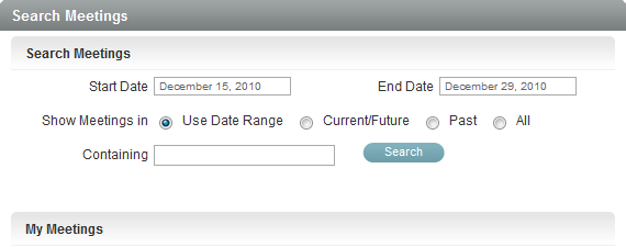
In the Search Meetings dialog box, specify the relevant data for the meetings you want to delete.
or
Select to view all past meetings
or
Select to view all meetings.
-
Click .
-
Select the check boxes for the meetings that you want to delete.
-
Click the button to delete the selected meetings.
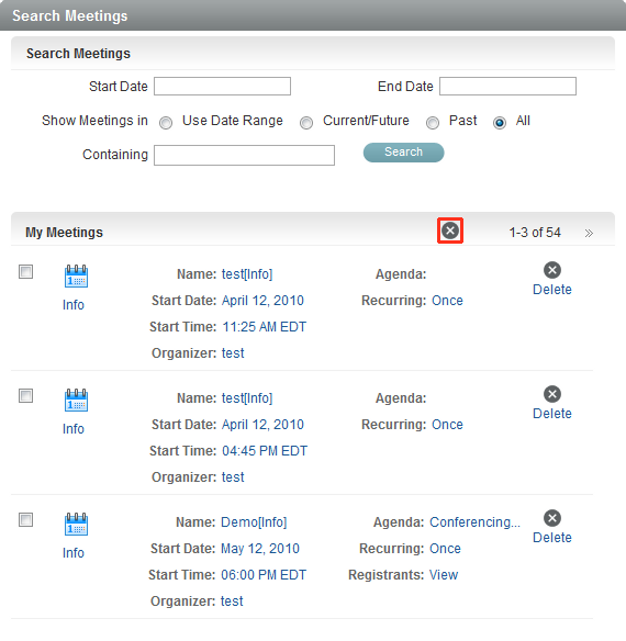
If you want to delete meetings that are displayed on other pages, select the meetings that you want to delete on the first page, use the arrows to navigate through the other pages of meetings, and select the other meetings that you want to delete. When you have selected all the meetings that you want to delete, click the button.
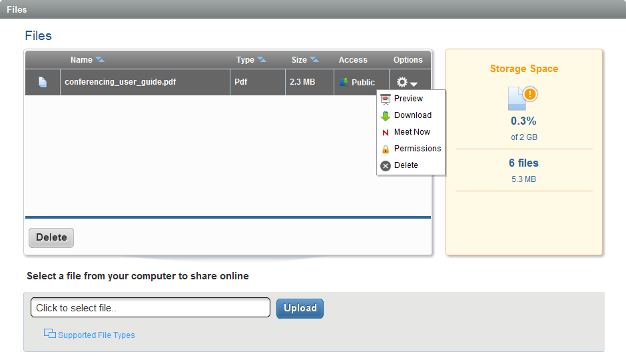
1.4.9 Managing Files
The option allows you to upload files into your meeting room, then share the files during your meetings. You can upload PowerPoint presentations, Adobe PDF files, Microsoft Word documents, and Microsoft Excel spreadsheets. Conferencing allows you to store up to 2 GB of files, polls, Web content, and recordings.
-
Log in to your Novell Conferencing account.
For information on how to log in, see Section 1.3, Logging In.
-
Click .
-
Click and select the file you want to upload in preparation for your meeting.

After your files have been uploaded, they are shown in a list and are available to be shared during your meetings. The following options are available in the column of the uploaded file.
-
Preview: Shows you what your document will look like in a meeting.
-
Download: Allows you to download a copy of the file that is stored in your room.
-
Meet Now: Immediately starts a meeting with the selected document being shared.
-
Permissions: Provides you with a link that you can share with meeting attendees so they can download a copy of your file. Also enables you to set a password to protect the document.
-
Delete: Deletes the document from the Conferencing storage.
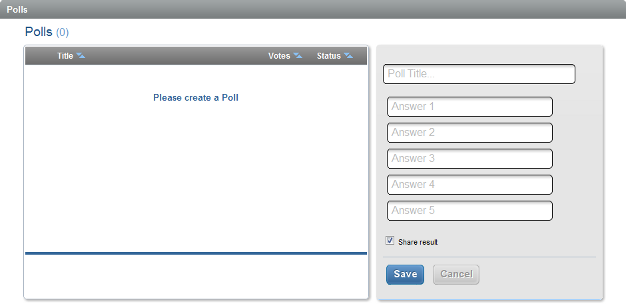
1.4.10 Managing Polls
The option allows you to create questions that you can use to interactively survey your attendees during a meeting. Conferencing allows you to store up to 2 GB of files, polls, Web content, and recordings.
-
Log in to your Novell Conferencing account.
For information on how to log in, see Section 1.3, Logging In.
-
Click .
-
Enter a title (question) for your poll and up to five multiple-choice answers that you want your attendees to choose from.
-
Select the box to allow your attendees to see the poll results after they submit their responses.
-
Click to save the poll to your dashboard for use in your future meetings.
When you have saved and shared your poll in at least one meeting, you can review the results in your dashboard. To do this, click the title of the poll. To the right of the poll selection area, you can see the most recent results of the poll under the tab. If you click the tab, you can see all the results from all the meetings you have shared the poll in.
Polls can be edited after they are created. To do this, select the poll from your list of saved polls and click the button. Both the title text and the answer text can be changed. However, you cannot add aditional answers. Editing any of the text in the poll does not change any of the existing results.
To delete a poll, simply select the poll and click the button.
1.4.11 Managing Web Content
Web Content allows you to share real-time media with your attendees during a meeting. You can enter the URL for YouTube Videos or Google Picasa Web Albums, or the embed code from video content hosted on any site, and share it when you are inside a meeting. Conferencing allows you to store up to 2 GB of files, polls, Web content, and recordings.
-
Log in to your Novell Conferencing account.
For information on how to log in, see Section 1.3, Logging In.
-
Click .
-
Insert a YouTube URL, Picasa URL, or embed code into the field and click .
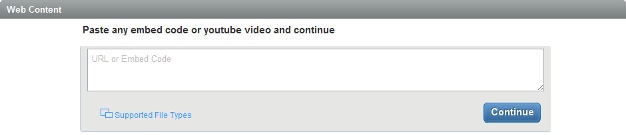
A dialog box appears with a previewof the URL or embed code.
-
Change the name of the URL or embed code as desired, then click .
After your Web content has been uploaded, it is shown in a list and is available to be shared during your meetings. The following options are available in the column of the uploaded file.

-
Preview: Shows you what your Web content will look like in a meeting and allows you to change the name of the Web content.
-
Meet Now: Immediately starts a meeting with the selected Web content being shared.
-
Delete: Deletes the Web content from the Conferencing storage.
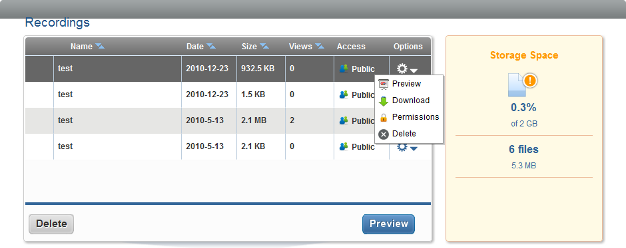
1.4.12 Managing Recordings
The Recordings option lets you manage all of your saved recordings. You can preview, download, set permissions, and delete your saved recordings. The recordings share the same storage space as files, polls, and Web content. For more information about recordings, see Section 6.2.3, Using the Recordings Option.
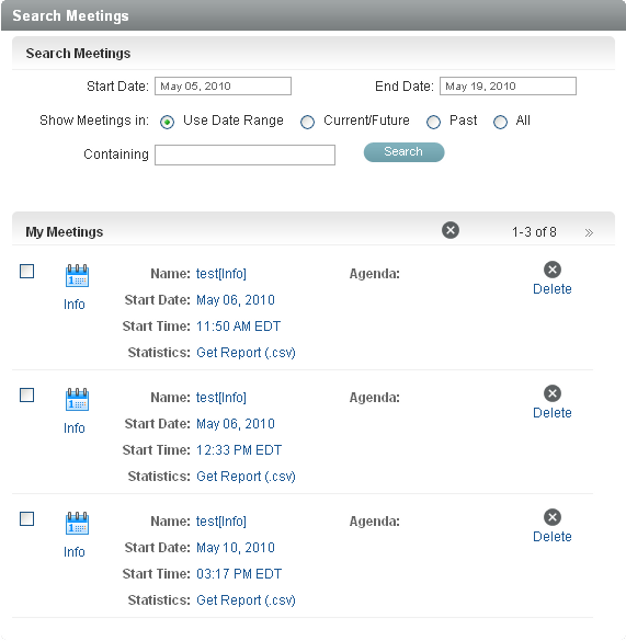
1.4.13 Searching for Meetings
The Search option lets the host look for information about previous meetings, including registrants, chat transcripts, or recordings. You can choose to search by start date, end date, current/future date, past date, all dates, and by text. You can also use this option to find a list of attendees.
-
Log in to your Novell Conferencing account.
For information on how to log in, see Section 1.3, Logging In.
-
In the dashboard, click .
-
In the Search Meetings dialog box, specify the relevant data and click .
1.4.14 Retrieving a Report About Attendees
After the meeting has finished, the host can retrieve a report containing information about individuals who attended the meeting.
Before retrieving the report, complete the following prerequisites:
-
Schedule a meeting, mark the option in the field, and invite people to your meeting.
-
Select the option from the widget tab.
-
Log in to your Novell Conferencing account.
For information on how to log in, see Section 1.3, Logging In.
-
In the dashboard, click .
-
In the Search Meetings dialog box, specify the relevant data and click .
A list of all your meetings appears.
-
To view the attendee report, click .
A CSV file opens, listing people who attended the meeting.
1.4.15 Changing Your Password
Your Novell Conferencing password can be changed whenever you want.
-
Log in to your Novell Conferencing account.
For information on how to log in, see Section 1.3, Logging In.
-
In the dashboard, click
-
In the Change Password dialog box, specify the old password and the new password, then retype the new password in the field.

-
Click .